
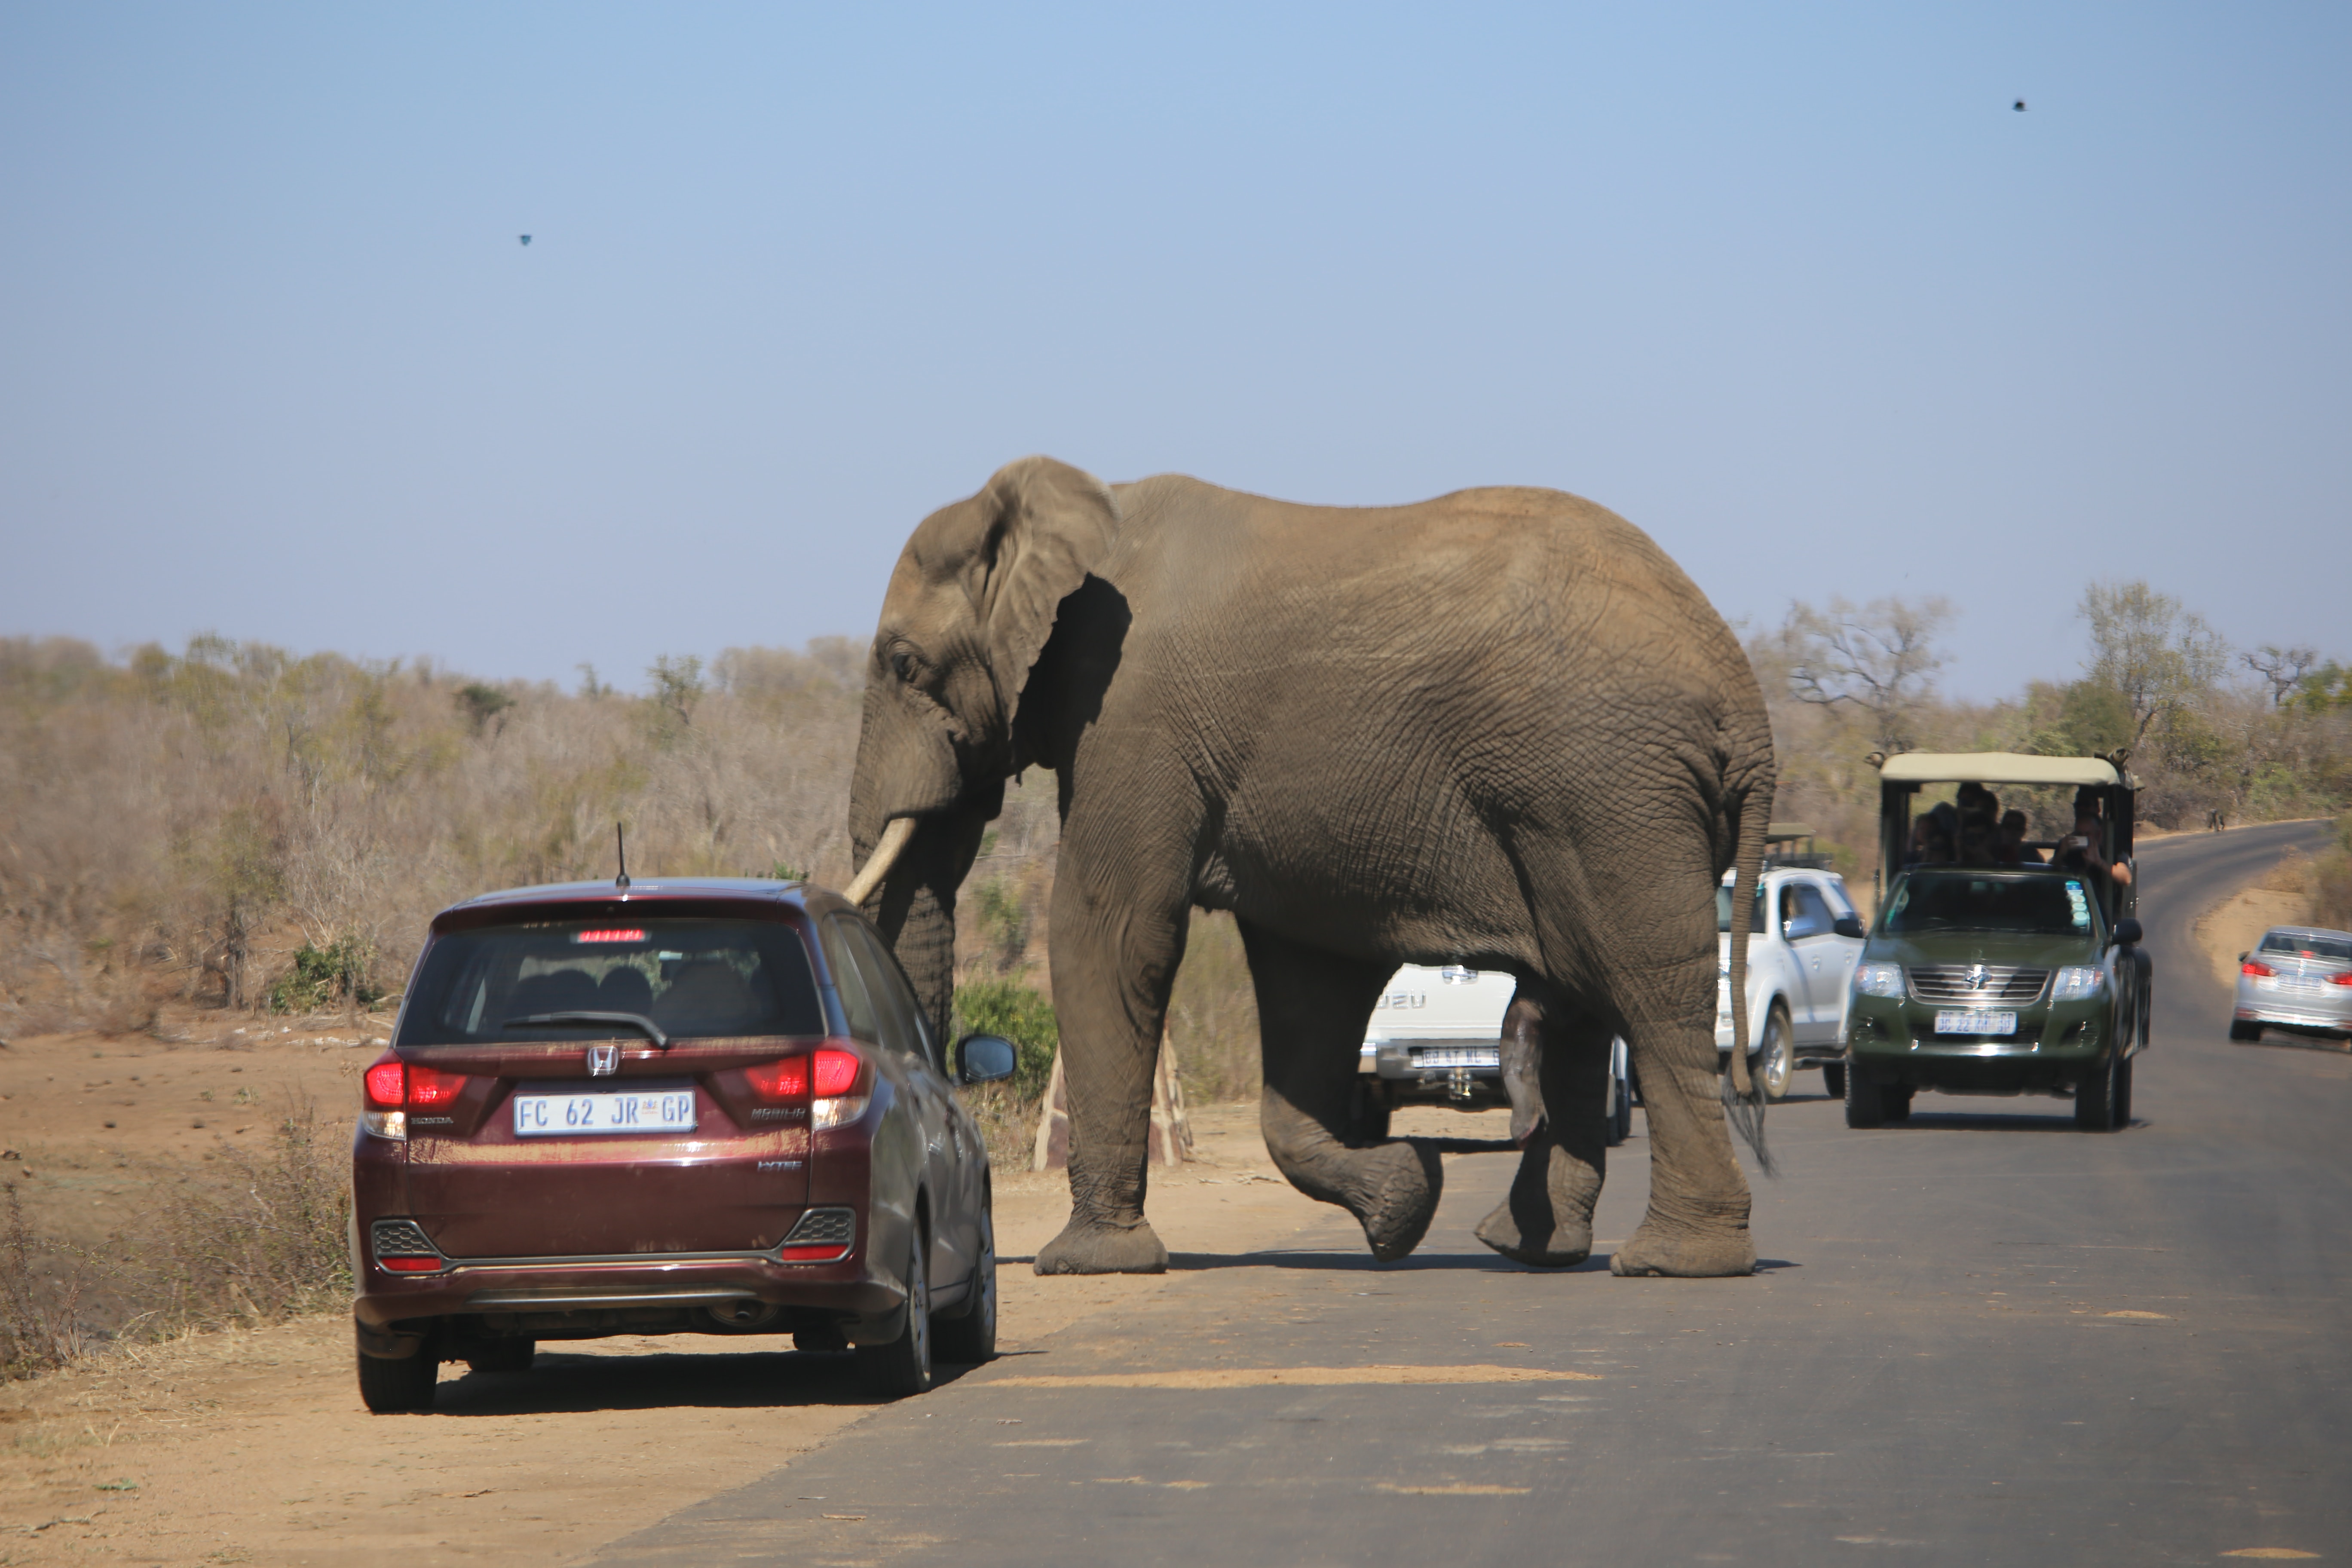

Human-wildlife conflicts are interactions between humans and wildlife that result in negative impacts on human social, economic, or cultural life, wildlife populations, or the environment. They occur when humans and wildlife share the same resources, such as land, water, food, or habitat, and when humans perceive wildlife as a threat to their safety, livelihood, or well-being.

Human-wildlife conflicts are not a new phenomenon, but they have increased in frequency and intensity in recent decades due to various factors, such as human population growth, urbanization, habitat fragmentation, climate change, wildlife poaching, and illegal trade. These factors have reduced the natural habitats and resources of wildlife, forcing them to adapt to human-dominated landscapes and compete with humans for survival. In January 2023, a 64-year-old man in Tamil Nadu was attacked by an elephant that killed 21 people in Kerala and Tamil Nadu. The elephant, code-named PT 7, was tranquilized by a forest team and relocated to the Wayanad Elephant Camp. This is one example that shows the importance of finding effective and sustainable solutions to prevent human-wildlife conflicts.
Some innovative solutions that can reduce or deter human-wildlife conflicts include fencing, repellents, alarms, lights, or translocation.
Let’s Build Better with Blues
In this post, I will show you how I created my own solution that detects an animal and alerts people with LoRa and Blues Cellular IoT. Below is an illustration overview of the solution I built.

For this project, I used a Xiao ESP32s3 Sense board, which is a low-power controller with an onboard camera. This helped me classify wild animals using Edge Impulse. I then transferred the classification information to a Blues base station via LoRa. To complete this transfer, I designed a custom PCB that has both Xiao ESP32S3 Sense and LoRa Wio E5 modules.

The Base station receives the LoRa signals and reverts them to the cloud network via Blues Cellular IoT.

Edge Impulse Model Creation
I used Edge Impulse to develop an image classification system. To do this, I used 10 GB of data from Kaggle.
 note
noteLarger data sets will give better results.

Next, I uploaded all the necessary image models to Edge Impulse.

Then, I labeled the images. For this step, you can label them manually, or you can generate predefined labels with YOLO V5.

Next, I prepared the impulse design, with the classification set in the image below.

Then, I generated the model features. Below is my model output.

Once I generated the model output, I deployed the model for Arduino IDE.

EL Model Deployment
The next step was to import the El Library to my Arduino IDE. To import, I opened the Arduino IDE and navigated to the Sketch tab. I then selected the Add Zip Library. Finally, I selected the downloaded zip file from the Edge Impulse portal to deploy the EI model to the Xiao ESP32S3 Sense.

Here is the Arduino sketch’s flow that helped me classify the wild animals and transfer the alert via LoRa.

To view the full code used in this section, see this GitHub repo.
This part of this Arduino sketch will send an alert message via LoRa if it detects any wild animal.
#if EI_CLASSIFIER_OBJECT_DETECTION == 1
  bool bb_found = result.bounding_boxes[0].value > 0;
  for (size_t ix = 0; ix < result.bounding_boxes_count; ix++) {
    auto bb = result.bounding_boxes[ix];
    if (bb.value == 0) {
      continue;
    }
    ei_printf("    %s (%f) [ x: %u, y: %u, width: %u, height: %u ]\n", bb.label, bb.value, bb.x, bb.y, bb.width, bb.height);

    if (bb.label == "elephant")
    {
      Serial.println("Elephant Detected");
      node_send(1000);
      digitalWrite(LED_BUILTIN, HIGH);   // turn the LED on (HIGH is the voltage level)
      delay(1000);                       // wait for a second
      digitalWrite(LED_BUILTIN, LOW);    // turn the LED off by making the voltage LOW
      delay(1000);
    }
  }
  if (!bb_found) {
    ei_printf("    No objects found\n");
  }
Once the particular animal is detected, the above function will trigger the node_send() function. Here is the node_send() function definition.
static int node_send(uint32_t timeout)
{
  static uint16_t count = 0;
  int ret = 0;
  char data[32];
  char cmd[128];
  int node = 1;
  int alarm = 1;
  memset(data, 0, sizeof(data));
  sprintf(data, "%04X,%04X", node, alarm);
  sprintf(cmd, "AT+TEST=TXLRPKT,\"5345454544%s\"\r\n", data);
  ret = at_send_check_response("TX DONE", 2000, cmd);
  if (ret == 1)
  {

    Serial.print("Sent successfully!\r\n");

  }
  else
  {
    Serial.print("Send failed!\r\n");
  }
  return ret;
}
This above function will send node number and alert message to the receiver when it is triggered.
Below, you can see the results of the Arduino serial monitor.

Reciever Setup
Next, I worked on the base station side. I set up the base station to receive all the LoRa signals and alert users when data would be moved to Blues Notehub via Notcard. Then, I set it to alert all remote users via Qubitro.
In this image, both Xiao + LoRa E5 and Blues Notecard are connected to the Xiao ESP32 S3 board. I used this Arduino sketch to receive the data from the slave node and then transferred it to Blues Notehub. Here you need to modify the product UID.
#define PRODUCT_UID "your project UID"I then navigated to the Notehub | Create Project and created a new project.
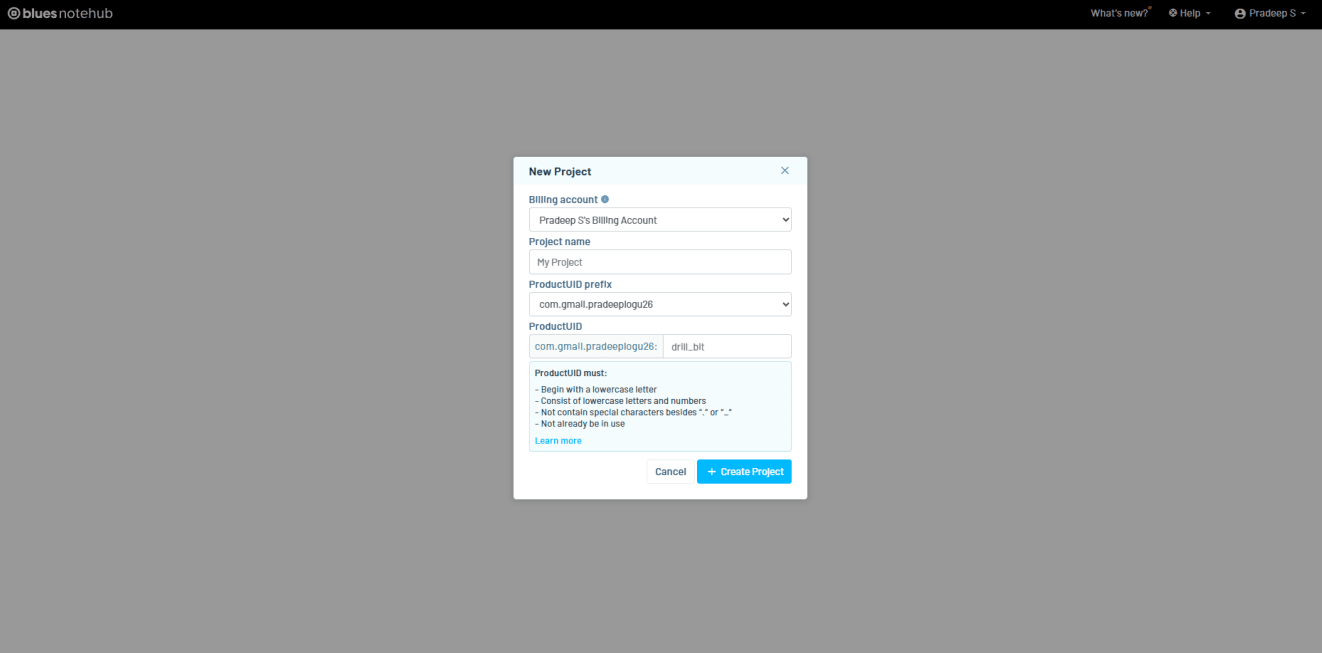
I entered my project name, copied the project UID, and replaced it in the Arduino Sketch. After this, I was able to see the Blues Notehub starting to receive data.

Cloud Visualization
Once the data reached the Notehub, I used Qubitro to visualize and make an alert function based on the received data.
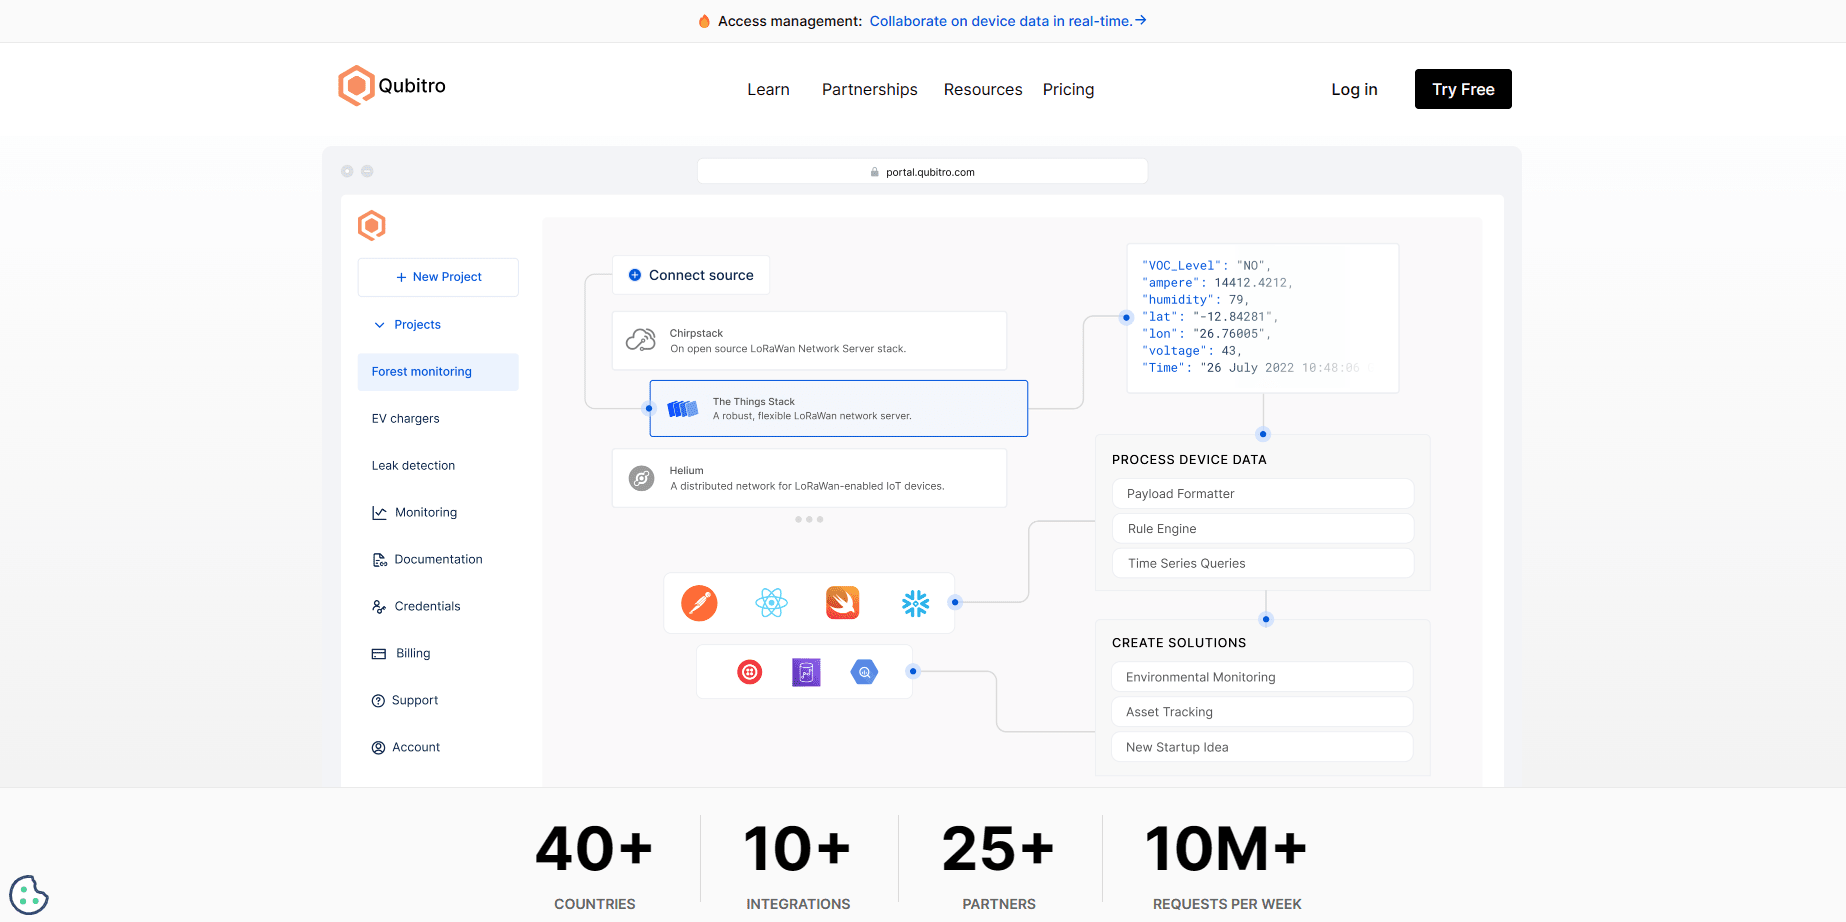
Qubitro simplifies the IoT development process by providing tools, services, and infrastructure that enable users to connect their devices, store and visualize their data, and build robust applications without coding. Qubitro supports various IoT protocols and platforms, such as LoRaWAN, MQTT, and The Things Stack.
I navigated to the Qubitro Portal and created a new project.

Then, I selected MQTT as the data source.
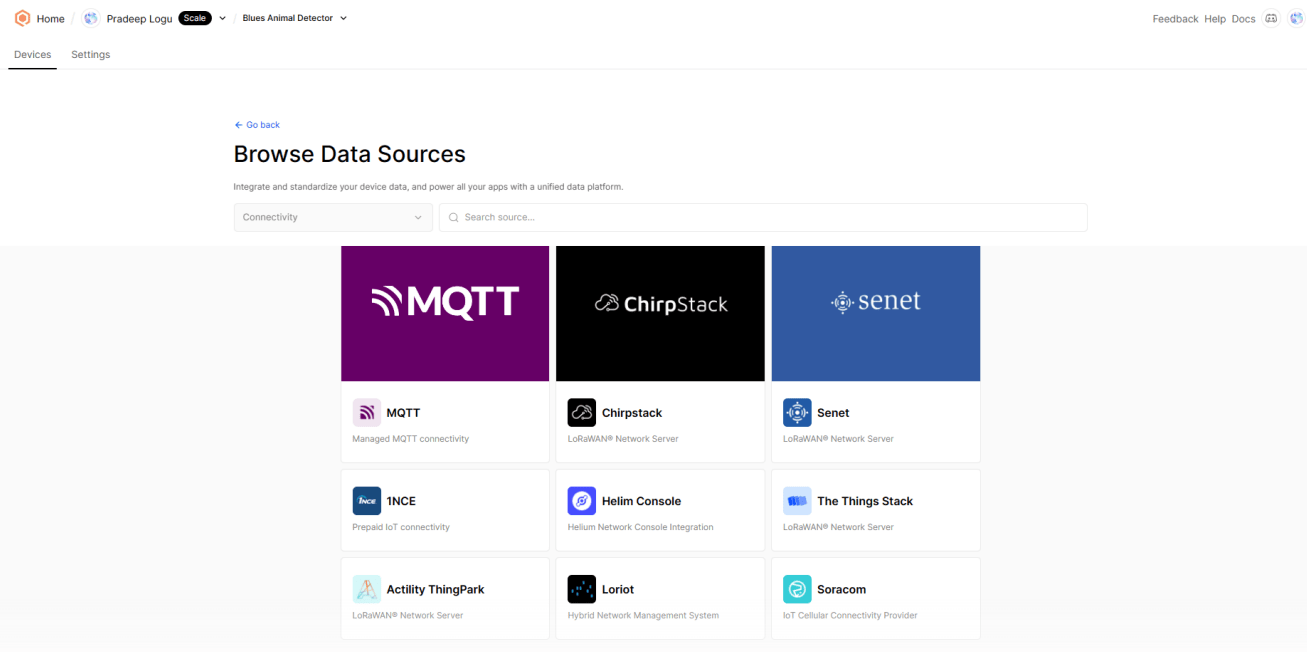
Next, I entered all the input details as needed.

Then, I opened the created MQTT source and selected the connection details. It will show you all the credentials, we need these credentials in order to transfer our data to Qubitro.

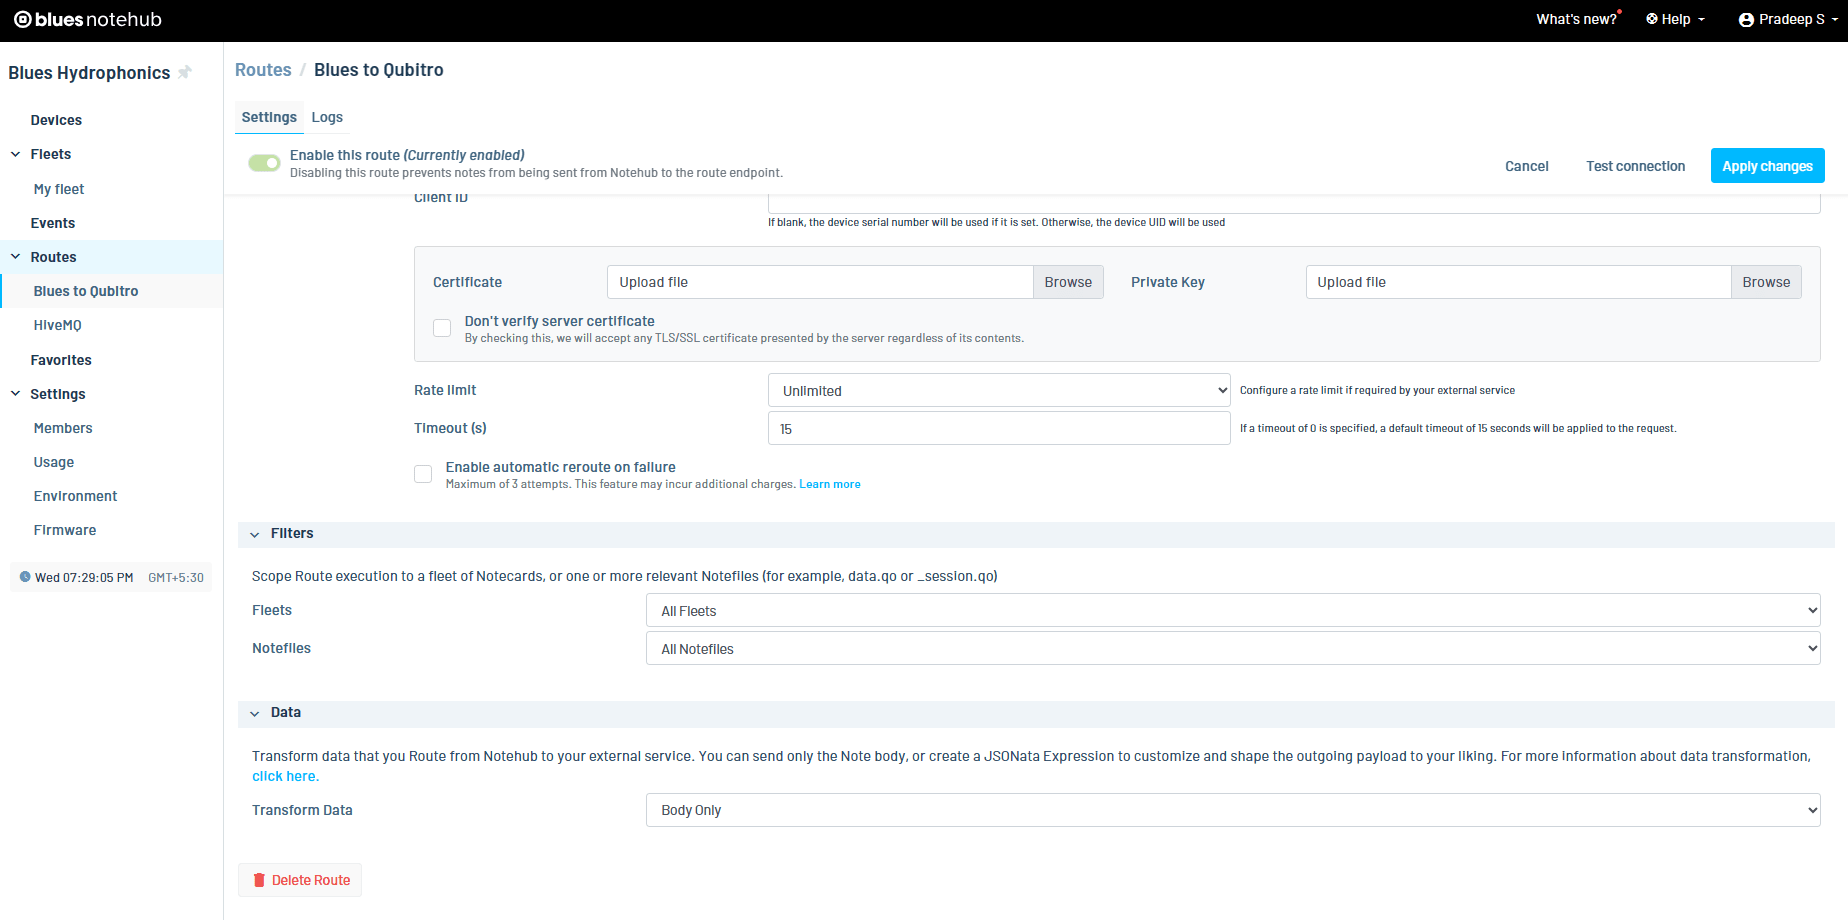
Routing Data Through Blues Notehub
Let’s move on to the Blues Notehub’s route page. Here, I created a new MQTT route and changed the username and password according to my Qubitro credentials.

At the bottom, I defined which data should move to Qubitro. Here I’m using body only. So, my payload only transferred to the Qubitro.
After my payload was successfully transferred to Qubitro, I opened the Qubitro portal to monitor the incoming data.

Visualizing Data
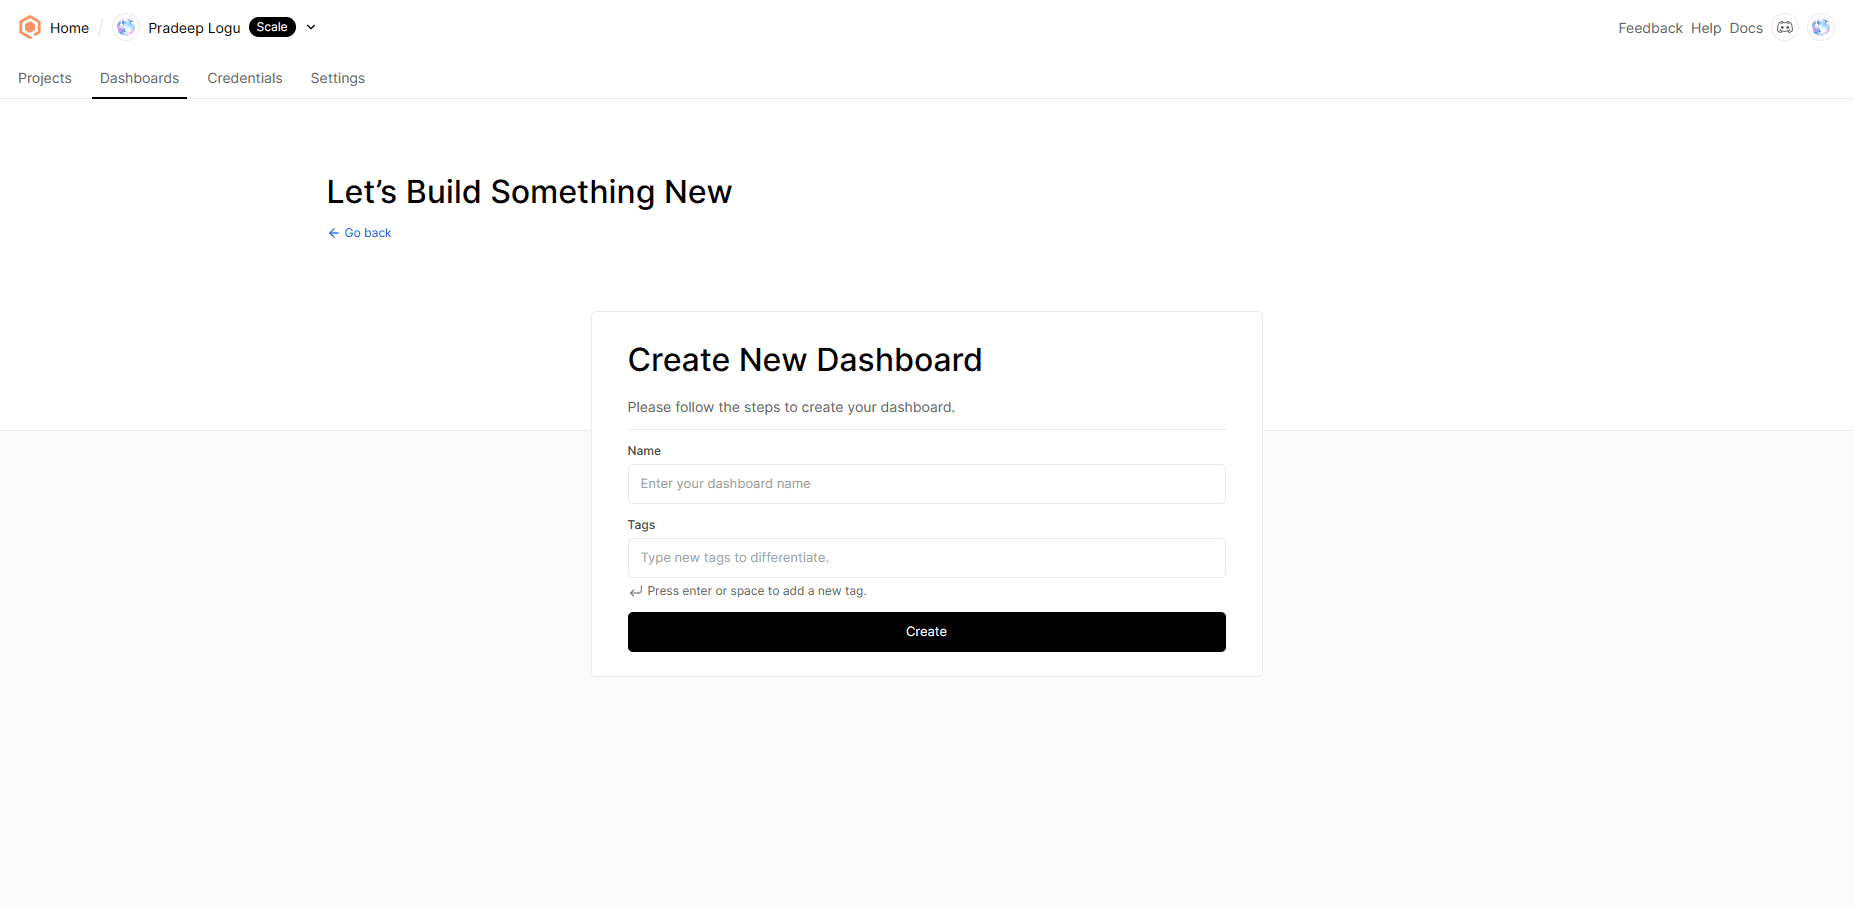
We can visualize the data via the Qubitro dashboard. First, I navigated to the Dashboard section and created a new dashboard.
Then, I clicked on edit and added the widgets I needed.

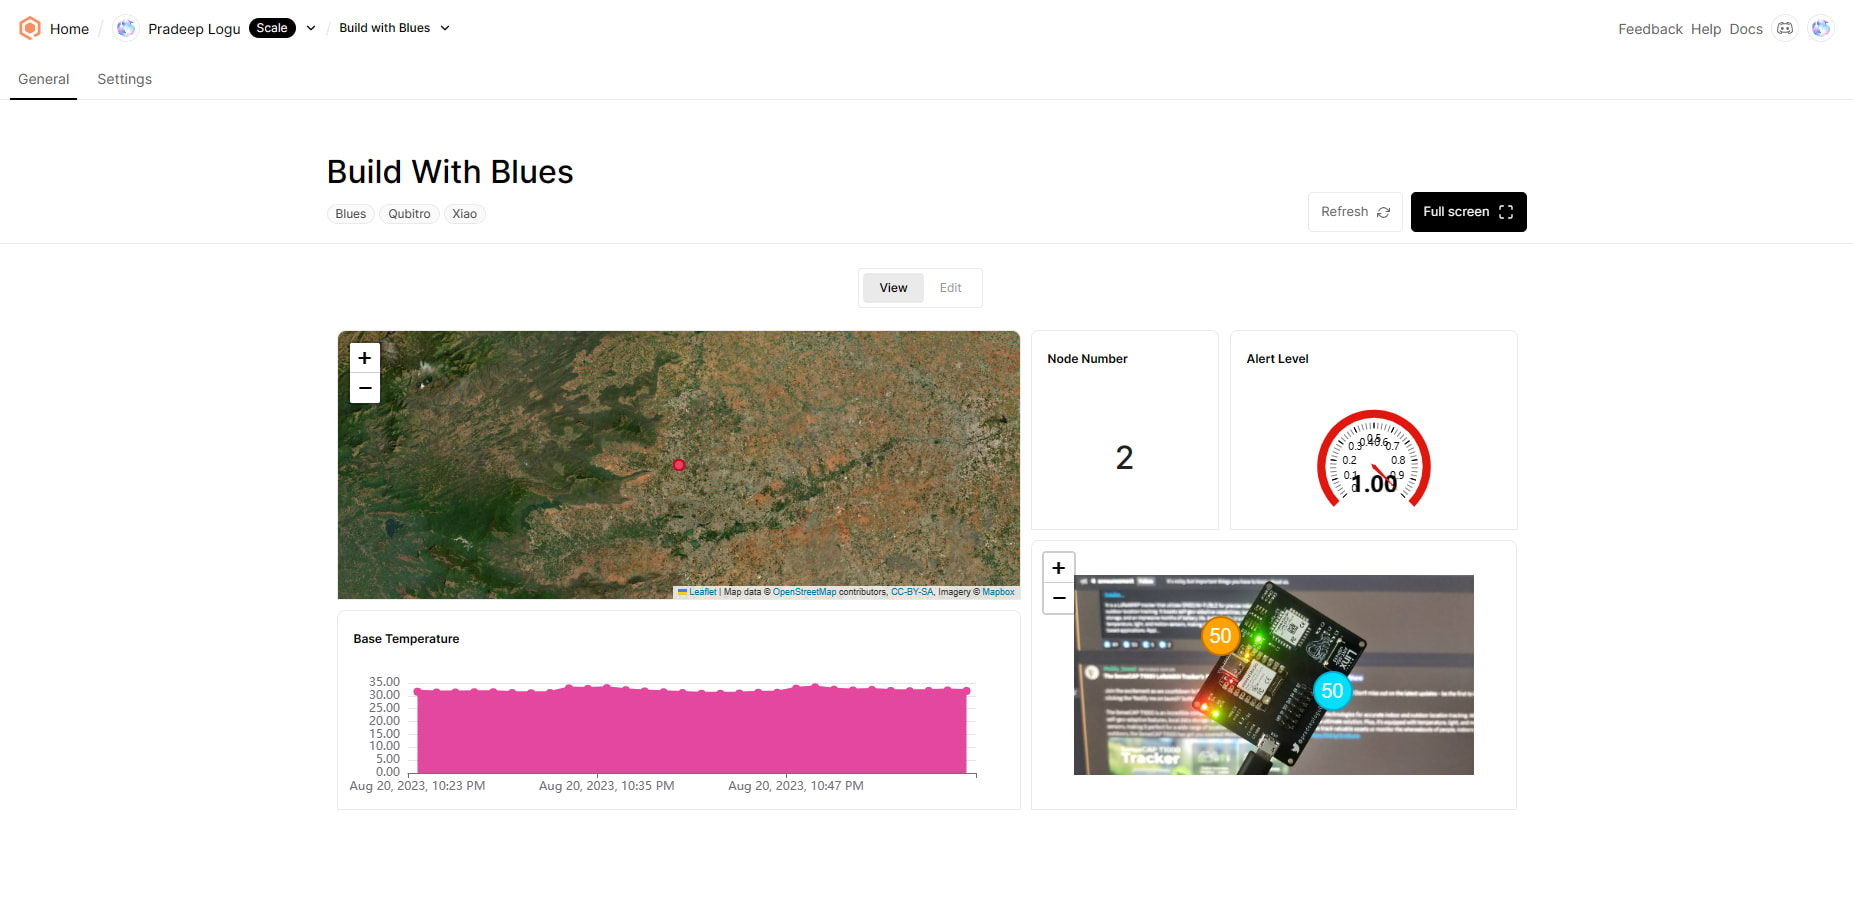
Next, I have added the image widget with the data points, making it straightforward to comprehend the data levels.

Then, I added a standard gauge to check and visualize the alert level.

Finally, I used a state widget for slave number visualization

and map widgets for GPS mapping.

This was my final dashboard, which shows the location of my base station and the slave node’s status.
Rule Engine Setup
In this section, I added a rule function to alert users when an anomaly is detected. To do this, I navigated to the function in the Qubitro portal and then selected the rule section.

Then I created a new rule.

Here I used Webhooks. I entered all the basic details and moved to the next page.

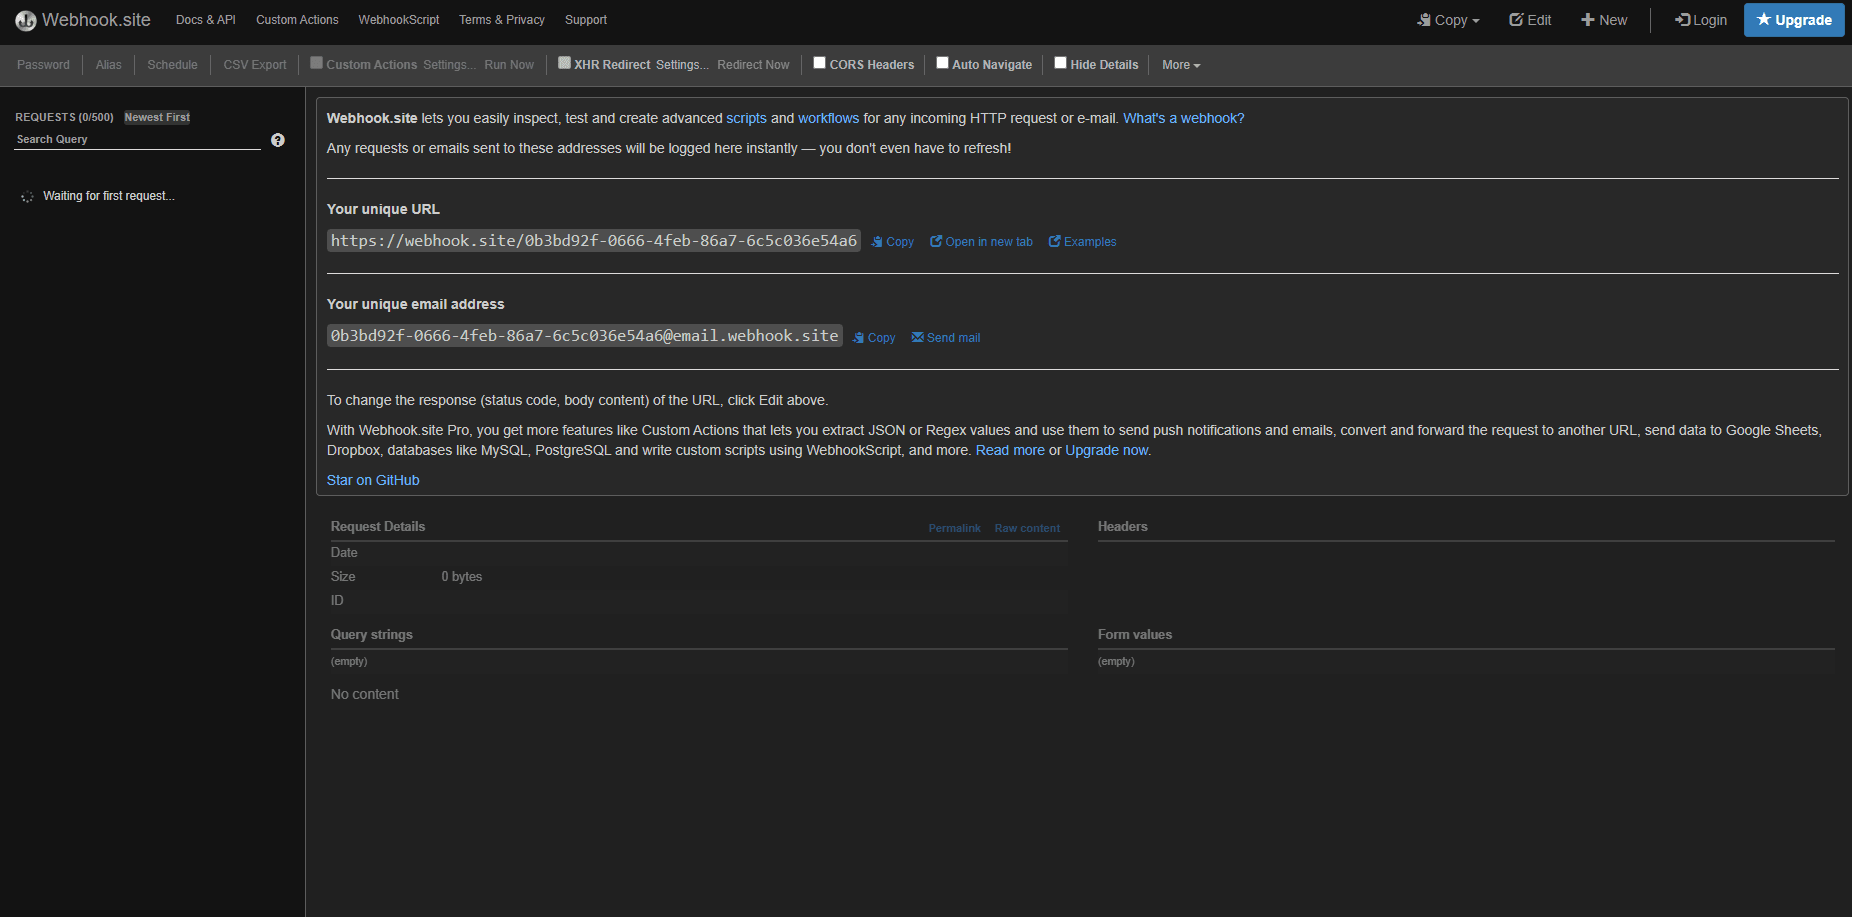
Then, I opened the webhook site and copied the webhook URL.
Next, I pasted the URL to the Qubitro rule page.
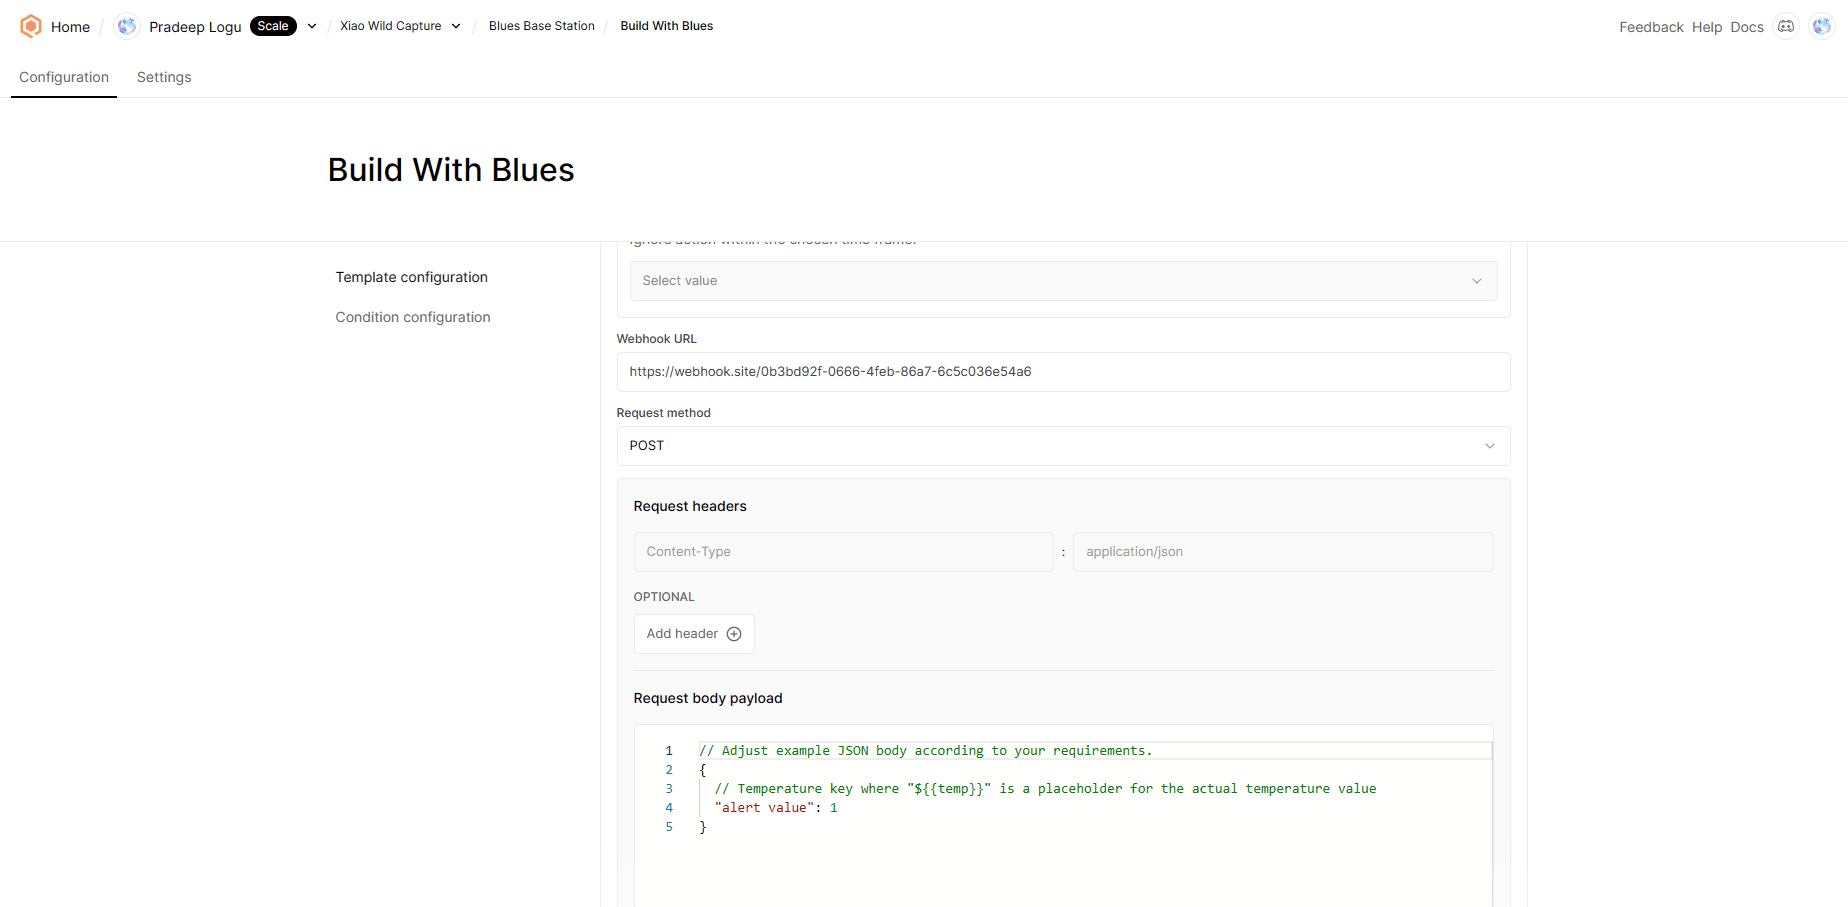
Then I selected the conditions. For this condition, my rule will trigger when my Alert level is greater than 0.

Below is the webhook response.

At this point, you could use Twilio or Mailgun to send a customized SMS or email to alert you.
Wrap up
Human-wildlife conflict can have negative impacts on biodiversity conservation, human development, and social harmony. It can also lead to retaliation against wildlife, which can further endanger their survival. With the help of Blues and Machine Learning, we can develop creative solutions to help overcome these issues.