

I have been a fan of the Raspberry Pi Pico since it came out. Its simplicity and rich feature set makes it a great low-power microcontroller for many projects.
With the support of a thriving Raspberry Pi community it serves as an outstanding development platform, that is already integrated into a number of interesting devices.
Moreover, incorporating cellular capabilities even alongside the built-in WiFi of the PicoW adds flexibility, enabling it to function in any location, even when no WiFi is available.
Developer-Friendly Cellular with the Notecard
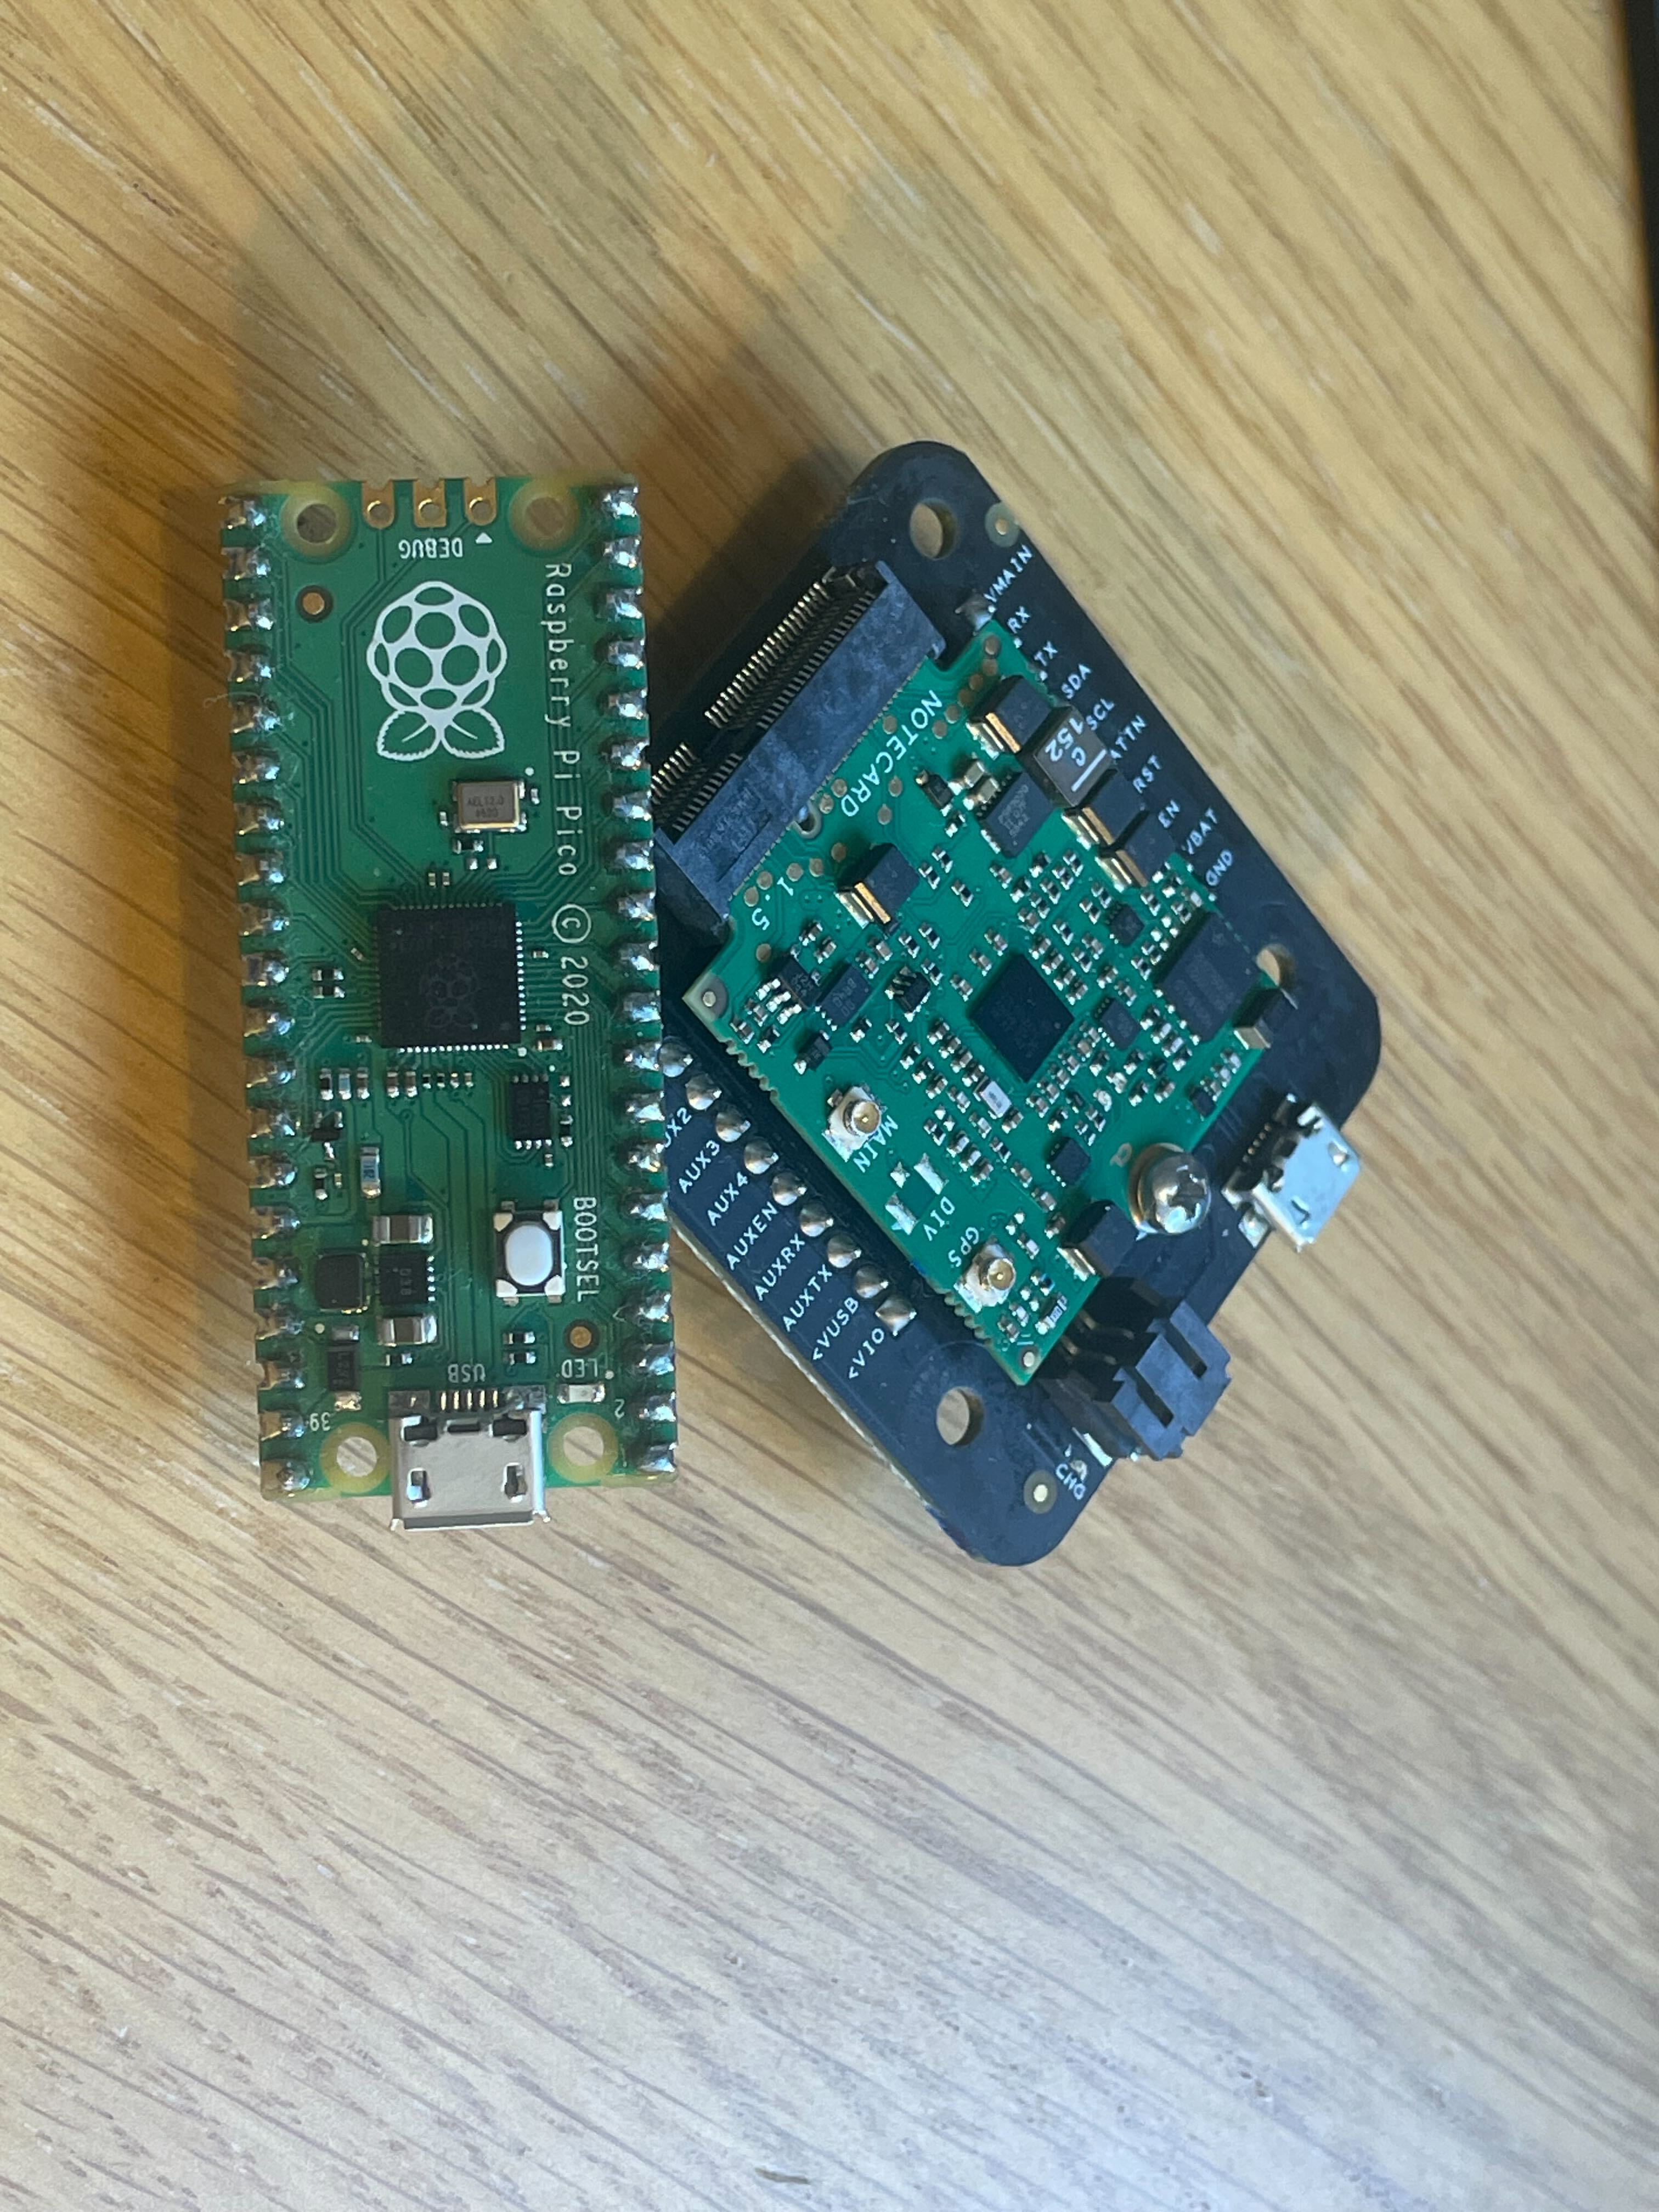
The key to success with Cellular IoT connectivity on the Pico is a secure and reliable System-on-Module, the Blues Notecard

The Notecard is a 30mm x 35mm device-to-cloud data pump. With the included cellular and GPS capabilities (and a WiFi option), the Notecard is an easy choice for securely syncing data with the cloud over a variety of global cellular protocols (specifically Cat-1, LTE-M, and NB-IoT).
And the cost? The Notecard comes prepaid with 10 years of global service and 500MB of data, starting at just $49.
But...what about the M.2 edge connector on the Notecard? How does that connect to a Pico?
Easy Integration Options
Let me introduce you to the Blues Notecarriers. These are development boards that make it dead simple to connect virtually any MCU or SBC to a Notecard. You place the Notecard into the provided M.2 slot and the Notecarrier exposes all of the pins on the Notecard to the MCU.
I am using the Notecarrier B, the smallest we supply, barely larger than the Notecard itself. It includes a Qwiic connector for easy connection over I2C, which many of the Pico Onboard devices support, however for my example, I am using a breakout cable to breadboard compatible pins.

I will be exploring the Notecard and Pico further in the future, but let us start with something simple, getting connected with the Notecard, and using it to set the time in the Pico's real-time clock.
After creating a free account at Notehub.io and initializing your first project, copy the provided unique ProductUID from the project and save it for later.
Connecting with Micropython
Micropython is a great way to develop on the Pico, and we have provided a library for the Notecard to use with it. Download it from GitHub and copy the notecard directory into the lib directory on your Pico. I use Thonny for this, as below:
Once we have the library, we are ready to connect to the Notecard. As I am using the pico explorer from Pimoroni as my base for the Pico, the I2C pins in use are from Device 0 on GPIO pins 20 and 21.
So we create an I2C instance with i2c=I2C(0,sda=Pin(20), scl=Pin(21), freq=400000)
This is then passed to the note-python library, to create a Notecard instance as follows:
nCard = notecard.OpenI2C(i2c, 0, 0). Put together in a program we have this:
from machine import I2C, Pin
import notecard

# Create I2C instance
i2c=I2C(0,sda=Pin(20), scl=Pin(21), freq=400000)

#Connect to Notecard
nCard = notecard.OpenI2C(i2c, 0, 0)
Next, we need to configure the Notecard to connect to our project on Notehub. With traditional Cellular modems this would be a series of AT commands to initialise the modem, create a connection to our server, and then send data back and forth.
The Notecard is different. With Notecard, we only need one JSON command, so it knows which project on Notehub to work with. Replace com.your-company.your-name:your_project with the one you saved from the previous section.
productUID = "com.your-company.your-name:your_project"
nCard.Transaction({"req": "hub.set", "product", productUID})
It is incredibly straightforward! We can simplify it even further by utilizing the Python library's convenient helpers that eliminate the need for manual JSON construction. To achieve this, we import a few additional classes, resulting in the following code:
from machine import I2C, Pin
import notecard
from notecard import card, hub

# Create I2C instance
i2c=I2C(0,sda=Pin(20), scl=Pin(21), freq=400000)

# Connect to Notecard
nCard = notecard.OpenI2C(i2c, 0, 0)

# Set ProductUID
productUID = "com.your-company.your-name:your_project"
hub.set(nCard, product=productUID)
This isn't quite enough to use the Notecard though. As part of the power saving features of the Notecard, by default it is not connected permanently to the cellular network, but instead only connects periodically on a schedule, or when explicitly required. We should set the schedule for connecting, and also force an initial sync, so we get the current time from the Celluar network. Change the last line above to the following:
hub.set(nCard, product=productUID, mode="periodic", outbound=15, inbound=60)Here we are setting the productUID as before, but also setting the mode for connection, in this case periodic, sending data not more than every 15 minutes, and receiving data not more than every 60 minutes, read more about the different modes, and other ways to control power usage on our documentation pages.
Now we have the Notecard setup, we can get the time from it. When the card is first powered on, it will make an initial connection to the cellular network to be fully initialized, and part of this is retrieving the time and location from the cell tower. We can use this time value to set the RTC on the Pico by adding the following code.
Firstly, add another import line at the top of the file for the time library:
import timeThen add this code to the end of the program:
epochtime = 0
while epochtime==0:
  celltime = card.time(nCard)
  if "time" in celltime:
    epochtime = celltime["time"]
  time.sleep(1)
warning
We have a loop here to ensure the time is set on the Notecard, because the first time the Notecard starts up it will take a few seconds to connect and set the time. However, in normal operation the Notecard should never be powered down.
We now have the time, we just need to prime the RTC on the Pico. Looking at the documentation we see that it takes the seperate time parts, not just epochtime. Fortunatly there is a function for this too, as part of the time library. The time library we have already imported above, so let us add the RTC class from the machine library. Change the top line of your file to the following:
from machine import I2C, Pin, RTCFinally, we can take our epochtime value from the Notecard, and convert it into the separate parts, which we then user to set the RTC.
tm = time.gmtime(epochtime)
rtc = machine.RTC()
rtc.datetime((tm[0],tm[1],tm[2],tm[6],tm[3],tm[4],0,0))
note
noteNote the tuple from time.gmtime does not have the same order of data in the tuple as RTC.datetime, so we need to reorder them as shown.
So there we are. Using the Notecard to prime the Real Time Clock on the Raspberry Pi Pico, anywhere you have cellular coverage. I am sure that you can see the value in this, but in case not, watch this space for further projects, including the next part where we start to build a connected clock that sets the time automatically and displays the weather. In the meantime, head over to the Blues Shop and pick up a Starter Kit to get going with Blues.