
Connecting to a LoRaWAN Gateway
Introduction
In this guide, we will walk you through setting up your own Blues Indoor LoRaWAN Gateway and provide resources to configure other gateways supported by The Things Stack.
Continue reading to learn more about the device-to-cloud data flow with the Notecard LoRa, or skip directly to the setup instructions for your gateway:
Data Flow with Notecard LoRa and Notehub
The Notecard LoRa was built to operate in a manner similar to the Cellular and WiFi Notecards. Just like a cellular modem requires a cell tower and a WiFi module requires a WiFi access point, the Notecard LoRa requires a LoRaWAN gateway to route data to the internet.
For the Notecard LoRa in particular, only LoRaWAN gateways provisioned on The Things Stack are supported. The Blues Indoor LoRaWAN Gateway ships pre-provisioned in the Blues Things Stack tenant and offers turnkey deployment options.
Whether using a Blues gateway or your own gateway, Blues helps to reduce the complexity of data flow from your Notecard LoRa device to the cloud.
Flow of Notecard Data using a Blues-Managed Gateway
Blues manages every part of the cloud-based data flow, from network server, to application server, to Notehub, and on to your cloud service.
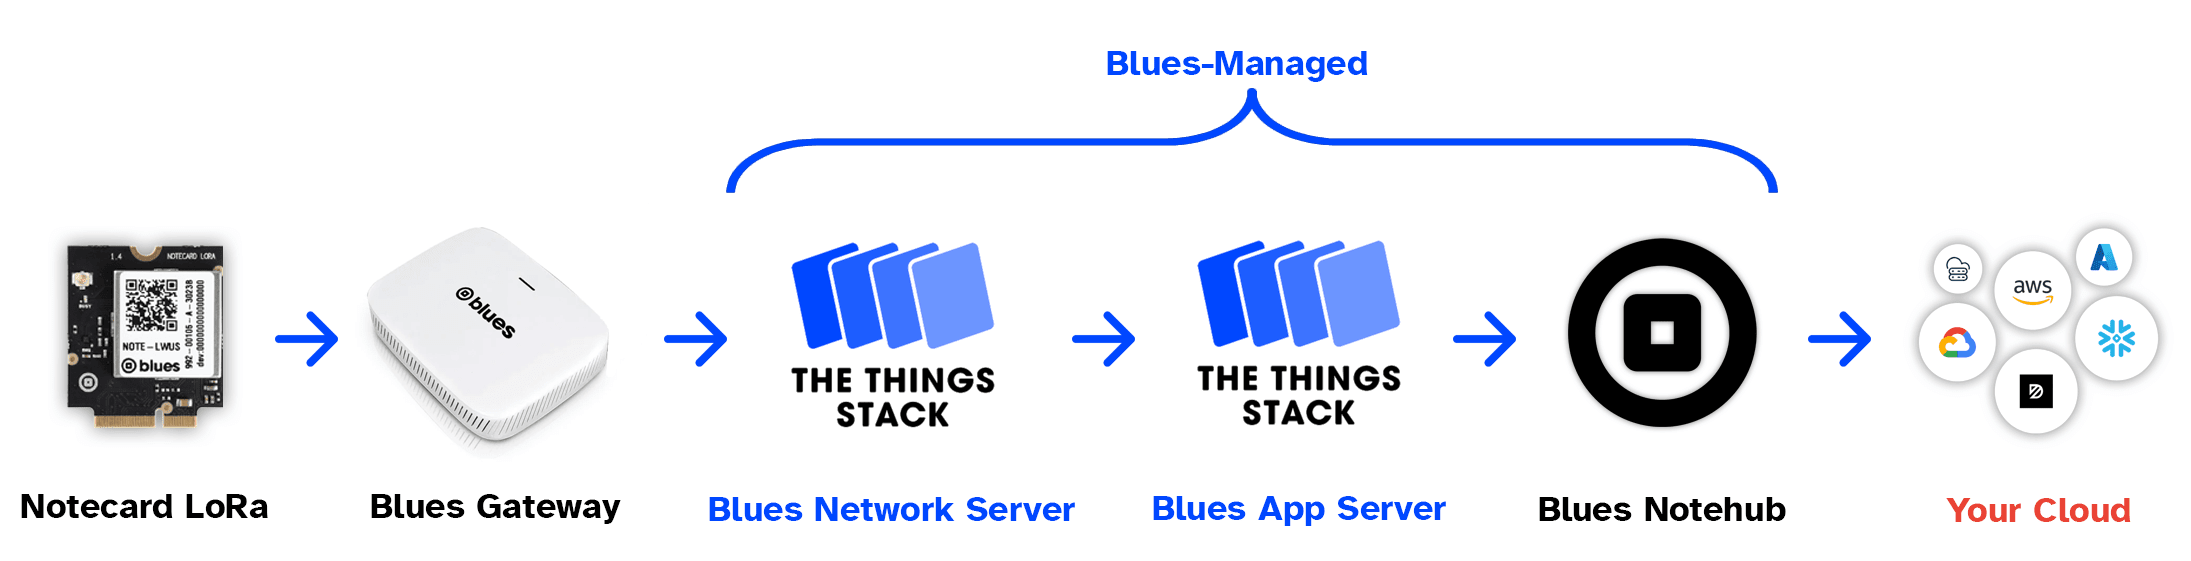
Flow of Notecard Data using a Public or User-Managed Gateway
Using a non-Blues gateway provisioned on The Things Stack requires user management of the network server and enabling of Packet Broker.

Connect a Blues Gateway to Ethernet
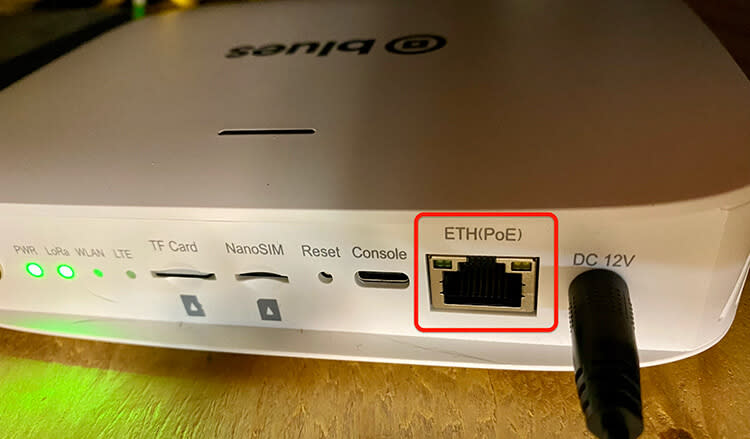
You can choose to connect your Blues Indoor LoRaWAN Gateway via Ethernet or WiFi (or both). Follow these instructions to connect your gateway via wired Ethernet.
-
Locate the Ethernet port on the back of your Blues gateway.
-
Plug an active Ethernet cable into the port and wait for the light on top of the Blues gateway to start pulsing blue.

-
That's it! Since your Blues gateway is pre-provisioned in the Blues Things Stack tenant, it's ready to relay data from your Notecard LoRa devices. Follow the instructions below to verify connectivity, change the default gateway password, and manage your Blues gateway.
Connect a Blues Gateway to WiFi
You can choose to connect your Blues Indoor LoRaWAN Gateway via Ethernet or WiFi (or both). Follow these instructions to connect your gateway via WiFi.
 note
noteThe Blues Indoor LoRaWAN Gateway requires access to a 2.4 GHz WiFi network, and does not operate on captive portals.
-
With your Blues gateway powered on and within WiFi range of your computer, connect your computer to the gateway's WiFi access point. The SSID of your gateway is named
RAK7268V2_XXXX, where the last segment is the last two bytes of your Gateway EUI orGWEUI.In the following example, the SSID of the gateway will be
RAK7268V2_A6BF.
-
Using your browser, navigate to
192.168.230.1and log in with the usernamerootand passwordBu1ldW1thBlues!.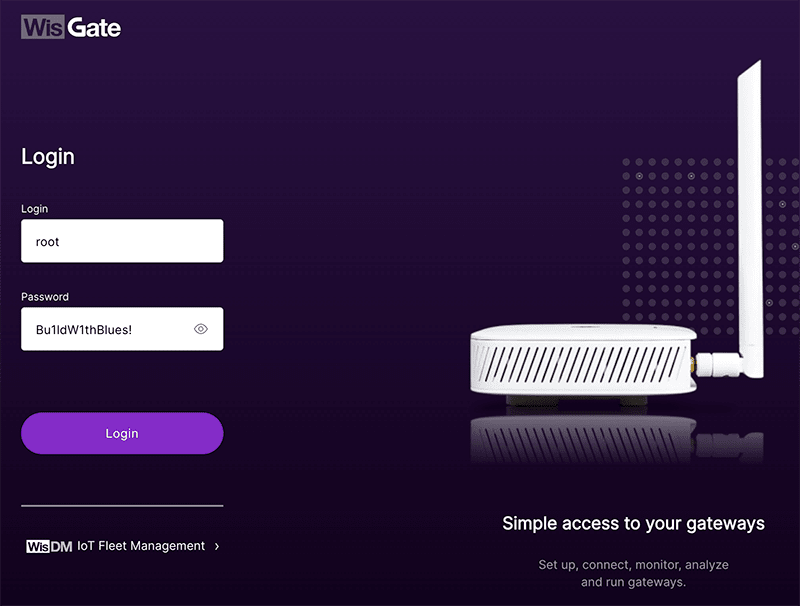
-
Once you have logged into your gateway, navigate to the Network tab, expand the WiFi pane, and click on Settings.
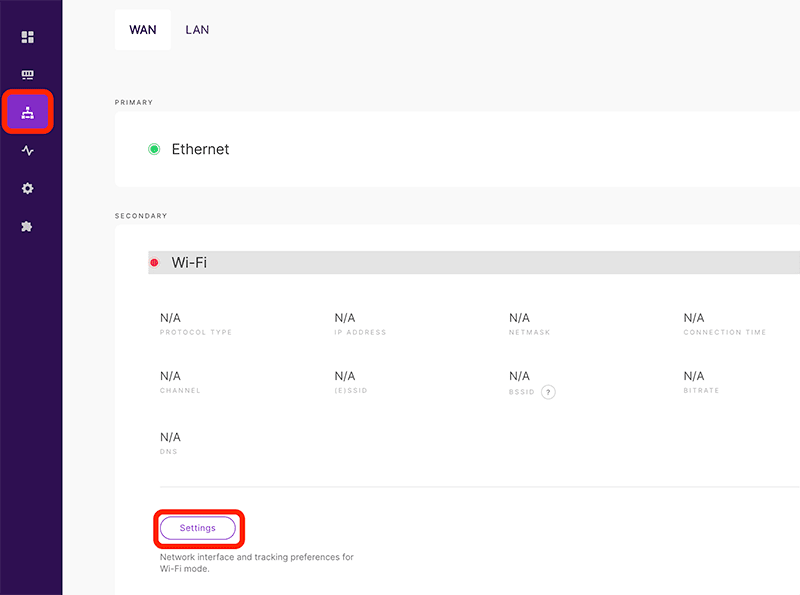
-
Toggle the switch to Enable the WiFi interface. Scan for available SSIDs, pick an SSID, enter your SSID's password, and click Save.
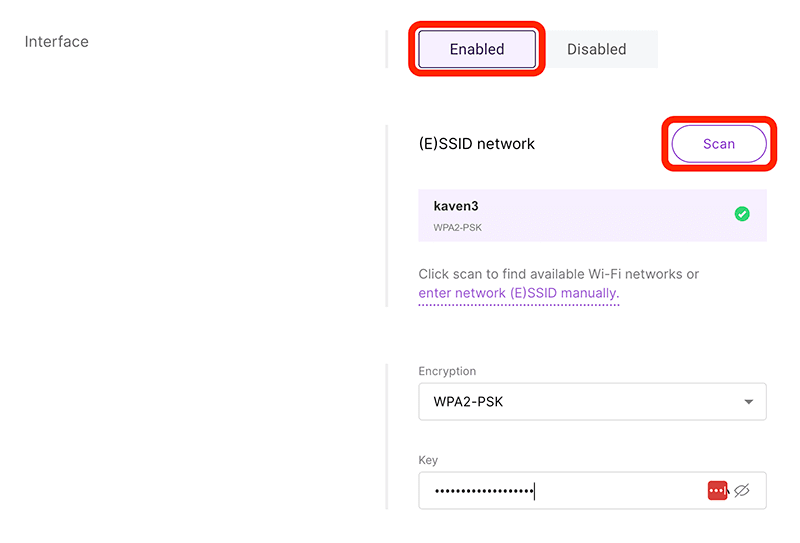
-
When configured correctly, the light on top of the Blues gateway should start pulsing blue.
-
That's it! Since your Blues gateway is pre-provisioned in the Blues Things Stack tenant, it's ready to relay data from your Notecard LoRa devices. Follow the instructions below to verify connectivity, change the default gateway password, and manage your Blues gateway.
Verify and Manage a Blues Gateway
-
Open a browser and navigate to the default IP address of your Blues gateway, which will be
169.254.X.X. The last two address segments are the last two bytes of the gateway MAC (which is also the Gateway EUI orGWEUI). You'll need to use a hexadecimal to decimal converter to convert each two bit pair to decimal.Please note this is a different IP address than what you may have used if you connected to the gateway's SSID during the WiFi configuration steps above.
For example, if your Gateway EUI is
ac1f09fffe10a6bf, the last two bytes area6andbf. Using the hexadecimal to decimal converter,a6becomes166andbfbecomes191. Therefore, your Gateway IP address is169.254.166.191.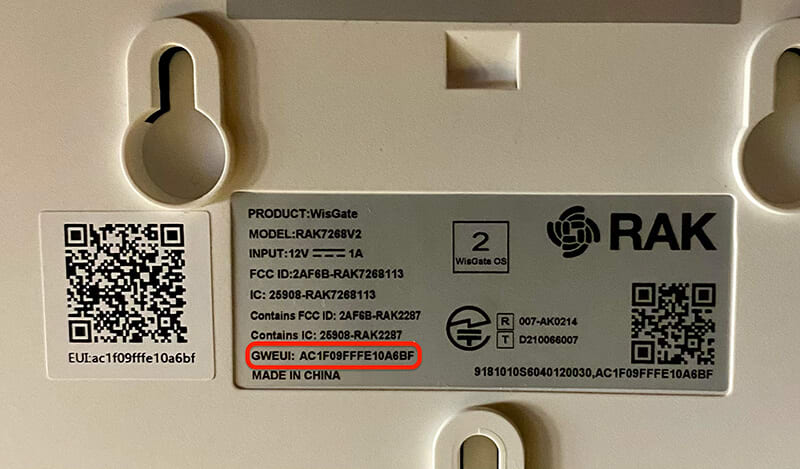
-
Log in to your gateway with the username
rootand passwordBu1ldW1thBlues!. -
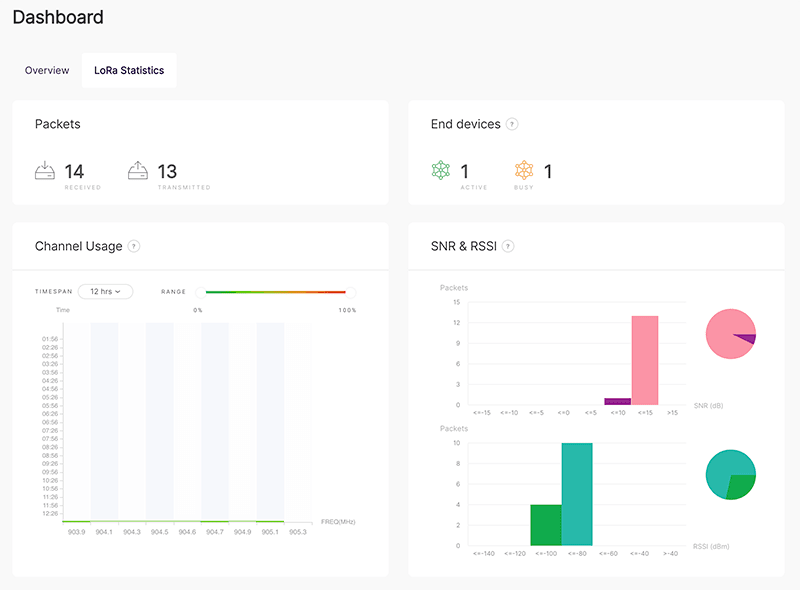
After logging into your gateway, you'll be presented with a Dashboard of your gateway activity. Once you complete the rest of the LoRaWAN Quickstart, you will see the relevant values update under the LoRa Statistics tab.
-
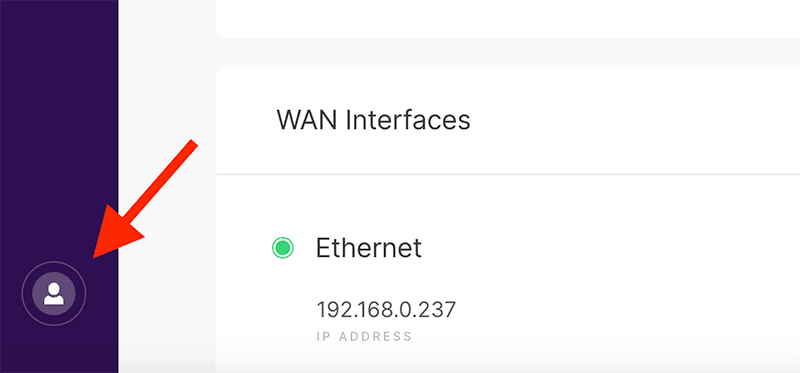
Now is a great time to update the default gateway password. Navigate to the User settings menu to update your password.
-
You may wish to bookmark your gateway dashboard for future reference. And now that your gateway is connected and ready to go, you're ready for the next steps.
 warning
If you ever need to perform a full factory reset on your Blues gateway, please reach out on the Blues Community Forum to notify a Blues staff member. There are additional reset procedures that Blues staff must perform to get your gateway back online.
Connect a non-Blues Gateway
The Notecard LoRa works with any LoRaWAN gateway on The Things Stack (including public LoRaWAN gateways).
If providing your own LoRaWAN gateway, follow the steps below to configure it on The Things Stack.
-
Each LoRaWAN gateway is configured differently. Start with The Things Stack documentation to find your specific gateway and follow the instructions provided to configure it.
Specifically make sure the correct frequency plan is set for your region:

-
Once you are done with the initial gateway configuration, you must configure Packet Broker in your The Things Stack tenant to automatically transfer Notecard LoRa traffic to the Application Server that Blues manages to relay data to Notehub. Also, be sure "List my network in Packet Broker publicly" is enabled in the Packet Broker settings.

Next Steps
If you're following the Blues Quickstart, next we recommend setting up your Notecard LoRa for sending data.
Set Up Your Gateway- Use the Notecard to Send Data
- Build Your First LoRa App
At any time, if you find yourself stuck, please reach out on the community forum.