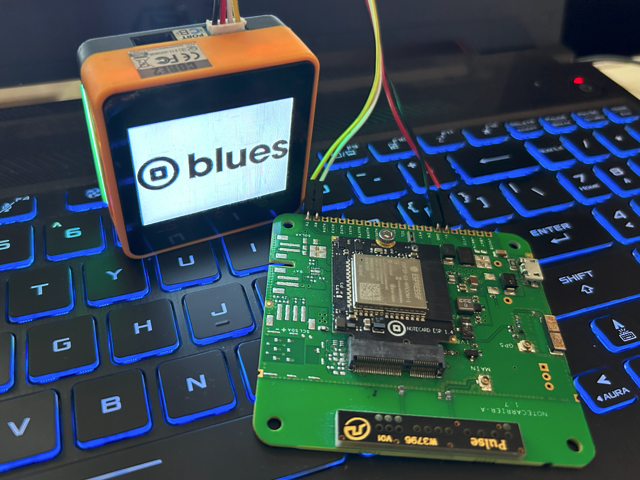
M5Stack UIFlow is a graphical programming language developed by M5Stack. It’s designed to make programming more accessible and fun for beginners, while still being powerful enough for experienced programmers. This blog will show you how to integrate and program the Blues Notecard with M5Stack hardware via their UIFlow interface.
Features
UIFlow has several key features that make it stand out:
- Graphical Interface: UIFlow uses a block-based interface, similar to Scratch. This allows users to drag and drop blocks of code, making it easier to understand the flow of the program.
- Compatibility: UIFlow is compatible with M5Stack’s range of IoT development boards. This means you can easily program devices to interact with the physical world.
- Online IDE: UIFlow can be accessed through a web browser, making it platform-independent. You can program your M5Stack devices from anywhere, without installing any software.
- Python Support: In addition to its graphical interface, UIFlow also supports Python. This allows more experienced programmers to write complex programs using a familiar language.
Applications
M5Stack UIFlow can be used in a variety of applications, including:
- Education: UIFlow’s simple, intuitive interface makes it an excellent tool for teaching programming concepts.
- Rapid Prototyping: With UIFlow, you can quickly prototype IoT devices using M5Stack’s development boards.
- Home Automation: You can use UIFlow to program M5Stack devices to automate tasks around your home.
Getting started
Getting started with M5Stack UIFlow involves a few steps:
-
Download the M5Burner firmware burning tool: This tool is used to flash the UIFlow MicroPython-based firmware onto the M5Stack device.

-
Firmware Installation: Use M5Burner to flash the UIFlow MicroPython-based firmware onto your M5Stack device.

-
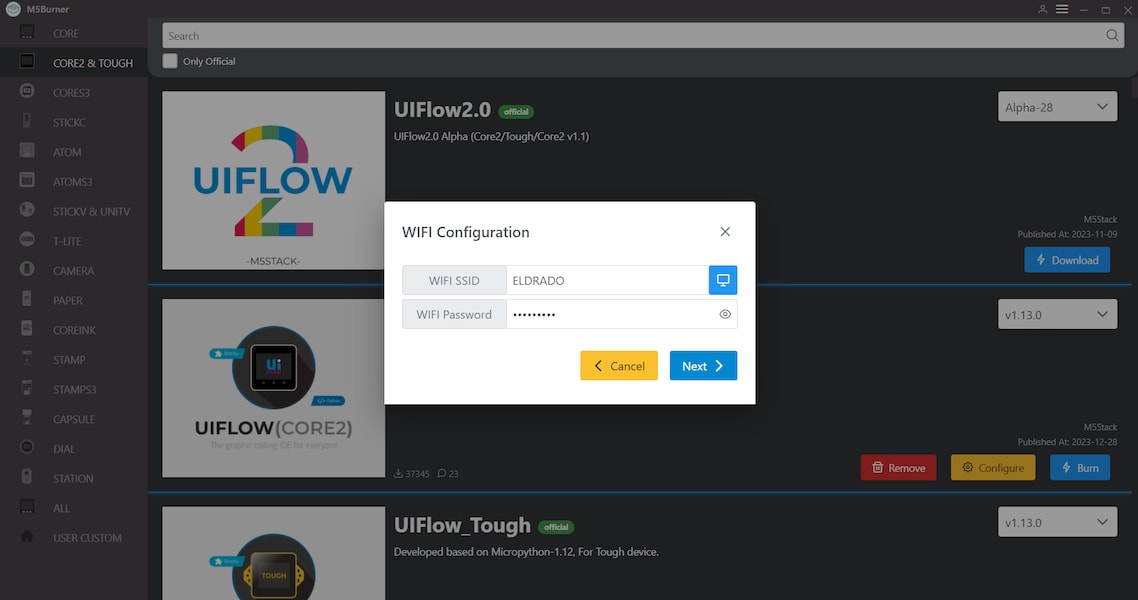
Configure Wi-Fi: After downloading the firmware configure the Wi-Fi details before uploading to the board.
-
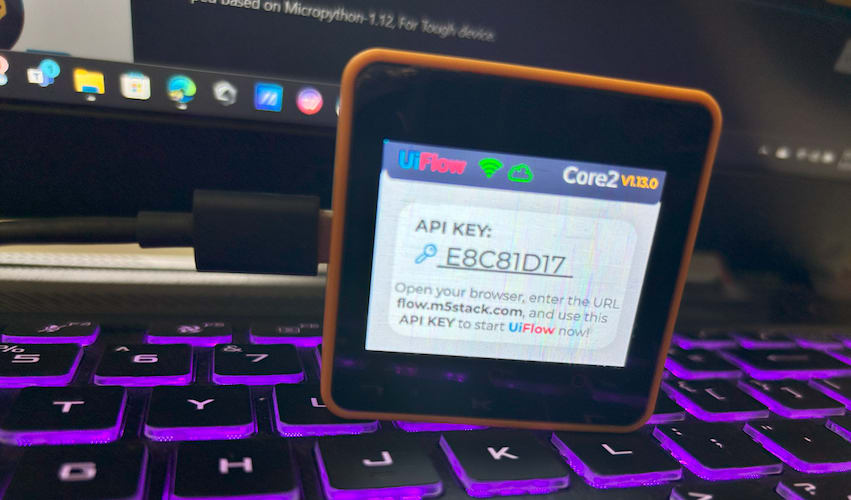
Network Programming Mode and API KEY: Enter network programming mode and pair your API KEY.
-
UIFlow Setup: Connect and program the M5Stack device in UIFlow, whether you use the web-based version or the desktop version.
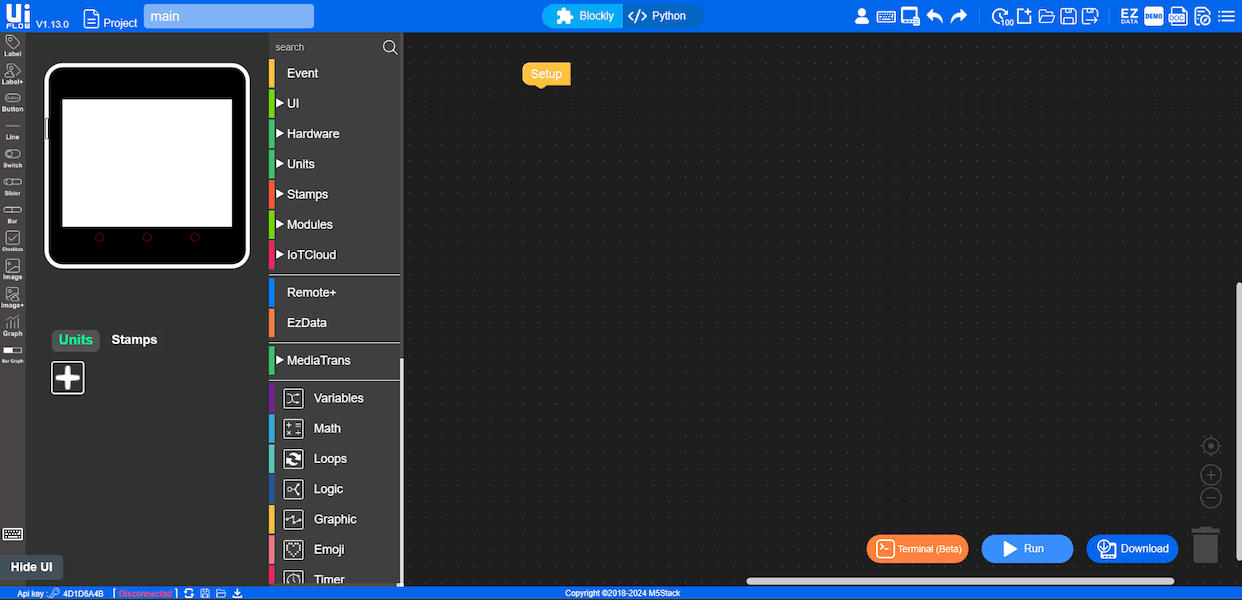
For a more detailed guide, you can refer to the UIFlow Quick Start guide on GitHub.
Blues Notecard Hardware Integration
The Blues Notecard supports both I2C and UART communication, and in this tutorial we’ll use UART to integrate the Notecard with M5Stack Core 2. To do so simply connect the grove cables between Core2 and any Notecarrier with a Notecard attached. That’s all.

UIFlow Integration with Blues Notecard
First, let’s try to implement some basics in UIFlow. Connect your M5Stack device with UIFlow by entering the API KEY in the UIFlow settings interface, and also select the device type.

Once the device is connected to UIFlow you can see the status on the bottom screen.
![]()
Next, open the UI tab and look for the screen background color menu.

Here is my simple program that can change my M5Stack screen color.

Next, click the run button.

That’s it, now you’re ready to integrate the Blues Notecard with UIFlow. Navigate to the Hardware tab and look for the UART menu.

Select the UART block. In my M5Stack Core2 pin, 14 is tx and 13 is rx. Also, set the baud rate as 9600.

Here is my simple block program that can send and receive data from the Notecard.
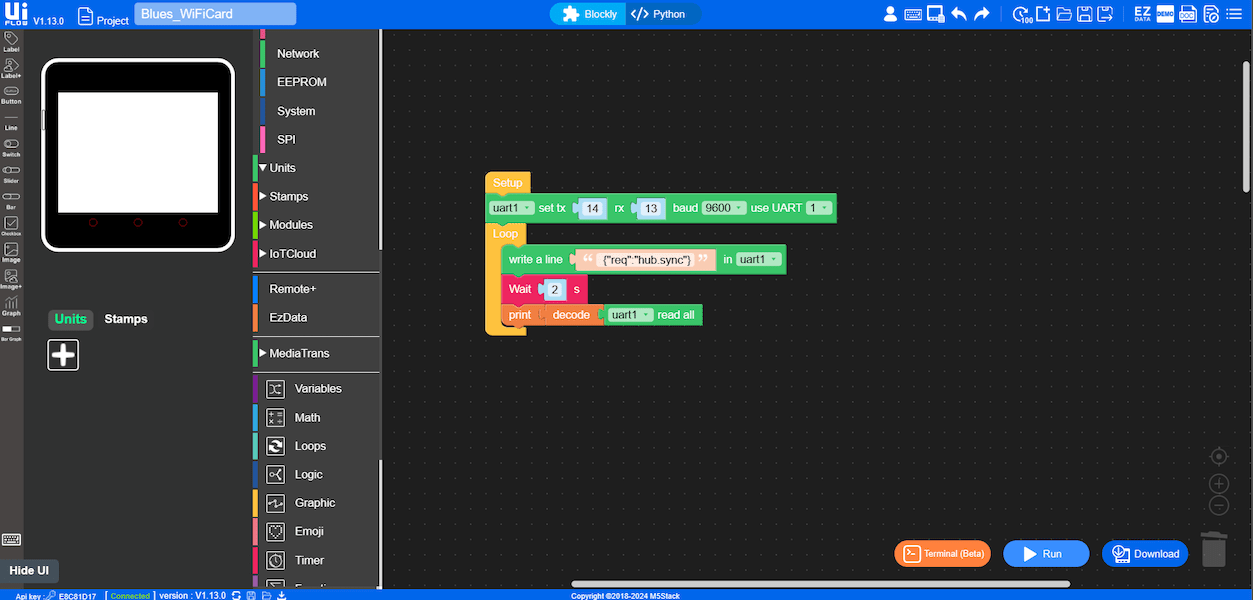
Here is the serial terminal response.

This is what we expected from the Notecard, next, let’s try to connect with our AP.

Here is the expected serial terminal response from the M5Stack Core2.

Now we are done with the basic configuration. Next, let’s configure the Notecard with our demo project. For that first create a project on Blues Notehub and copy the product UID.

Then configure the UIFlow to connect with the demo project.
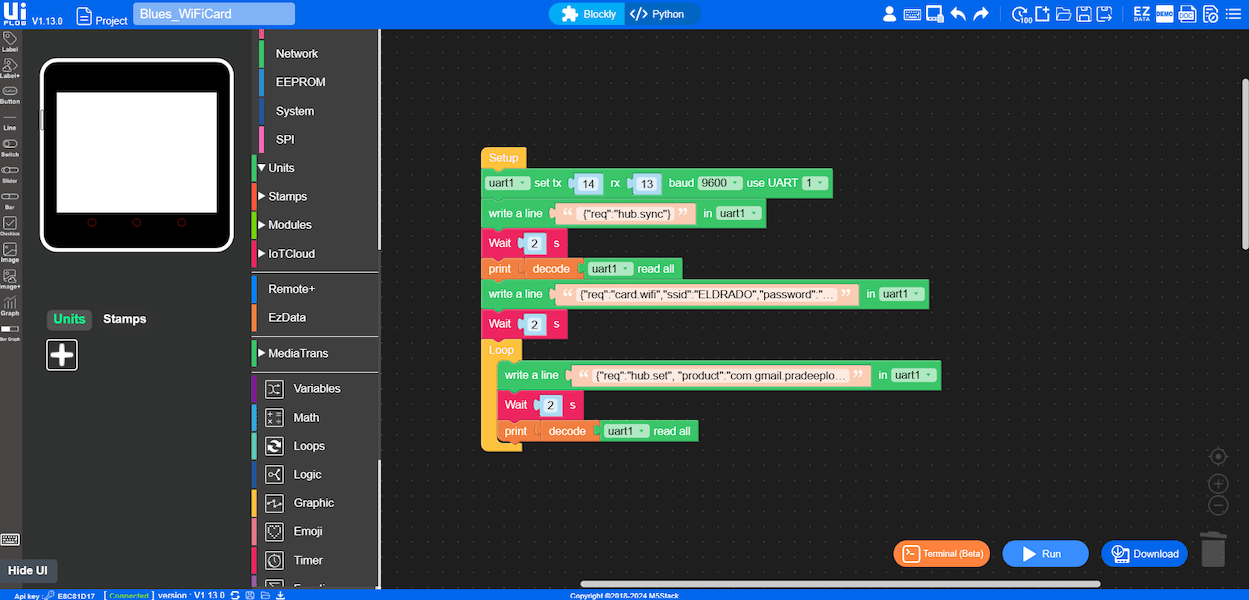
Look at the Notehub project and look for the device connection.
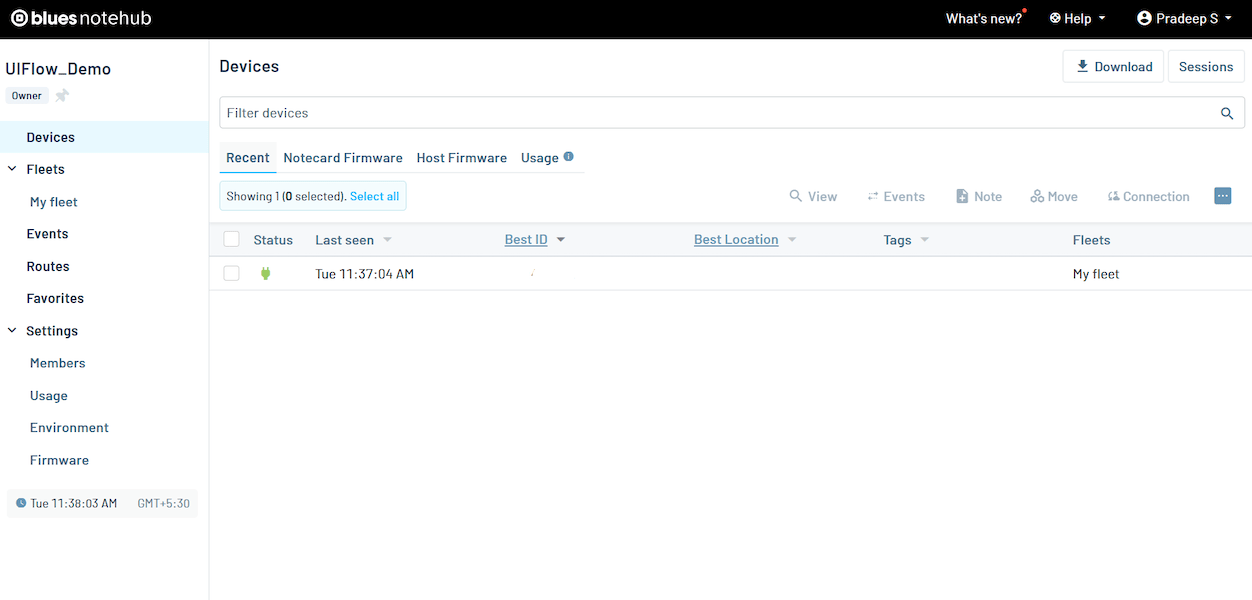
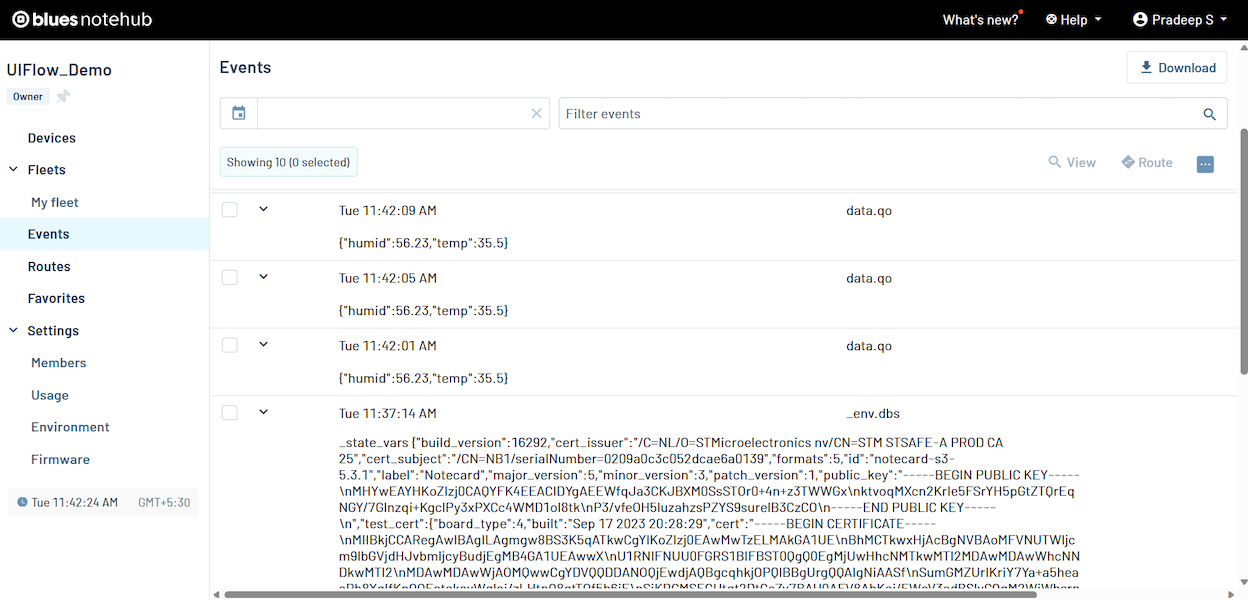
Now, let’s try to send some dummy sensor values to the Notehub.

Here is our final Notehub response.
In addition to the simple data integration, I have added some UI and LED controls.

Here is the Micropython code corresponding to the UIBlocks.
from m5stack import *
from m5stack_ui import *
from uiflow import *
import time

screen = M5Screen()
screen.clean_screen()
screen.set_screen_bg_color(0xFFFFFF)

image0 = M5Img("res/10.png", x=-17, y=54, parent=None)

uart1 = machine.UART(1, tx=14, rx=13)
uart1.init(9600, bits=8, parity=None, stop=1)
uart1.write(' {"req":"hub.sync"}'+"\r\n")
wait(2)
print((uart1.read()).decode())
uart1.write('{"req":"card.wifi","ssid":"XXXX","password":"XXXXX"}'+"\r\n")
wait(2)
uart1.write('{"req":"hub.set", "product":"com.gmail.XXXXXXXX"}'+"\r\n")
wait(2)
print((uart1.read()).decode())

while True:
  rgb.setColorFrom(6, 10, 0xff0000)
  rgb.setColorFrom(1, 5, 0xff0000)
  uart1.write('{"req":"note.add","body":{"temp":35.5,"humid":56.23}}'+"\r\n")
  wait(1)
  print((uart1.read()).decode())
  uart1.write('{"req":"hub.sync"}'+"\r\n")
  wait(1)
  print((uart1.read()).decode())
  rgb.setColorFrom(6, 10, 0x33ff33)
  rgb.setColorFrom(1, 5, 0x33ff33)
  wait(2)
  wait_ms(2)
Conclusion

The integration of UIFlow with the Blues Notecard provides a powerful, yet easy-to-use platform for IoT development. Whether you’re a seasoned developer or a beginner just getting started, this combination of tools can help you bring your ideas to life. Happy coding! 😊
