

Too often in this industry we dismiss products and services that are informally labelled for use by "makers". Something about that term illicits assumptions that the product, tool, or service is simple, silly, or not enterprise-ready.
The irony is we all know this "maker" persona is in many ways the foundation of embedded development, and key for inspiring young/new developers. Sure, maybe they are building a ridiculous Rube Goldberg machines, but that can be just step one on their journeys.
I bring this up because Adafruit is a well-known brand that has a strong attachment to makers, and for good reason. They are my go-to source for high quality components when I'm building out POCs that demonstrate the value of Blues.
Now, I only recently learned more about Adafruit's cloud service, Adafruit IO, and I have to say I left impressed.
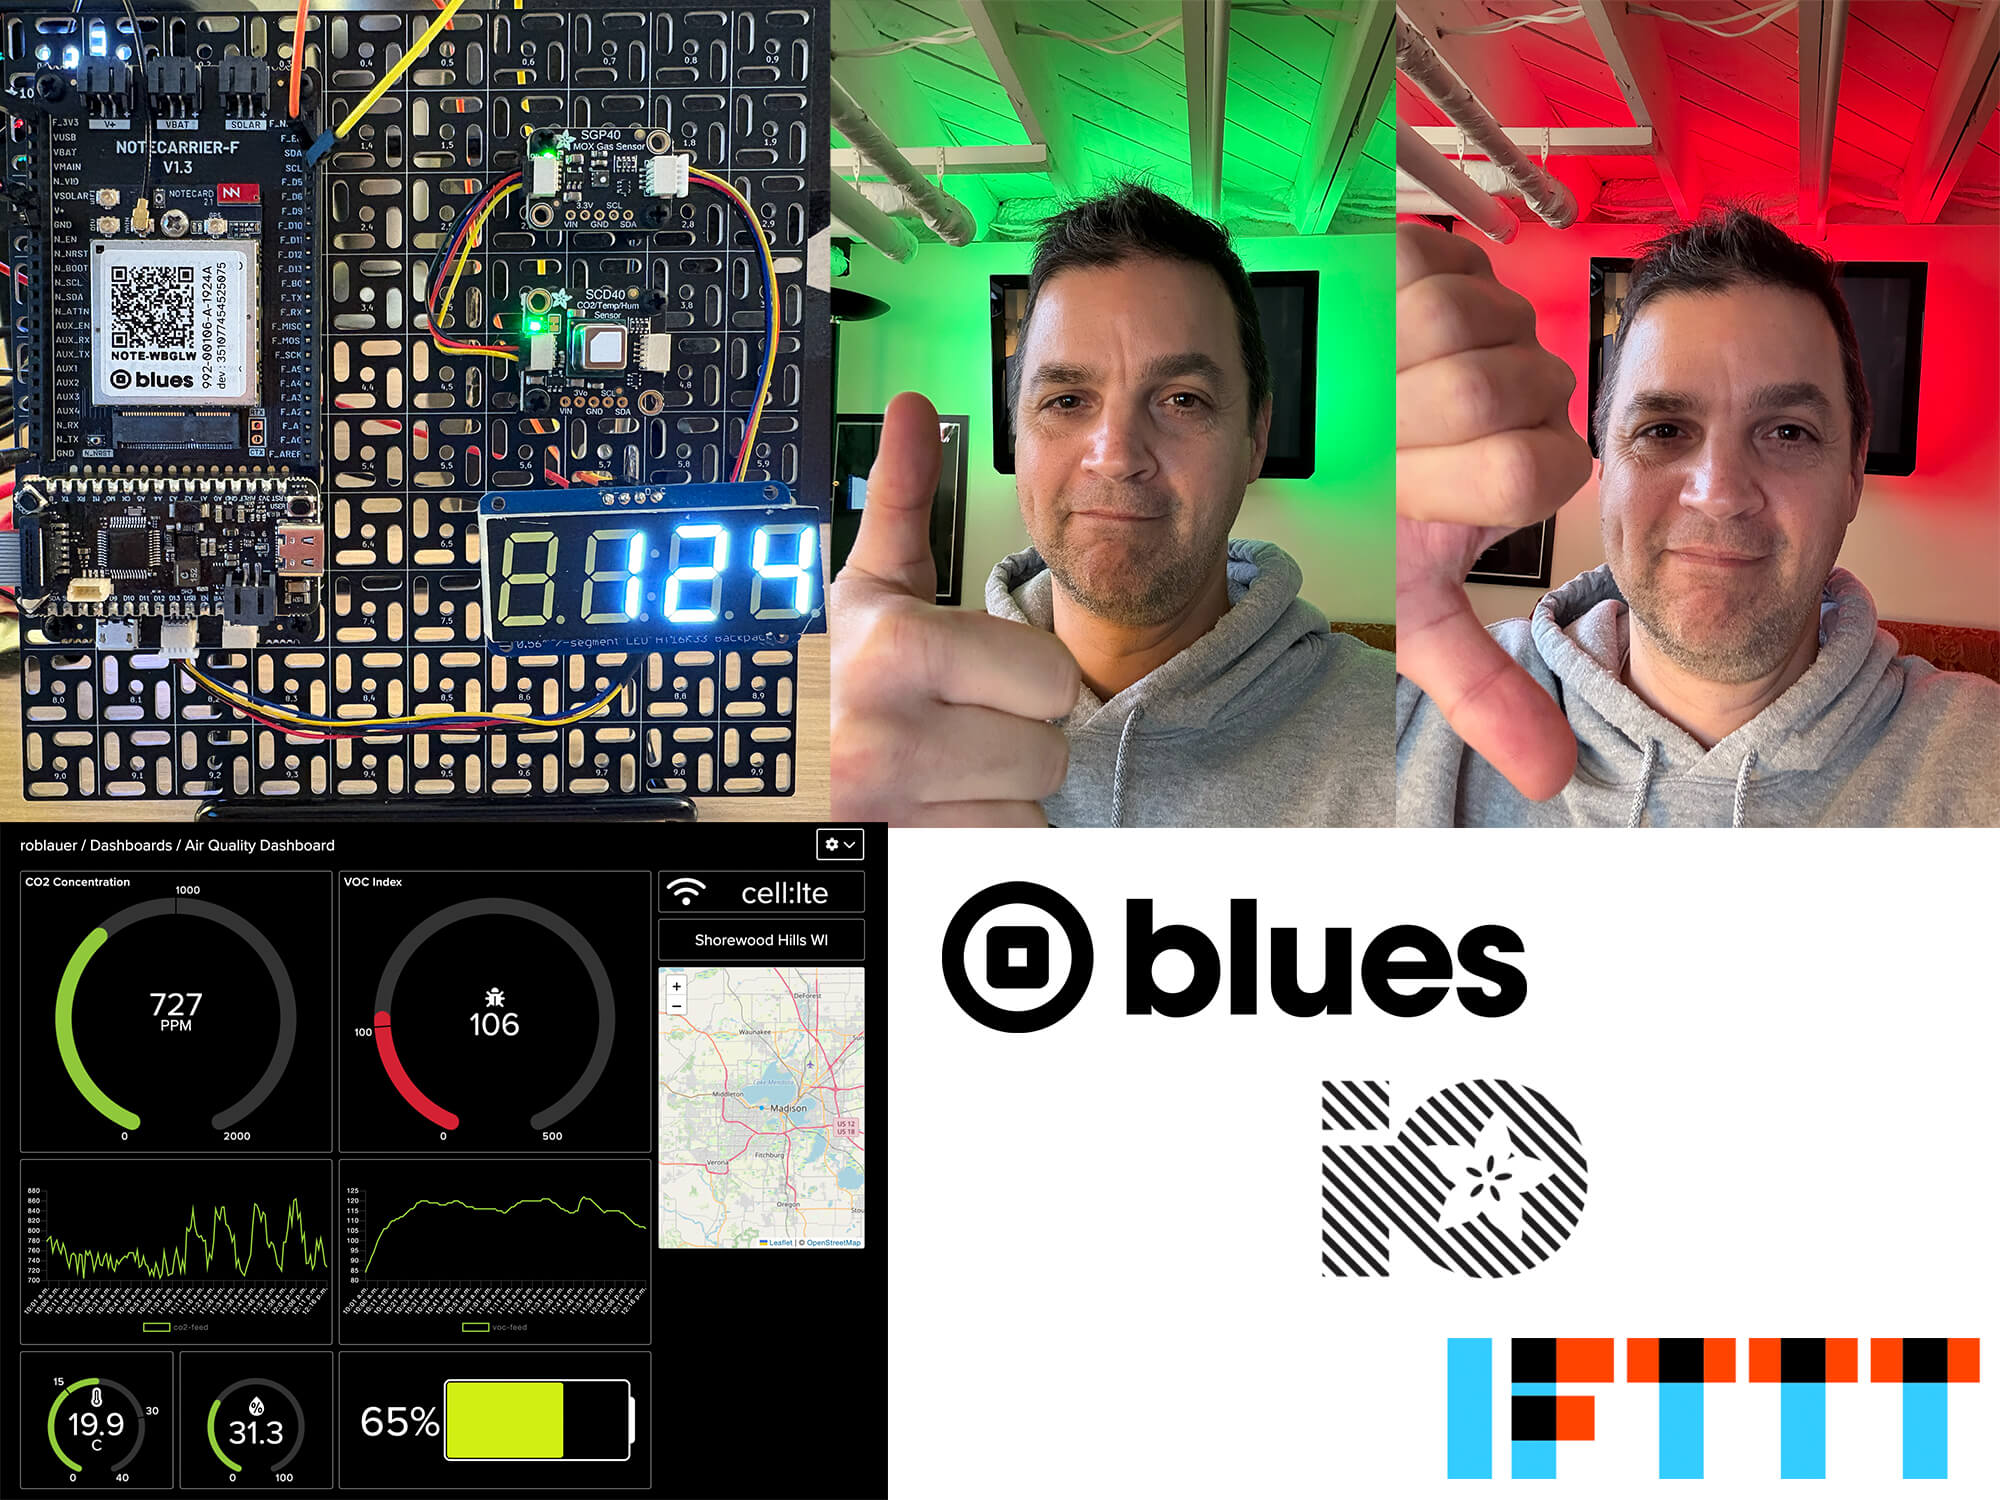
This article is a subset of a write-up I did on Adafruit Playground that demonstrates how to build a cloud-connected indoor air quality monitoring solution: Monitor Indoor Air Quality with Blues, IFTTT, Adafruit IO and a Hue LED Strip. Yes, very much a "maker" project, but it includes the potential for very practical extensions.
What is Adafruit IO?
Adafruit IO is a cloud-based platform designed for IoT applications, enabling users to collect, visualize, and interact with data from connected devices. Built with simplicity and rapid prototyping in mind, Adafruit IO supports a wide range of hardware, including Arduino, Raspberry Pi, and STM32- and ESP32-based microcontrollers.
Adafruit IO also provides MQTT and HTTP APIs, allowing for seamless integration with Blues Notehub.
Their platform offers real-time and historical data visualization through customizable dashboards, as well as automation features such as "actions" and "power-ups" for more event-driven responses.
Let's take a quick journey through setting up a Blues Notecard, Blues Notehub, and Adafruit IO to sync data from a connected device.
Again, for a complete view of this project, consult the write-up on Adafruit Playground.
Blues Notecard and Notehub Setup
If you don't know already know by now, Blues Notecard and its paired cloud service, Blues Notehub, make it incredibly easy to cloud-connect your product. Supporting cellular, WiFi, LoRa, and satellite options, Notecard is your onramp for wireless connectivity.

In fact, it takes only two commands to start sending data to the cloud using the Notecard API:
-
Start with the
hub.setAPI:The hub.set API tells the Notecard to which Notehub cloud project it should send data.
After setting up a (free) Notehub project, you'll have a globally unique
ProductUID: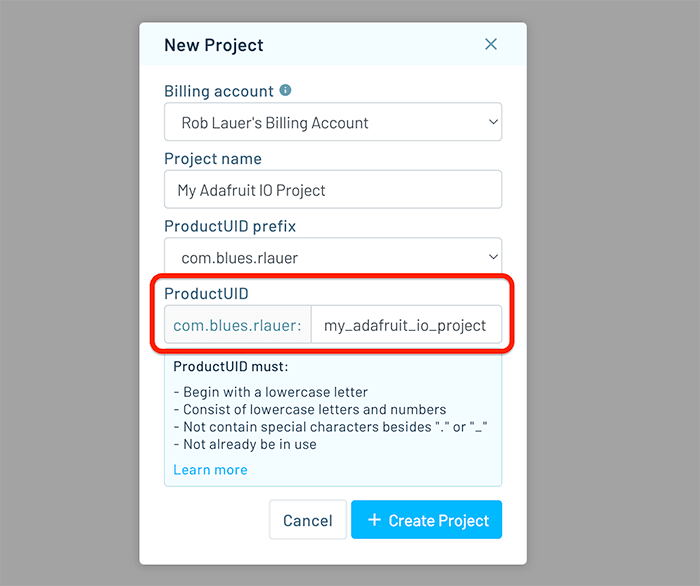
And the supporting code in your sketch?
{
   J *req = notecard.newRequest("hub.set");
   if (req != NULL)
   {
      JAddStringToObject(req, "product", PRODUCT_UID);
      JAddStringToObject(req, "mode", "continuous");
      notecard.sendRequest(req);
   }
}
TIP: If you're new to Notecard, you should know you also develop with virtually any language or RTOS (not just C!).
-
Send data with the
note.addAPIEvery time we want to send data to the cloud, we call the note.add API. This creates an event (a.k.a. a Note in Blues lingo) full of sensor data.
For example, if you were gathering temperature, humidity, and other sensor readings:
{
   J *req = notecard.newRequest("note.add");
   if (req != NULL)
   {
     JAddStringToObject(req, "file", "sensors.qo");
     JAddBoolToObject(req, "sync", true);
     J *body = JAddObjectToObject(req, "body");
     if (body)
     {
       JAddNumberToObject(body, "temp", temp);
       JAddNumberToObject(body, "humid", humid);
       JAddNumberToObject(body, "co2", co2);
       JAddNumberToObject(body, "raw", sraw);
       JAddNumberToObject(body, "voc", vocIndex);
       JAddNumberToObject(body, "voltage", voltage);
     }
     notecard.sendRequest(req);
   }
}
And the resulting data appears in your Notehub project like so:

Adafruit IO Setup
Let's imagine at this point we are gathering sensor data locally and sending it periodically to the cloud using Notecard and Notehub.
Next, we need to do something meaningful with this data, and that's where Adafruit IO comes into play. With a generous free tier, this cloud service provides a ridiculously easy way to visualize data (dashboards), create alerts (actions), and even integrate with third-party services (power-ups).
Adafruit IO Feeds
After setting up an Adafruit IO account, head to the Feeds section to create one feed for each data element you want to use:

Routing Data from Notehub to Adafruit IO Feeds
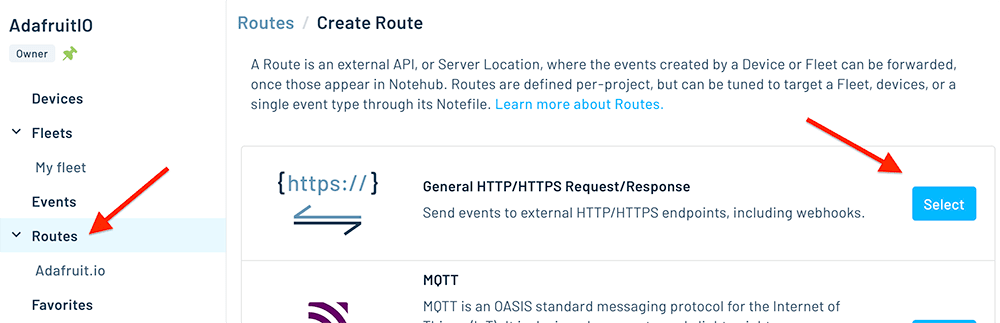
Next, head back to Notehub to create a route which will tell Notehub how to deliver events to the feeds.
From the Routes menu option, choose General HTTP/HTTPS Request/Response.
To set up the rest of the route:
-
The URL will be:
https://io.adafruit.com/api/v2/{username}/groups/{group}/dataWhere
{username}is your Adafruit IO username and{group}is the name of the group that encapsulates your feeds. (This is probablydefault.) -
Under HTTP Headers you'll have to add your Adafruit IO key (which is available back in your Adafruit IO account).
X-AIO-Keyis the name and your Adafruit IO key is the value. -
Under Filters you'll want to send the sensor data associated with this project and ignore other session and health info that Notecard sends.
Therefore, under the Notefiles section, choose Selected Notefiles, and then
sensors.qo(or whatever name you used in yournote.addrequest above). -
Lastly in the Data section, we'll need to edit or transform the JSON payload sent from the device before it's delivered to Adafruit IO. Every cloud service has a certain format of data they expect, and Adafruit IO is no different!
In essence we need to create a set of key-value pairs, one for each data element we are sending. Something like...
{
  "key":"co2-feed",
  "value":body.co2
}
How is this accomplished? Through the magic of JSONata expressions! JSONata lets you transform JSON objects on the fly.
TIP: The JSONata Exerciser is a great way to test out JSONata expressions!
Here's the full JSONata expression I used, with an image of this expression in the aforementioned JSONata Exerciser:
{
  "feeds":[
     {
           "key":"bestlocation-feed",
           "value":best_location
     },
     {
           "key":"co2-feed",
           "value":body.co2
     },
     {
           "key":"humid-feed",
           "value":body.humid
     },
     {
           "key":"raw-feed",
           "value":body.raw
     },
     {
           "key":"temp-feed",
           "value":body.temp
     },
     {
           "key":"transport-feed",
           "value":transport
     },
     {
           "key":"voc-feed",
           "value":body.voc
     },
     {
           "key":"voltage-feed",
           "value":body.voltage/5*100
     }
  ],
  "created_at":$fromMillis(when * 1000),
  "location":{
     "lat":best_lat,
     "lon":best_lon
  }
}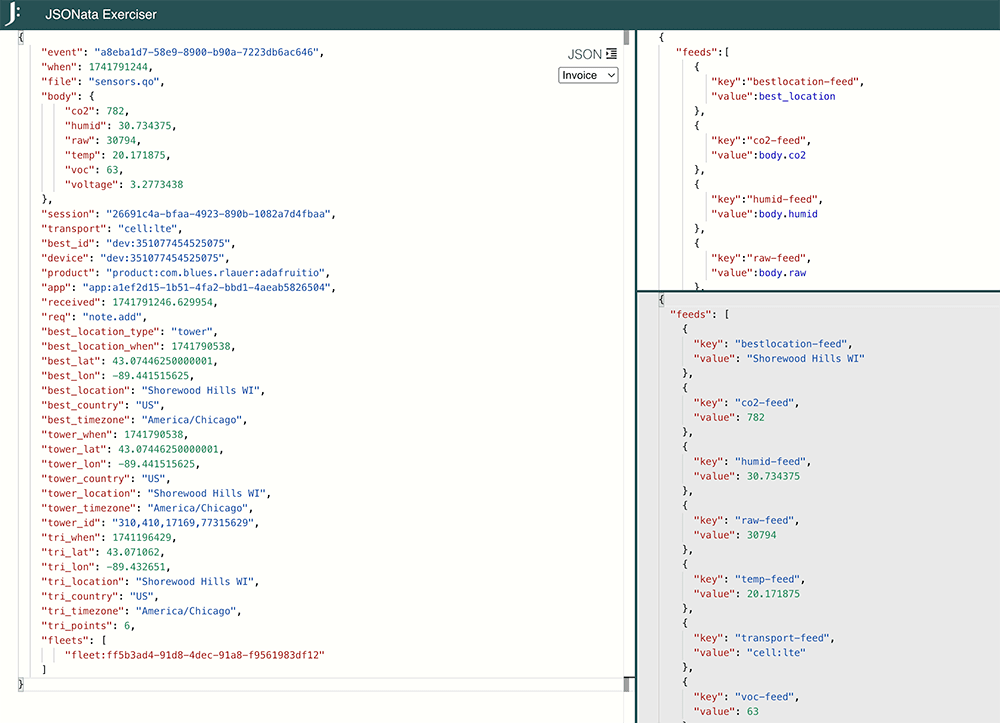
-
Finally, save the route (making sure it's enabled) and watch as the next event comes in. You should see a little green check under the status column in the Event view, which tells you the event was successfully routed to Adafruit IO.

Adafruit IO Dashboard
Now that we have data flowing into Adafruit IO, let's create a dashboard.

-
Head to the Dashboards menu option in Adafruit IO and create your first dashboard.
-
Using the intuitive UI provided, create one or more blocks for each feed. For example, I created a gauge to show the most recent reading from a sensor and a line chart to show historical readings:

-
Now, repeat the previous step for every data element you want to visualize. It's that simple!
Adafruit IO Actions
"Actions" are another Adafruit IO capability that lets you perform an activity on a scheduled basis, on a timer, or when a feed is updated.
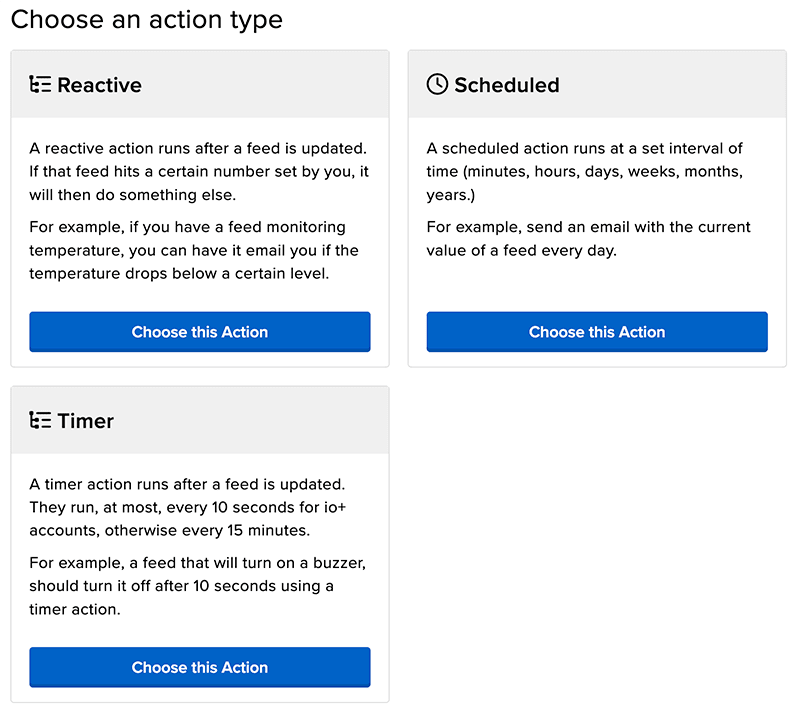
A simple action is to receive an email alert when a sensor value reaches a specified threshold.
-
Head to the Actions menu option in Adafruit IO.
-
Create a new action using either a form or the "Blockly" editor (which feels a bit like programming in Scratch!).
-
Here's what my email alert looks like in the Blockly editor:

-
And the alerts? Not too bad:

 note
noteYou can also build these same alerts directly in Notehub.
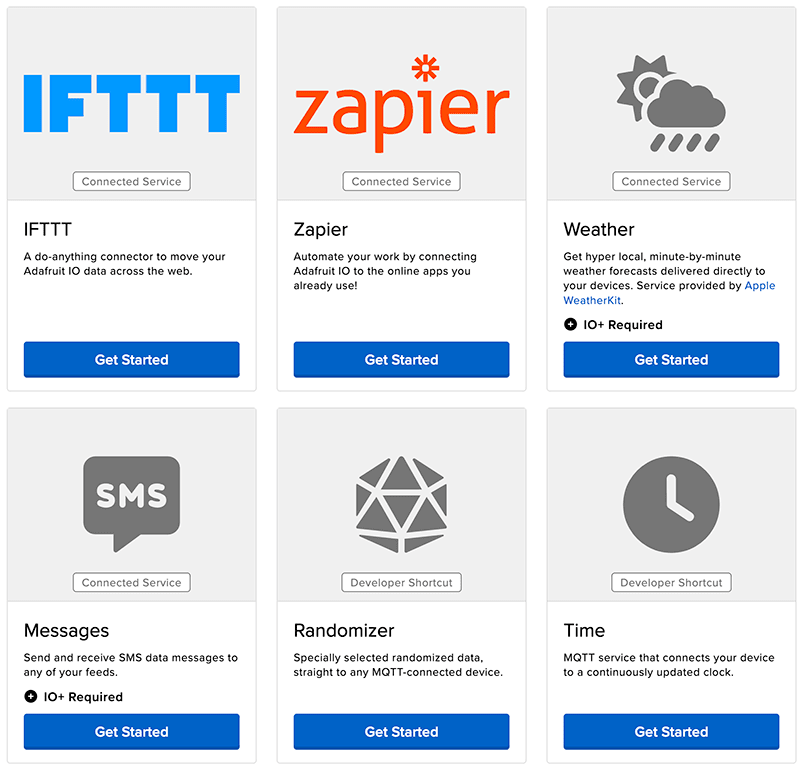
Adafruit IO Power-Ups
Power-ups are Adafruit IO-provided integrations with third party services like IFTTT, Zapier, and SMS for messaging (among other services).
For the aforementioned Adafruit Playground project I put together, I used IFTTT to integrate with my Philips Hue LED strip and provide some more dramatic lighting feedback by changing the color when a sensor value goes above/below an arbitrary value.
-
Choose the IFTTT from the Power-Ups menu in Adafruit IO.
-
Log in to your IFTTT account and create an applet.
-
The first step of the applet is to monitor a monitor a feed from Adafruit IO. Search for "Adafruit" and complete the form as needed to set the LED strip color (e.g. if the specified value is less than 100).

-
Next, in the "then" section, you'll want to connect to your Hue account and select the "change color" action for your HUE light.

-
The IFTTT applet should then be complete!

 warning
The free tier of IFTTT only polls your Adafruit IO feed once per hour. You can upgrade to their "Pro" tier to get more frequent polling.
Summary
This project measured VOC index levels in my office which don't change that often, so I hard-coded in some VOC values to quickly demonstrate the lights changing:
Again, check out the original Adafruit Playground write-up for the full project details.
Next steps? Get started with Adafruit IO here and get your own Blues Starter Kit.