


Banner image credit @nahakiole on Unsplash.
Blues University is an ongoing series of articles geared towards beginner- and intermediate-level developers who are looking to expand their knowledge of embedded development and the IoT.
Introduction
The proliferation of the Internet of Things (IoT) has transformed how devices communicate and share information. The IoT's growth is intricately tied to its reliance on web services for seamless data exchange. These services act as connective tissue, enabling devices to communicate, share data, and operate cohesively in a networked environment.
It's estimated that around 55 billion IoT devices will be in circulation by 2025. As IoT applications continue to diversify across industries, making web services efficient and secure becomes paramount. The ability of these services to scale and work together is crucial for integrating numerous devices, fostering a connected ecosystem that boosts automation, data-driven decision-making, and overall efficiency.
The relationship between embedded devices and web services is dependent on network communications. Often operating with limited resources, embedded devices interact with web services to send and receive data. This interaction involves protocols like HTTP or MQTT, allowing devices to transmit information to cloud-based platforms for processing and analysis.
A web service provides an interface with standardized notation or a protocol for executing a set of tasks. The interfaces are standard web protocols, such as HTTP, to enable data exchange and communication over the internet. Web services facilitate real-time monitoring, remote control, and the extraction of valuable insights from embedded devices.
HTTP: The Foundation of Web APIs
Hypertext Transfer Protocol (HTTP) is a means of encoding and exchanging information over the internet. It allows messages from clients, web browsers, IoT devices, and mobile apps to travel to servers and relevant resources before returning to the clients.
HTTP works by a request/response paradigm, where a client sends a "request" to a server, and the server returns a "response" to the client with a relevant description of the request's status. This way, a request can pass through several intermediate steps like routers, load balancers, proxy servers, and caching processes.
Its stateless nature, simplicity, and compatibility make HTTP a cornerstone of seamless communication in web services. It underpins most data transactions, ensuring reliable and standardized data transfer across the global network.
Common HTTP Methods
IoT devices don't tend to communicate with each other when using web services. Instead, they communicate with web servers, typically managed through application programming interfaces (APIs). APIs accept client requests from IoT devices and fulfill the request based on the request's HTTP method.
HTTP methods describe the action that a client request requires from a server. In IoT devices, these different HTTP methods translate to continuous data collection, sharing, and analysis.
Common HTTP methods include:
-
GET — The
GETmethod retrieves a resource from the server. The response to aGETrequest returns with the response headers and body. TheGETmethod is crucial for IoT devices that need to retrieve configuration settings, updates, or other data from central servers. For instance, a smart thermostat may use aGETrequest to fetch weather forecasts from a server to adjust its heating settings. -
POST — The
POSTmethod asks the server to create a new resource.POSTplays a pivotal role when IoT devices, like sensors, need to report new data to a server. For example,POSTcan post an environmental sensor's temperature readings to a weather database. -
PUT —
PUTmodifies an existing resource. The method is useful for devices needing to update their status or replace their data, like a wearable fitness tracker updating a user's step count. -
DELETE — The
DELETEmethod is used for deleting a resource, typically for actions that require removing specific data or un-registering a device.
The Anatomy of a Web API
APIs are constructs of programming languages that provide abstractions so you can more easily build complex functionality.
An API usually consists of the following key parts:
-
A unique identifier that describes the address of the resource — REST APIs, for instance, have URL-like identifiers. In a request, this is the endpoint of the root and the path. For instance, if an endpoint is
https://api.github.com/repos/octokit/octokit.rb, the root ishttps://api.github.com, and the path is/repos/octokit/octokit.rb. The root is the entry point for the request API's underlying application. The path describes the specific resource requested. -
A list of parameters to define the resource to be worked with or processed — Parameters are path parameters that form the address of a resource you're requesting. They could be query parameters that allow you to tune and drill down your requests with key-value pairs for filtering purposes. They could also be body parameters that provide more specific search functionality than query parameters.
-
A return value of what to expect from the processing of the API — This is the "response" from the API, containing data or information in varying formats, usually JavaScript Object Notation (JSON) or Extensible Markup Language (XML). It also includes status codes indicating the request's outcome (for example,
200for success).
Working with HTTP APIs
A uniform resource locator (URL) is a unique identifier for an internet
resource. It serves as an address to resources such as web pages, files like
videos and images, and more. An example of a URL is https://www.google.com.
Most URLs have four parts: a scheme, a sub-domain, a domain, and a top-level
domain. Using https://www.google.com as an example, let's dissect the URL into
its parts:
-
https://— This is the scheme. It describes the protocol that will access the resource. It's a mandatory part of every URL as it defines the rules for data exchange. Hypertext Transfer Protocol Secure (HTTPS) here simply tells the client to display the resource, such as a web page in the hypertext or HTML format, and encrypt any information the user supplies on the page. HTTP is the unsecured version of the scheme. -
www— This is the sub-domain, which distinguishes the different sections of the domain or website. The "www" in the example above is for any resource on the web. -
google— This is the domain, which indicates the organization that owns the URL. Domain Name System (DNS) records link this user-friendly domain name to the IP address where the web browser can find that domain's data. In Google's case, the IP address is172.217.14.228. -
com— This is the top-level domain (TLD), which shows the kind of organization the website or domain belongs to. The ".com" here shows it's a commercial entity, whereas ".org" would indicate an organization.
Request Headers and Their Roles
In HTTP requests, request headers hold the additional information that describes the mode of communication between the client and the server. The additional information could also describe the client's resource request or the resource itself.
Request headers are crucial in HTTP requests, as they carry extensive information about the client's request and preferences, and the communication mode between client and server.
Below is a detailed description of some common HTTP request headers with examples:
-
Host indicates the domain name or IP address of the server to which the request is being sent, essential for servers with multiple domains (virtual hosting).
- Example:
Host: www.example.comsignifies the client's intent to communicate withwww.example.com.
- Example:
-
Accept-Language communicates the client's preferred languages for receiving content, allowing for localization.
- Example:
Accept-Language: en-US,en;q=0.5implies the client prefers US English but is open to any English variant.
- Example:
-
User-Agent provides details on the client's software, including the operating system, browser, and device type, to ensure content compatibility.
- Example:
User-Agent: Mozilla/5.0 (Windows NT 10.0; Win64; x64) AppleWebKit/537.36 (KHTML, like Gecko) Chrome/58.0.3029.110 Safari/537.36indicates a Chrome browser on Windows 10.
- Example:
-
Authorization contains the credentials for client authentication to the server, usually in response to a 401 Unauthorized status and WWW-Authenticate header from the server.
- Example:
Authorization: Basic QWxhZGRpbjpvcGVuIHNlc2FtZQ==, where the string after "Basic" is a Base64-encoded username and password.
- Example:
Clients use these headers to provide servers with specific instructions on how to process requests, while servers can tailor responses to fit the client's capabilities and preferences.
Differentiating Between Query Parameters and Body Data
Query parameters and body data are two ways your computer talks to a website or an application server. In web development, when you send a request to a server, it often needs to include some information. Query parameters and request body are two common methods to do so.
Query parameters are appended to the end of a URL and are usually visible in the address bar of your browser. They're separated from the URL by a question mark (?) and from each other by ampersands (&). On the other hand, the request body is a chunk of data sent to the server separately from the URL. It's often used for more complex or larger sets of data.
Query parameters are part of the URL and are usually used for simple and short datasets, while the request body is a separate part of the request used for more complex or larger datasets.
Query parameters are in the website's address bar, like
?size=large&address=123mainst. It's visible and can be bookmarked or shared
easily. For example, in a YouTube link, you might see ?v=videoID, where
"videoID" is a code for the video you want to watch.
Body data, in contrast, is like a secret message inside the request. When you fill out a form online, like entering your password, that's body data. It's hidden and more secure. For instance, when you log in to a website or an app, your username and password are part of the body data, not the address.
Response Codes: Interpreting Feedback from the Server
Responses from the server come in the form of HTTP status codes. These codes provide feedback on how the server processes given data — whether that data is sent via query parameters, body data, or other means.
When you send a request using query parameters or body data, the server processes the request and responds with an appropriate HTTP status code based on the outcome.
Below are a few different server response codes you may encounter.
200+ Codes
200+ codes signify that the request was successfully received, understood, and accepted. Common examples include:
- 200 OK — The request has succeeded. The information returned with the response is dependent on the method used in the request.
- 201 Created — The request has been fulfilled and resulted in a new resource being created.
- 204 No Content — The server successfully processed the request but isn't returning any content.
300+ Codes
300+ codes indicate that further action needs to be taken by the user agent in order to fulfill the request. Examples are:
- 301 Moved Permanently — This and all future requests should be directed to the given URI.
- 302 Found — The requested resource resides temporarily under a different URI.
- 304 Not Modified — The resource has not been modified since the last request.
400+ Codes
400+ codes are considered client error status codes, indicating that an error likely occurred in the request, preventing the server from processing it. Examples include:
- 400 Bad Request — The server cannot or will not process the request due to an issue perceived as a client error.
- 401 Unauthorized — Similar to 403 Forbidden, this code signifies that authentication is required but has failed or has not yet been provided.
- 404 Not Found — The requested resource could not be found but may be available in the future.
500+ Codes
500+ codes represent server error status codes, which indicate that the server failed to fulfill an apparently valid request. Some examples are:
- 500 Internal Server Error — This generic error message indicates that an unexpected condition was encountered, and no more specific message is suitable.
- 503 Service Unavailable — The server is currently unavailable (because it's overloaded or down for maintenance).
- 504 Gateway Timeout — The server was acting as a gateway or proxy and did not receive a timely response from the upstream server.
Example 200 Response
Let's review a quick example of a 200 response.
Say a client sends a GET request to a server to collect a user's user ID,
username, and email:
GET /users/123 HTTP/1.1
Host: example.com
To indicate a successful request, the server responds with a 200 code...
HTTP/1.1 200 OK
Content-Type: application/json
...delivering the user's details in JSON format:
{
  "id": 123,
  "name": "John Smith",
  "email": "john@example.com"
}
Exploring Clients: Tools to Test and Interact with Web Services
HTTP clients facilitate communication between a user's device and web servers. Acting as messengers, these clients enable the exchange of information by sending requests to servers and receiving responses. Commonly used in web browsers, mobile apps, and other software, the clients use HTTP to fetch, submit, or manipulate data. They serve as interactive intermediaries, ensuring seamless data flow and interaction.
HTTP clients are invaluable for assessing web application functionality and reliability. Testers use them to simulate user interactions, send HTTP requests, and scrutinize server responses. This process enables you to comprehensively examine functionalities like authentication, data retrieval, and form submissions.
By mimicking real-world user behavior, HTTP clients ensure web services are robust and performant, identifying and resolving potential issues before deployment.
Let's review some tools for testing web services. Note that the HTTP clients discussed in this section allow you to test REST APIs.
cURL
cURL enables computer systems with a command-line toolkit to exchange data between network protocols such as HTTP, SMTP, FTP, Lightweight Directory Access Protocol (LDAP), and more.
Let's use the experimental API Postman Echo.
To try an example, open your local machine's terminal. If you're on macOS user, open the Terminal app. If you're a Windows user, use the Command Prompt by default or another terminal app you're familiar with.
-
GET:
curl https://postman-echo.com/get -
POST:
curl --request POST "https://postman-echo.com/post" --data "name=Jamie&age=23" --header "Content-Type:application/x-www-form-urlencoded" -
PUT:
curl --data "name=Jamie&age=23" -H 'Content-Type: application/json' -X PUT "https://postman-echo.com/put" -
DELETE:
curl -X DELETE "https://postman-echo.com/delete"
Next, let's review how to interpret responses and use headers in cURL.
Running a cURL command generates request and response headers. In the image below, the request headers are in the orange rectangle, and the response headers are in the fuchsia rectangle.

Here, the request headers are:
> Host: google.com
> User-Agent: curl/8.1.2
> Accept: */*
Using the image above, note these headers and their specified values:
- The HTTP method is
GET. - The host is
google.com, which you're trying to access. - The user-agent identifies the device requesting a response from the host.
- The accept header is specified as
*/*, allowing the server to return any content type from the host URL.
Now, take a look at the response headers:
HTTP/1.1 301 Moved Permanently
Location: http://www.google.com/
Content-Type: text/html; charset=UTF-8
Content-Security-Policy-Report-Only: object-src 'none';base-uri 'self';script-src 'nonce-NQmUZe9Mv9oF6vtOqK0SUg' 'strict-dynamic' 'report-sample' 'unsafe-eval' 'unsafe-inline' https: http:;report-uri https://csp.withgoogle.com/csp/gws/other-hp
Date: Sat, 07 Oct 2023 20:20:25 GMT
Expires: Mon, 06 Nov 2023 20:20:25 GMT
Cache-Control: public, max-age=2592000
Server: gws
Content-Length: 219
X-XSS-Protection: 0
X-Frame-Options: SAMEORIGIN
The headers in the request's response include the following:
- Location — The source of the returned resource
- Content-Type — An HTML document returned in text form "text/html"
- Content-Security-Policy-Report-Only — The kind of security policies enforced by the server
- Date — The date and time of the resource's return
- Expires — The date and time of the resource expiring and becoming invalid
- Cache-Control — The caching policy in the server response
- Server — The server is the Google Web Server (gws).
- Content-length — The size of the response body in bytes
- X-XSS-Protection — This is 0, which tells you the detection of cross-site scripting attacks is inactive. If it were 1, the directive would be active, and the resource wouldn't render if an attack was detected.
- X-Frame-Options: SAMEORIGIN — The page only renders in a frame if the request comes from the same site, protecting against click-jacking attacks that maliciously embed this site's content in other sites.
Postman
Postman is a robust graphical user interface (GUI) client for testing APIs. It can send requests to endpoints with headers and parameters and display the corresponding response in the GUI, as depicted below:

GUI tools like Postman are particularly helpful if you're newer to development or working with web services. The visual aspects of GUIs make learning easier, increasing your chance of success.
Aside from running requests and receiving responses, Postman provides several other functionalities, including:
- An API Builder to define your API. Postman also lets you enforce API governance rules for consistency in API development.
- Tools for documenting your API with collections and annotations for endpoints, requests, and responses.
- The ability to monitor your API's health and performance.
- Automated testing and CI/CD integration, saving you the effort of running repetitive tests.
Other Tools
cURL and Postman are popular API testing tools, but there are several others on the market:
- Swagger — An open-source tool that lists the endpoints with documentation. It's compatible with various development frameworks, auto-generates documentation in the OpenAPI specification, and lets you execute requests directly from the documentation.
- HTTPie — A command-line tool with a simple syntax for testing and debugging APIs. It also has built-in JSON support and syntax highlighting.
- SoapUI — An open-source tool for testing Simple Object Access Protocol (SOAP) and REST APIs with a drag-and-drop interface.
MQTT Protocol: Powering Real-Time IoT Communication
Message Queuing Telemetry Transport, or MQTT, is a publish-subscribe protocol initially made for the IoT ecosystem. Like HTTP, it uses the client-server architecture. However, HTTP servers only respond to client requests, one at a time, while MQTT allows messages to be broadcast and received by multiple subscribers. Another difference is that the HTTP payload is in text form while the MQTT payload is in binary or text.
Imagine a smart home where various devices communicate seamlessly. MQTT facilitates this by enabling devices like thermostats, lights, and security cameras to share data efficiently. For instance, when you adjust the thermostat through a mobile app, MQTT ensures that the command is quickly transmitted to the thermostat, triggering the desired temperature change. Similarly, if a motion sensor detects activity, it uses MQTT to swiftly relay the information to the security camera, prompting it to start recording. This real-time, lightweight communication protocol is vital for IoT applications, ensuring swift and reliable data exchange in interconnected environments.
Topics and brokers, Quality of Service (QoS), retained and last will messages, and implementation are all vital considerations when using MQTT.
Topics and Brokers
Topics function as channels for categorizing data in the MQTT protocol. An IoT device that wishes to share information will publish it under a particular topic. Conversely, devices needing this information will subscribe to the relevant topic. The structure allows for selective and efficient data transmission, ensuring devices only receive pertinent information.
Brokers are the heart of the MQTT communication system. They manage and route the data between publishing and subscribing devices. Essentially, the broker acts as a middleman, ensuring that data sent to a specific topic reaches all its subscribers.

The surge in IoT devices, from smart thermostats to industrial sensors, leads to a vast amount of data transmission. The topic-broker system ensures this data exchange is organized, efficient, and targeted. Without such a structure, the IoT ecosystem would face significant inefficiencies, potentially overwhelming devices with irrelevant data.
QoS Levels
The MQTT protocol supports three QoS levels. QoS is a unit of measurement of message reliability. QoS levels are crucial because the reliability of message delivery is vital for IoT applications. Depending on the IoT device's function, the QoS level you select can significantly impact its operation. For instance, ensuring a message is reliably received without duplication is important in critical applications like health monitoring or industrial automation.
Below are the QoS levels and their impact on message delivery and reliability:
- 0 QoS (fire and forget) — The message is unreliable and has been delivered without duplication. At this level, the sender doesn't require the acknowledgment of message delivery.
- 1 QoS (at least once) — The message is reliable. This level ensures the message is delivered at least once with possible duplication. The sender keeps a copy of the message until it confirms successful receipt. In this case, the receiver must acknowledge receipt.
- 2 QoS (exactly once) — The message is reliable without duplications. It has been delivered exactly once without duplications. The sender has confirmation of successful delivery as this QoS applies a four-way handshake between the sender and the message recipient.
Retained Messages and Last Will
The MQTT protocol supports retained messages and last will messages.
Retained messages have the retained=True flag for the broker to store the
message when there are no subscribers for its topic. The broker keeps a record
of only one retained message per topic, which is the last retained message under
the topic, and the topic's corresponding QoS.
This approach prevents messages from being discarded and enables new subscribers to receive the latest retained message from a publisher.
Last will messages, on the other hand, are predefined messages that a client sets. Should the client unexpectedly disconnect, the broker sends the last will message to a specific topic. Last will act as a notification mechanism, alerting subscribers of unforeseen client disconnections.
Security Considerations in IoT Web Services
Security and privacy are essential when communicating over the web, and the IoT is certainly no exception! Building IoT networks involves different components across the device, network, and application layers, all of which carry security risks. IoT devices collect enormous amounts of data, which are transferred via APIs and protocols and saved to the cloud. Keeping the data confidential and secure should be a top priority.
Confidentiality is also paramount when handling sensitive private data, for example, identity, health, or location details. Implementing access control and cryptography helps prevent unauthorized resource access and insecure data exchange, respectively.
Another consideration is data integrity, which is about maintaining data precision and completeness. Issues like distortion, noise, attenuation, or other factors in the ecosystem can affect data transmission in IoT, making it difficult to wholly or correctly detect signals. However, you can apply error-correcting codes to IoT channels to ensure maximal data delivery.
HTTPS and SSL/TLS
HTTP, the internet protocol used in web service communication, isn't secure. So, Hypertext Transfer Protocol Secure (HTTPS) was developed to protect client and server connections. HTTPS ensures data integrity via its encryption and authentication strategy and provides privacy. While HTTPS prioritizes security, advancements like HTTP/2 and Transport Layer Security (TLS) 1.3 optimize performance without compromising security.
The Secure Sockets Layer (SSL) is the security protocol part of HTTPS that provides enhanced security measures.
TLS is an advanced version of SSL with improved security and data integrity over a wider range of applications. It offers solutions to SSL challenges through a faster handshake process, stronger cipher algorithms, and new features like the hash-based message authentication code (HMAC).
When a sender or a client sends encrypted data to a recipient or a server, the server receives a key for decrypting the data before use. SSL and TLS are security protocols that facilitate the agreement between the sender and recipient for a successful encryption and decryption process.
As you plan your system's security measures, decide on your authentication and authorization approach. Certain strategies might be more appropriate depending on your specific needs and the nature of your application.
Consider the following techniques and methods:
- A dedicated web service — A specialized web service that manages authentication and authorization for incoming network requests.
- An API gateway — A service that covers for all other services and completes the authentication and authorization on behalf of the other applications. It then routes the requests to the other application without the client knowing the underlying systems. This method greatly reduces latency.
Some other authentication types are:
-
Basic HTTP authentication — This is an insecure method formed by simply concatenating the login credentials, such as the username and password, to form a string and pass the string, in base64 format, in the request header. This method doesn't involve encryption. Being a stateless method, the client must pass the login credentials every time a new request is made.
-
Session-based authentication — This is a stateful method that stores the user's state in the server as a session. The session ID is then stored as a cookie. Therefore, the client doesn't have to pass the login credentials every time it makes a request.
-
Token-based authentication — This method generates a signed token when the client is first authenticated with the login credentials. The token, usually consisting of a header, payload, and signature, is then used to authenticate subsequent requests. The most popular token is the JSON Web Token (JWT). As a stateless method, the token doesn't need to be stored as it can be validated using the signature.
-
OAuth and OpenID Connect — OAuth 2.0 primarily provides clients with a framework for authorization, enabling them to access resources via permissions granted by resource owners. Meanwhile, OpenID Connect, built on top of OAuth 2.0, facilitates authentication, allowing users to sign in using existing services like Google, Facebook, and other accounts. Together, they offer robust mechanisms to securely access resources and verify user identities, often complementing session-based authentication.
Looking into the Notehub API
Now that you know all about web service communications and tools, let's dive into Notehub, which is the Blues cloud service that allows for seamless connectivity between end devices and the cloud.
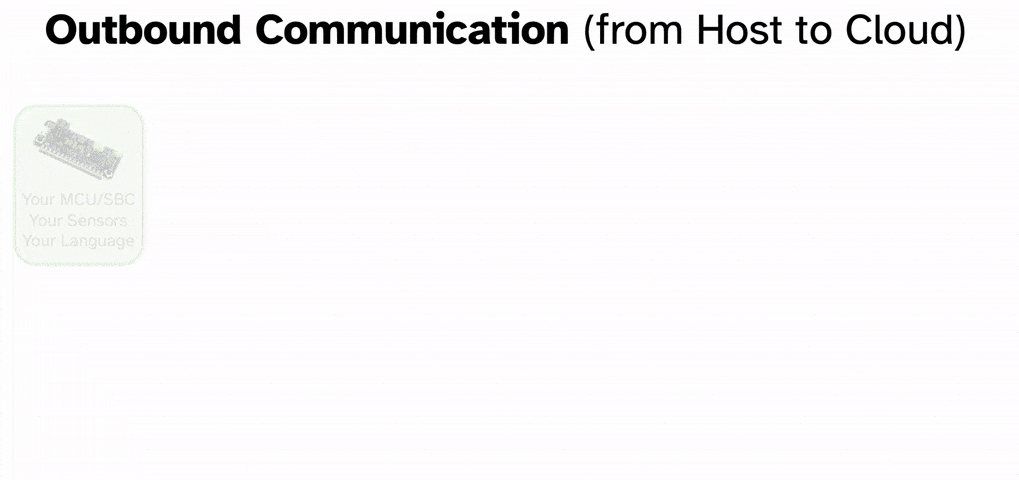
Wireless connectivity devices in the Blues ecosystem (Notecards) use Notehub to connect to the cloud securely and reliably while providing data from a connected host microcontroller (think along the lines of sensor data or location data).
Notecard and Notehub work together to provide bidirectional wireless communication capabilities. In this diagram, Notes are sent from a host microcontroller (or single-board computer) to an arbitrary cloud endpoint.
Notehub Interfaces
Notehub provides a web GUI via notehub.io and REST API to help you easily retrieve data sent to Notehub from one or more Notecards.
Notehub's REST API enables you to manage your devices, fleets, and configurations based on your business requirements. The latter helps you programmatically retrieve devices and events, send data to your projects' Notecards, and update a Notehub fleet.
Key Notehub APIs and Use Cases
This section reviews some Notehub's key endpoints and their use cases.
Sending Data to a Notecard from Notehub
To send an event (or an "Note" in Blues lingo) to a device, you can make a
POST request on your terminal with the
Add Note API:
curl -X POST -L 'https://api.notefile.net/v1/projects/<projectUID>/devices/<deviceUID>/notes/<file>' -H 'Authorization: Bearer <access_token>' -d '{"body": {"temp": 72.22 }}'Be sure to replace the <projectUID>, <deviceUID>, <file>, and
<access_token> variables with the appropriate values.
Retrieving Data and Event Logs
To get a list of Notecard end devices in a project, send a GET request using
the
Get Project Devices API:
curl -X GET -L 'https://api.notefile.net/v1/projects/<projectUID>/devices' -H 'Authorization: Bearer <access_token>'Don't forget to replace the <projectUID> and <access_token> with the correct
values.
Managing Device Configurations
You can also manage Notecard devices by grouping them as fleets in a project. Fleets let you filter and manage devices as a set.
The following terminal command creates a fleet using the Create Fleet API:
curl -X POST -L 'https://api.notefile.net/v1/projects/<projectUID>/fleets' -H 'Authorization: Bearer <access_token>' -d '{"label":"My new fleet"}'To add additional devices to a fleet, use the PUT endpoint. To remove devices,
use the DELETE endpoint.
Adding Devices to a Fleet
Once you've established fleets, you may need to add devices to these groupings. The following Add Device to Fleets API simplifies adding a device to a specific fleet, enhancing organization and batch management:
curl -X PUT -L 'https://api.notefile.net/v1/projects/<projectUID>/devices/<deviceUID>/fleets' -H 'Authorization: Bearer <access_token>' -d '{"fleet_uids":[<fleet_uids>]}'Say you have a collection of video game cartridges. Using the PUT method is like placing a new gadget into a box already set up to store it.
Removing Devices from a Fleet
Just like you might need to add a device, you may need to remove a device from a fleet, either because it's decommissioned, repurposed, or for other operational reasons. The Remove Device from Fleets API helps maintain the integrity and structure of device fleets:
curl -X DELETE -L 'https://api.notefile.net/v1/projects/<projectUID>/devices/<deviceUID>/fleets' -H 'Authorization: Bearer <access_token>' -d '{"fleet_uids":[<fleet_uids>]}'Changed your mind about a gadget? No problem — just remove it from storage. The
DELETE method is like taking that gadget out of its categorized box.
Fetching Fleet Details
To manage and monitor fleets effectively, you may need to fetch details about a specific fleet, such as its members, metadata, and more. The Get Fleet Devices API provides a comprehensive view of a fleet's details:
curl -X GET -L 'https://api.notefile.net/v1/projects/<projectUID>/fleets/<fleetUID>/devices' -H 'Authorization: Bearer <access_token>'Curious about what's inside one of your gadget boxes (fleets)? With the above
GET request, you look inside to see which gadgets you've put there.
For more comprehensive information on using Notehub within your IoT solution, consult the Notehub Walkthrough.
Routing Data with Notehub
Routing data efficiently and securely is an integral aspect of IoT systems, and collaborating with Notehub and other Blues tools can help you achieve this.
While Notehub includes a comprehensive API (see above), it also provides a centralized platform for securely routing data from IoT devices to various cloud platforms like AWS, Azure, GCP, and Snowflake. Data is routed in JSON format, allowing for filtering and optimization according to specific requirements through Notehub's templates and transformation capabilities.
Routing to external services with Notehub extends to MQTT servers and most HTTPS endpoints, providing a versatile data communication platform.
Notehub facilitates interaction with Notecards, securely routing data, managing the firmware of Notecards and its connected host microcontroller, and orchestrating projects, fleets, and teams. It offers a detailed insight into Notecard devices, events, and sessions, which is crucial for efficient data management and routing.
Challenges and Considerations in Embedded Web Services
Resource Management
The most significant resource constraint in embedded systems is power. Because IoT systems are usually battery-powered, there's a limit to the physical battery size that the devices can accommodate. IoT systems also face the constraint of memory and computational power because embedded systems usually have moderate memory and CPU. Therefore, you must ensure the lowest energy consumption without impairing system performance.
Web connections are often quite expensive in terms of power consumption, so it's a common practice to queue non-urgent changes on a device and batch send them at some interval rather than maintaining a constant (and expensive) network connection.
Another challenge that influences the expansion rate of IoT systems is communication between devices. This consideration calls for a more efficient use of power and lower interference to improve data integrity. There must be a massive adoption of newer and better technologies like Bluetooth, Wireless Local Area Networks (WLAN), Wireless Highway Addressable Remote Transducer Protocol (WirelessHART), and others.
Connectivity Management
Effective connectivity management in IoT systems is crucial, and it's equally important to prepare for any potential service interruptions. It's important to remember that no system can be completely failsafe.
To ensure seamless operation, employ the following strategies:
-
Planning — Planning ahead helps with organizing your system. It gives you a clear perspective of possible causes and points of failure when breakdowns or interruptions occur. Prepare for connection errors and network emergencies, and have a recovery plan ready.
-
Monitoring — Set up monitoring and alert systems for your network, web applications, and devices. This way, you can follow through with the monitoring metrics and logs for prediction and fixes.
-
Redundancy — Build your systems and networks with redundancy in mind. Always have fall-back plans for network and power outages to prevent data loss and critical infrastructure breakage. It's good to have alternatives for key network elements.
-
Continuous improvement — Keep running tests to discover potential loopholes or anomalies. Take lessons from service interruptions and implement improvements to keep enhancing your system.
Summary
Understanding and leveraging web services is a must when navigating the IoT landscape, as these services enable seamless data exchange between devices. Web services offer interoperability and scalability for businesses to build a cohesive and interconnected IoT ecosystem, fostering innovation across industries. Without a robust grasp of web service dynamics, realizing the full potential of IoT applications becomes a formidable challenge.
In embedded devices, it's critical to strike a balance between resource management and efficient communications. These devices often operate with limited resources, and optimizing communication protocols ensures minimal energy consumption and efficient use of processing capabilities. Careful consideration of resource constraints enhances embedded systems' overall performance and longevity, contributing to the sustainability and effectiveness of your IoT deployment.
This article if part of a broader series where you can dig deeper into each aspect of embedded development. To embark on this journey, be sure to follow Blues University, where you can explore and contribute to shaping the future of IoT.
If you're new to embedded development and the IoT, the best place to get started is with the Blues Starter Kit for Cell + WiFi and then join our community on Discourse. 💙