

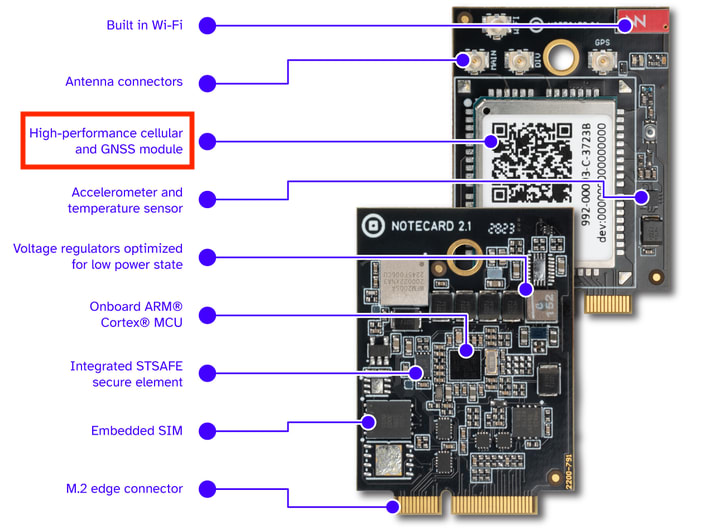
One of the more convenient features of the Notecard is its integrated GPS/GNSS module, which allows you to include accurate location readings with the data you send to the cloud.
Although the Notecard’s onboard GPS/GNSS module is convenient (it’s onboard and enabled with a single API!), there are situations where you might want to supplement the Notecard with an external GPS/GNSS module. The most common scenario: because the Notecard Cellular’s modem provides both GPS/GNSS and cellular functionality, it cannot perform both actions simultaneously.
For most applications this is not an issue, as the Notecard intelligently switches between cellular communication and GPS/GNSS location retrieval automatically according to configurable intervals. However, if you are developing an application that needs the ability to continuously stream location readings with as little delay as possible, using an external GPS/GNSS module allows the Notecard’s modem to maintain a continuous cellular connection—meaning you can both take location readings and transmit them simultaneously.
This article walks through the steps you need to take to use an external GPS/GNSS module with the Notecard.
New to Blues?
Learn what we do in this 3-minute video that walks you through how we simplify wireless connectivity.
Learn what we do in this 3-minute video that walks you through how we simplify wireless connectivity.
Step 1: Connect the External Module
The first step for using an external GPS/GNSS module is deciding on a specific module to use. The Notecard expects a module that speaks in NMEA sentences, which are relatively standardized so most available third-party modules should work.
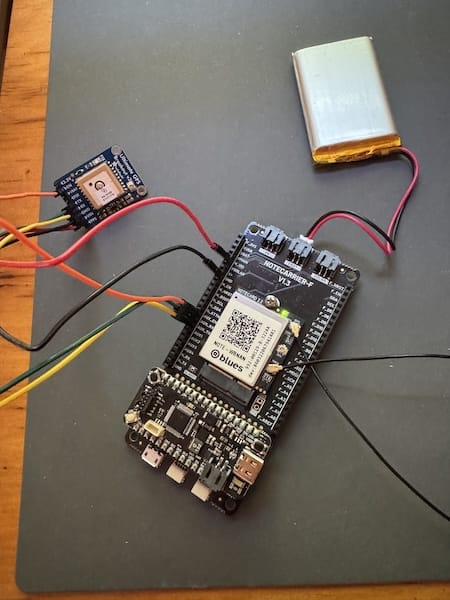
For my demo I used the Adafruit Ultimate GPS Breakout, which I liked because the breakout made it easy to access the pins for testing and for connecting the module to the Notecard.

The Notecard expects the external module to be connected to its AUX serial pins. In my case I made the following connections between my Adadruit Ultimate GPS and my Notecard.
| Notecard | Adafruit Ultimate GPS |
|---|---|
VIO | VIN |
GND | GND |
AUXRX | TX |
AUXTX | RX |
AUXEN | EN |
Here’s what that looks like. (For the rest of my hardware I’m using a Blues Notecarrier F and Blues Swan, both of which are available in a Blues Cell+WiFi Starter Kit.)
 note
noteThe Adafruit Ultimate GPS has an internal antenna as well as a u.FL connector for attaching an external active antenna. I found the internal antenna to be sufficient in my own testing, but you could consider adding an active antenna if you’re having trouble consistently getting signal.
Also, note that when using an external GPS module you do not need to use the GPS u.FL connector on the Notecard itself.
Step 2: Configure the Notecard
With the hardware connected, we next need to configure the Notecard to recognize and use the external module. The request we need for that is card.aux.serial, and we need to set its mode to "gps".
{
  "req": "card.aux.serial",
  "mode": "gps"
}
Next, we can use the Notecard’s card.location.mode request to enable GPS/GNSS sampling. You can set the mode to "continuous" or "periodic" depending on your needs.
- Periodic mode tells the Notecard to sample a new location periodically, and you can control how often with the request’s
secondsargument. Using periodic mode is required for tracking applications (more on that in a bit). - Continuous mode tells the Notecard to sample a new location for every new Note.
Let’s start in continuous mode with the request below to see how it works.
{
  "req": "card.location.mode",
  "mode": "continuous"
}
Finally, we have to use the Notecard’s hub.set request. This is a standard request required for all Notecard projects, BUT, because we’re using an external module we can do one thing that’s unique—we can place the Notecard’s modem in continuous mode while its card.location.mode is also configured for continuous usage.
{
  "req": "hub.set",
  "product": "com.blues.tvantoll:test",
  "mode": "continuous",
  "outbound": 30,
  "inbound": 240
}
And that’s it! To verify you have everything set up correctly, start by connecting your Notecard to the In-Browser Terminal and run the card.location command. You may have to run the command multiple times to see your Notecard’s progress acquiring a location from the external module.
{
  "req": "card.location"
}
Once you have a location you’ll see it in the lat and lon response fields.

noteIf you’re struggling to acquire a signal you may need to perform your initial connection outdoors, or in a location with a clear view of the sky. In my own testing I’ve found that placing the device near a window is usually sufficient.
Now that you have a location, try adding a Note with the note.add request. For example, the request below adds a test value, and includes a sync: true flag that tells the Notecard to immediately send this Note to Notehub.
{
"req": "note.add",
"file": "test.qo",
"body": { "test": 1 },
"sync": true
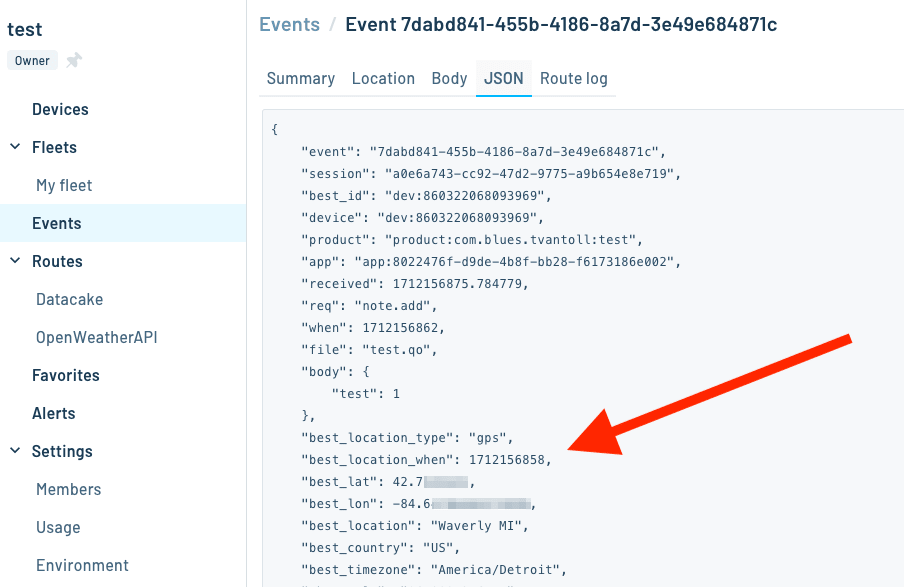
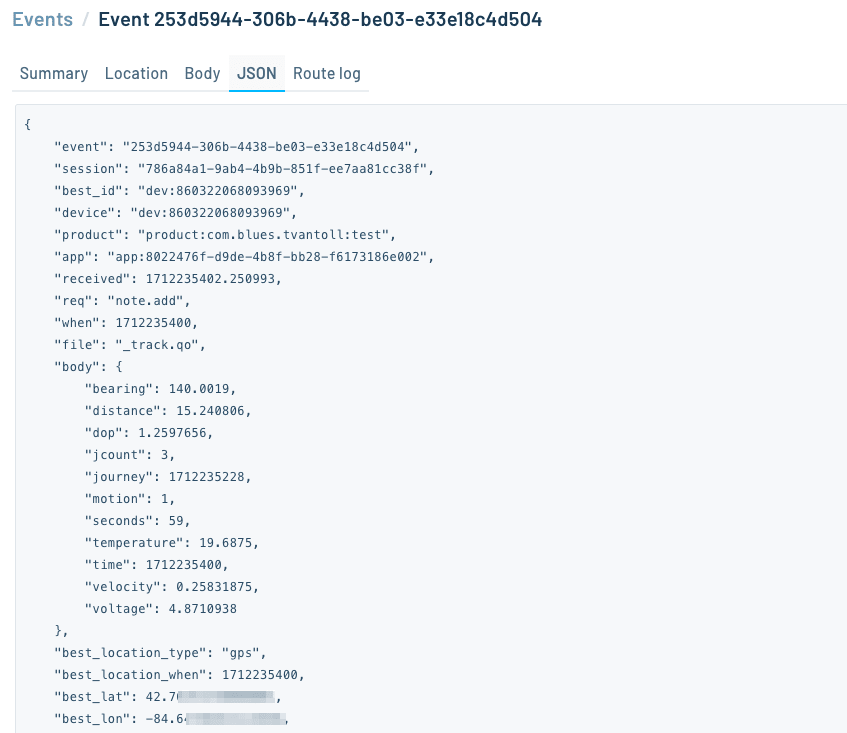
}Next, visit your Notehub project, find your event in your project’s Events page, and click the JSON tab. Here you can find your Note, along with all the metadata the Notecard collects—including the GPS location retrieved from your external GPS/GNSS module.
And at this point, if all you need is GPS/GNSS readings to be associated with your Notes—your job is done. As you create new Notes, the Notecard will automatically retrieve the most recent location from the external GPS/GNSS module and store/transmit those locations along with your Notes—which is cool!
However, a common use case for using an external GPS/GNSS module is tracking, which requires the use of one additional request.
Step 3: Tracking
The Notecard has built-in behavior for tracking a Notecard’s location throughout a journey. You can enable and configure this feature using the Notecard card.location.track request. For example, the configuration below enables location tracking.
{
  "req": "card.location.track",
  "start: true
}
Once enabled, the Notecard will automatically start tracking its location, and periodically create _track.qo Notes to store that information. Before we look at the _track.qo Notes specifically, let’s first discuss two other values you may wish to tweak to finalize your tracking.
First, let’s return to the card.location.mode request. When tracking you need to set this request’s mode to "periodic" and pass a new seconds value, which controls how often the Notecard should create _track.qo Notes while in motion. For example, the code below tells the Notecard to create a _track.qo Note every 60 seconds.
{
  "req": "card.location.mode",
  "mode": "periodic",
  "seconds": 60
}
Second, you may wish to change how often the Notecard transmits these _track.qo Notes to Notehub, which you can do by altering the outbound value of your hub.set request. For example, the following request tells the Notecard to sync outbound Notes to Notehub every minute.
{
  "req": "hub.set",
  "outbound": 1
}When using the Notecard’s onboard GPS, setting both {"req":"card.location.mode","seconds":60"} and {"req":"hub.set","outbound":1} is impossible, as the Notecard doesn’t have the ability to switch between cellular and GPS/GNSS usage in very short intervals. However, when using an external GPS/GNSS module, you allow that Notecard to focus on cellular connectivity and the external GPS/GNSS module to focus on location—making these fast intervals doable.
That being said, capturing and transmitting data every minute will use a lot of power. If you plan on running your device on battery power you will likely want to change these intervals to far less aggressive values.
And with that you’re all set! With this configuration the Notecard will automatically start tracking your device’s location, generate _track.qo Notes that contain location information, and transmit those Notes to Notehub at the intervals you provided.
noteThe Notecard only creates _track.qo Notes when your device is in motion (according to the Notecard’s onboard accelerometer). If you’re testing this with your device sitting on your desk, a quick shake is plenty to register motion.
If you return to Notehub you’ll see the _track.qo Notes in your project’s Events list.

And if you view an individual Note you’ll see your device’s location, as well as a bunch of additional metadata.
As a last step, with data flowing into Notehub you may wish to route your data to an external service. Alternatively, you may wish to Notehub API to pull events from Notehub for working with your data.
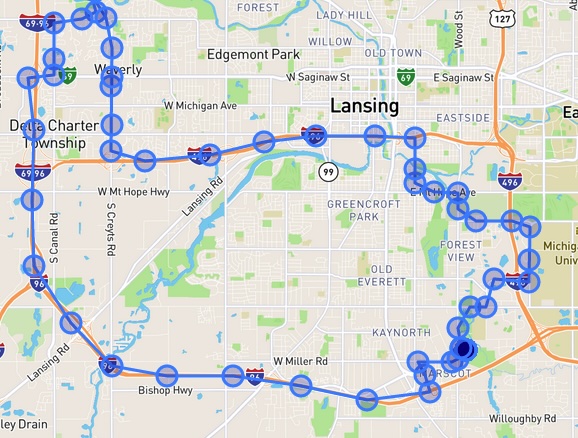
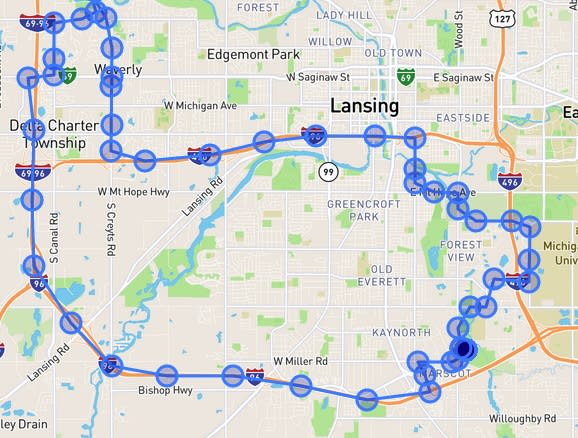
As one final suggestion, for my own apps I love using a sample web application my coworker Paige Niedringhaus put together. It’s very configurable if you’re comfortable with web tech, and it’s what I used to create the map I used as a banner for this article (a trip to south Lansing for a soccer game ⚽).
Wrapping Up
Although not for every project, using an external GPS/GNSS module allows the Notecard to focus on connectivity, allowing you build applications that take more frequent location readings. The Notecard allows you to configure how you use the external module in a number of ways, so you can tweak nearly every setting to meet the needs of your project.
For reference, here is a full list of commands to set up the Notecard with an external GPS/GNSS module:
{"req":"hub.set","mode":"continuous","outbound":30,"inbound":240}
{"req":"card.aux.serial","mode":"gps"}
{"req":"card.location.mode","mode":"continuous"}
And here’s a full list of commands to set up the Notecard for continuous (aggressive) tracking with an external GPS/GNSS module:
{"req":"hub.set","mode":"continuous","outbound":1,"inbound":240}
{"req":"card.aux.serial","mode":"gps"}
{"req":"card.location.mode","mode":"periodic","seconds":60}
{"req":"card.location.track","start":true}
Have fun playing with the Notecard! And if you have any questions feel free to reach out in the comments.