Debugging a Notecard with the FTDI TTL-232R-RPI Debug Cable
When developing or debugging an IoT solution with a Notecard, you're likely issuing Notecard API requests when the device is plugged into your computer via a USB cable. This is ideal in many ways as it supplies both power to the Notecard and a serial connection for data transfer.
However, there are scenarios where you may want to debug a Notecard without plugging it into your computer. For example, if your Notecard is not functioning properly (or is non-responsive) you may not want to risk power cycling the Notecard by plugging it in. This act may reset the Notecard and you risk losing the current error state.
Using the TTL-232R-RPI debug cable from FTDI allows you to connect a Notecard + Notecarrier (or any custom PCB with the appropriately exposed pins) over serial without also supplying power to the board. Note that in this scenario, you will need to provide power to the Notecard via an external power source (e.g. a LiPo battery).

Connecting the FTDI Cable
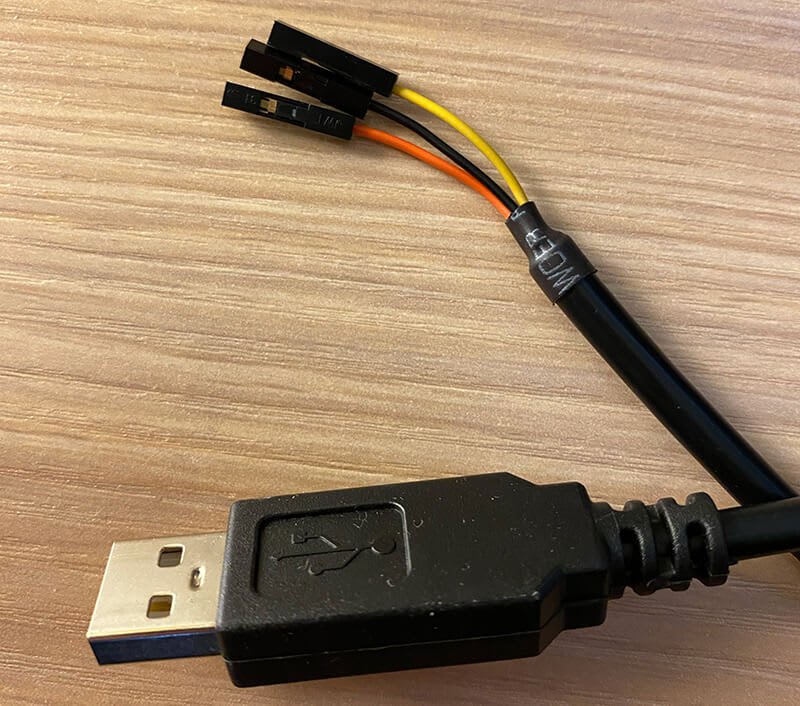
The TTL-232R-RPI debug cable from FTDI (referred to going forward as the "FTDI cable") provides a USB data transfer path capable of supporting data rates from as low as 300 bits/s to 3 MB/s at 3.3V TTL levels. The cable itself is 1 meter long with a USB-A connection on one end, and three female pin headers exposing TX, RX, and ground wires on the other.
Connect FTDI Cable to a Notecarrier
Connecting an FTDI cable to a Notecarrier (or a custom PCB with matching header pins) is a relatively simple process using the three provided wires from the cable:
- The orange
RXwire connects to theAUXRXheader. - The yellow
TXwire connects to theAUXTXheader. - The black ground wire connects to the
GNDheader.
In addition, the AUXEN pin on the Notecarrier needs to be pulled high by
bridging AUXEN to <BAT (the Notecarrier's battery/V+ rail):

Pulling AUXEN high enables the Notecard's AUX serial tracing capability, which
exposes debug output on a separate bus from your primary Notecard connection. You
can read more about this behavior in
Working with the Notecard AUX Pins.
Setting Up a Terminal Program
Next, you need to install and configure a serial terminal application to communicate with the Notecard. The screenshots below are from CoolTerm, but any serial terminal application will function just as well.
Installing Drivers
Most modern OSes do not require installation of any software drivers to use the FTDI cable. However, FTDI provides royalty-free VCP and D2XX drivers for download should you require them.
Set the Port, Baudrate, and Termination String
The serial port exposed will vary on a machine-by-machine basis, but within your serial terminal application you will need to choose the appropriate port:

If it's difficult to determine which port you need to select, try unplugging unnecessary peripherals to reduce your options.
When selecting the Baudrate, be sure to choose 115200.
Finally, while this may vary by serial terminal software, you may need to enable
an option to "terminate send string data" with a hex carriage return of 0D 0A:

Issuing an API Request
With a Notecard/Notecarrier properly connected to the FTDI cable and your serial terminal application configured, you're ready to issue an API request.
While at this point you can issue any Notecard API command you desire, we
recommend first enabling trace mode on the Notecard by issuing the trace
command:

This enables a stream of data containing useful debugging information from the Notecard and can inform you of precisely what is happening on the Notecard in real time.
At this point, you may continue to issue any Notecard API commands you desire. For example, to view the last known network state, try a card.wireless request. Likewise, to check the current V+ voltage level or look at historical voltage trends, try a card.voltage request.