

Blues was founded on the premise that we could reduce the inherent complexity that exists with wireless communications (specifically in the IoT). While we haven't taken over the entire wireless IoT world (yet!), we have proven that we can reduce this complexity at scale, on anything from DIY weather gauges to massive fleets of industrial equipment.
Nevertheless, engineers and designers new to the Blues ecosystem sometimes question the value of Notecard and Notehub, opting instead for the traditional route: bare modems, custom components, breakout boards, and standing up their own data ingestion/processing servers. If that approach works for you, great! But if you've already gone down that path and hit roadblocks — or maybe you're somewhere in between — this article is for you.
A Focus on the Developer Experience
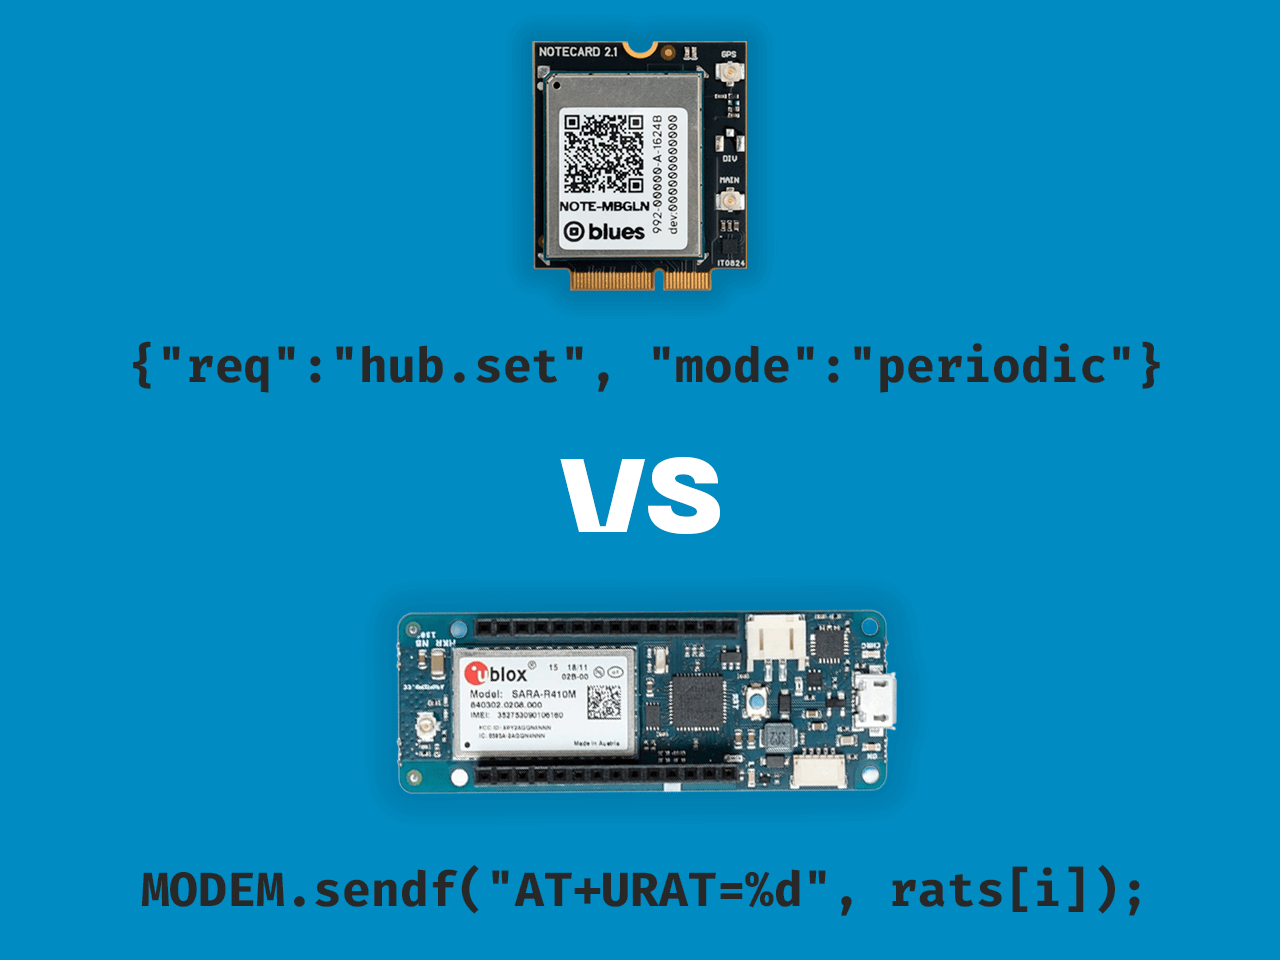
Disclaimer: this article isn't a perfect apples-to-apples comparison, but it does offer a developer-centric look at how an all-in-one Cellular IoT board (like the Arduino MKR NB 1500 I used) stacks up against Blues Notecard Cellular in terms of adding wireless connectivity to send and receive data over a cellular network. Both are relatively easy to embed in a physical product, but the differences beyond that are clear and consequential.
But first, if you literally are new to Blues, it'll be helpful to get some additional background on what we are all about:
New to Blues?
Learn what we do in this 3-minute video that walks you through how we simplify wireless connectivity.
Learn what we do in this 3-minute video that walks you through how we simplify wireless connectivity.
Let's walk through a handful of wireless connectivity steps and compare how they are addressed by each wireless solution, in code. I'll present "the Blues way" and then show off "the DIY way" as a comparison.
Initiating a Cellular Connection
Starting at the very beginning, we need to figure out how to initiate a connection with a cellular network.
The Blues Way
The majority of the base configuration of a Notecard, in regards to how and when it connects to a network, is established using the hub.set API. For example:
{
  "req": "hub.set",
  "mode": "continuous",
  "product": "com.blues.example:product",
  "outbound": 60,
  "sync": true
}
What about registering the APN or pin code? Or choosing a network type between LTE-M, NB-IoT, or GSM? Not necessary! Notecard includes an embedded SIM and will automatically utilize an appropriate network for your region.
In the next "The Blues Way" section below, we'll start breaking down each argument from this request. Before we continue though, it's important to note that Notecard is going to intelligently initiate wireless transactions only when it needs to. You don't have to manually initiate connections or manage cellular connectivity. Notecard is smart enough to connect when it needs to. It Just Works™.
The DIY Way
On the other hand, if managing the cellular radio ourselves, we need to manually initiate a connection, so let's see how that might be accomplished.
Please note that you'll likely need to supply your own physical SIM card depending on the cellular IoT board you are using.
#include <MKRNB.h>

NB nbAccess(true);
GPRS gprs;

bool connectCell()
{
  if (nbAccess.begin(PINNUMBER) == NB_READY && gprs.attachGPRS() == GPRS_READY) {
    return true;
  } else {
    return false;
  }
}
In the code sample above, we rely on the
MKRNB Library for Arduino to
assign a PINCODE (there are overrides for APN, USERNAME, and PASSWORD if
needed by your SIM) to bring up the modem. nbAccess.begin is a synchronous
function, so our program will wait until a connection is made (or not).
Specifying Connection Cadence
Next, we need a creative way for our product to tell the network interface to either maintain a continuous connection or maybe to connect on some kind of periodic or even ad hoc basis.
The Blues Way
Notecard supports a variety of connectivity modes in the hub.set API for creating/maintaining a network connection.
In the hub.set example above, the request uses "mode": "continuous".
The most commonly used modes are:
continuous- Enables an always-on network connection.periodic- Periodically connect to sync data.minimum- Only connect when explicitly told to do so.
Also, you'll often use arguments like outbound and/or inbound in your
hub.set requests. This is an integer value that tells Notecard how often to
attempt to sync data (in minutes).
The DIY Way
One way to implement these modes on the Arduino board is through the following
function, where a "continuous" connection will ping a specified host every
minute, or sleep the board for a defined PERIODIC_INTERVAL_MIN value to (kind
of) replicate Notecard's periodic mode with outbound set, or just do nothing
at all if replicating Notecard's minimum mode.
#define CONTINUOUS 0
#define PERIODIC 1
#define ON_DEMAND 2
const uint8_t CONNECTIVITY_MODE = CONTINUOUS; // specify your connection type
uint32_t lastPing = 0;

void maintainConnection()
{
  if (CONNECTIVITY_MODE == CONTINUOUS)
  {
    uint32_t now = millis();
    if (now - lastPing >= 60000)
    {
      NBClient p;
      p.connect(PING_HOST, 80);
      p.stop();
      lastPing = now;
    }
  }
  else if (CONNECTIVITY_MODE == PERIODIC)
  {
    deepSleepMinutes(PERIODIC_INTERVAL_MIN);
    connectWithBackoff();
  }
  // ON_DEMAND does nothing here
}
I don't love it, as there is a lot of nuance involved with these modes on Notecard.
For example, Notecard will only initiate a connection in periodic mode if
there is actually something to sync (saving you battery power and
data). Also,
Notecard supports voltage-variable behaviors
where, depending on the voltage of the power source, you can extend the periodic
sync cadence over time as voltage decreases (and extend battery life).
Identifying a Cloud Target
Now that we at least have some means of connecting to a cellular network, we should tell the device where in the cloud it's going to be sending/receiving data to/from. This is handled in very different ways between our two paths, so this is the first true "apples-to-oranges" moment in this article.
The Blues Way
The hub.set argument of "product": "com.blues.example" assigns the Notecard
to a specified project in the
Blues cloud service Notehub.
Upon creating a free Notehub project, you'll be provided with a globally unique
productUID that represents the com.blues.example ID used above.

Aside from features like device/fleet management, OTA DFU, monitoring/alerting, and cloud-based variables (yes that's a lot), Notehub is also the way to securely route data to any cloud endpoint (think AWS, Azure, Datacake, Ubidots, MQTT brokers, and so on).
The DIY Way
Outside of Blues, you're going to have to manually configure your HTTP and/or MQTT endpoints in code. Far from ideal, but this is the life we have chosen (at least for this article).
For example, we could start with defining an HttpClient from the
ArduinoHttpClient library
to point at an arbitrary endpoint like webhook.site,
which is a great option for testing outbound HTTP requests.
const char HTTP_HOST[] = "my-inbound-endpoint.com";
const int HTTP_PORT = 80; // change to 443 for TLS
const char HTTP_PATH[] = "/inbound";

const char WEBHOOK_HOST[] = "webhook.site";
const int WEBHOOK_PORT = 80; // change to 443 for TLS
const char WEBHOOK_PATH[] = "/your-uuid-here";

NBClient tcp;
HttpClient http(tcp, HTTP_HOST, HTTP_PORT);
HttpClient webhook(tcp, WEBHOOK_HOST, WEBHOOK_PORT);
We'll use these variables when we start sending outbound data later on.
If you do choose to do transmit over TLS, you must also manage your TLS certificates appropriately. This is not something you have to worry about with Notecard!
Connecting with Retries (and Backing Off)
Connecting to a cellular network is not often as seamless and transparent as we hope. At the risk of repeating myself, Blues transparently handles all of what I'm about to show you. However, if doing it the DIY way, you're going to need to build in both connection retries and "back-off" functionality. Why? If a cellular connection can't be made, you'll need the ability to automatically retry the connection. More importantly though, you'll also need to build in a back-off method to avoid spamming your carrier and forcing them to blacklist your device.
The Blues Way
Again, Notecard handles this for you without code!
If you'd like, you can read more about this feature in our guide on Understanding the Notecard Penalty Boxes
The DIY Way
If doing this manually we'll have to get a little more creative when
establishing a connection. Using the same connectCell() method as documented
above, we could build in a rudimentary back-off mechanism that will
exponentially increase the wait time between attempts to avoid getting your
device kicked off the carrier's network.
bool connectWithBackoff()
{
  delay(100);

  while (!connectCell())
  {
    if (retryCount >= 10) // this is an arbitrary limit, YMMV
    {
      return false;
    }
    else
    {
      retryCount++;
      backoffMillis = min((1UL << retryCount) * 1000, 24UL * 3600UL * 1000UL);
      LowPower.deepSleep(backoffMillis);
    }
  }
  retryCount = 0;
  backoffMillis = 0;
  return true;
}
Not that I'm counting, but so far we are at one line of JSON to configure
Notecard (i.e. the first hub.set request) and (checks notes) a lot of C
for the manual option. But I digress...
Inbound Data Sync
Let's move on to syncing data between device and cloud, starting with checking a remote endpoint for any inbound data (meaning an event from cloud to device that may be used to update a device variable or send a command).
The Blues Way
The "sync":true argument of that same hub.set request tells Notecard to
automatically and immediately sync any inbound data from Notehub to the
device.
 note
noteThis isn't the only way to sync inbound data with Notecard, as alternatively you can use the hub.sync API to initiate a sync with Notehub and pull in any pending inbound data.
{"req": "hub.sync"}It's important to understand that "events" are called Notes in Blues parlance. A Note is an arbitrary JSON object that contains user-defined data and/or meta data associated with the Notecard.
Inbound Notes are named ending with .qi and can be created in the cloud
(e.g. on Notehub.io or using the
Notehub API) and delivered to a
device. Notes can also be created on the device to be synced with the cloud
(this is an outbound Note, named ending with .qo, which we will discuss in
the next section).
After a sync is completed with Notehub, you can probe for any new Notes using the file.changes API:
{
  "req": "file.changes",
  "files": ["data.qi"]
}
...which could return a response like this, showing there is {"total":1} Note
available for processing:
{
  "total": 1,
  "info":  { "data.qi": {"total":1} }
}
...whose content we can read with the note.get API:
{
  "req": "note.get",
  "file": "data.qi"
}
...which could return a response with an arbitrary user-specified body
including a timestamp:
{
  "body":{
    "api-key1": "api-val1"
  },
  "time":1598909219
}
The DIY Way
One way to do this outside of Blues is to implement a rudimentary inbound
polling method, executed on a specific cadence in your loop():
void loop()
{
  if (CONNECTIVITY_MODE == CONTINUOUS && millis() - lastInbound > 30000)
  {
    pollInbound();
    lastInbound = millis();
  }
}

void pollInbound()
{
  if (http.get(HTTP_PATH) == HTTP_SUCCESS && http.responseStatusCode() == 200)
  {
    handleInboundJSON(http.responseBody());
  }
}

void handleInboundJSON(const String &jsonStr)
{
  StaticJsonDocument<256> doc;
  if (deserializeJson(doc, jsonStr))
  {
    // now do something with your deserialized JSON `doc` object
    // e.g. replicate the file.changes and note.get APIs from Notecard...
  }
  return;
}
Admittedly this is not a very well fleshed out example for Arduino, as you'll
still need to replicate what the file.changes and note.get APIs do for you!
Outbound Data Sync
Most connected products require bidirectional data communications, so let's next look at how we're going to push data from a device to the cloud.
The Blues Way
As mentioned above, the most common way to send data to the cloud is by using an outbound Note, which we can generate using the note.add API.
{
  "req": "note.add",
  "file": "sensors.qo",
  "body": { "temp": 72.22 },
  "sync": true
}
This one request will tell Notecard to:
- Create a Note (i.e. an event) called
sensors.qo. - Include the user-specified
tempdata (this could be any arbitrary JSON object). - Immediately sync the data with Notehub using the optional
"sync":trueargument. If omitted, the Note will be synced at the next periodic sync due (e.g. theoutboundcadence used above).
noteYou should also know that a "store-and-forward" feature is built into
Notecard. As part of the note.add request, Notecard will automatically
save the Note to flash storage prior to initiating any connection. In case
of a long delay before the next sync, a network connectivity issue, or power
outage, you can rest assured Notecard will retain your data and retry a
connection once it is back online.
For reference, here is how Notes appear in Notehub, with the ability to then forward them on to a cloud endpoint of your choosing:

The DIY Way
This is where the complexity of managing this yourself escalates significantly.
I've put together some psuedo code below that shows off how you might pass an
arbitrary JSON payload with an optional persist argument to store said
payload to flash (i.e. effectively mimicking Notecard's store-and-forward
mechanism).
However, you'll have to build the savePayload and clearPayload methods
yourself AND create a mechanism for retrying failed connections. Yikes.
bool outbound(const String &payload, bool persist)
{
  if (persist)
    savePayload(payload);

  webhook.beginRequest();
  webhook.post(WEBHOOK_PATH);
  webhook.sendHeader("Content-Type", "application/json");
  webhook.sendHeader("Connection", "close");
  webhook.beginBody();
  webhook.print(payload);
  webhook.endRequest();

  if (webhook.responseStatusCode() != 200)
    return false;

  StaticJsonDocument<256> rsp;
  if (deserializeJson(rsp, webhook.responseBody()))
    return false;

  if (rsp)
  {
    // optionally handle some response from the endpoint
  }

  if (persist)
    clearPayload();

  return true;
}
Power Management
When designing a product for a low-power deployment, you don't want to manually manage the sleep/idle state of the modem. Let's see how the two paths compare.
The Blues Way
Considering the way this article has gone, it should be no surprise that Notecard intelligently handles power management for you, allowing it to idle at ~8-18uA@5V. No programming or user intervention required.
The DIY Way
This is unique to Arduino, but there is a ArduinoLowPower library that makes it easy to sleep a board that uses the SAMD21 MCU like the one I used for this article.
#include <ArduinoLowPower.h>

void deepSleepMinutes(uint32_t minutes)
{
  LowPower.deepSleep(minutes * 60UL * 1000UL);
}
In this case, the code isn't the problem. The problem is programmatically managing the sleep/wake cycle of the board. Enjoy working that out.
Other Considerations
Believe it or not, what I've covered so far only scratches the surface of what Notecard and Notehub provide, compared to building your own cellular solution with an off-the-shelf board like the Arduino MKR NB 1500.
What else does the Notecard/Notehub pairing provide you're surely wondering?
- Looking beyond cellular, there are swappable Notecard models that support WiFi, LoRa, Cell+WiFi, and a failover Satellite option.
- Notecard includes an integrated STSAFE Secure Element with hardware cryptography, a hardware random number generator, and a factory-installed certificate provisioned at chip manufacture. Notehub handles certificate rotation for you. (Doing this manually would require a separate blog post entirely!)
- Blues has you covered with turnkey OTA DFU capabilities for both Notecard firmware updates and host MCU firmware updates.
- Large binary file transfers are easy to handle with Notecard, even when using low-bandwidth cellular connections.
- Need your device's location? Notecard Cellular includes an onboard GPS module and all Notecards with WiFi provide a feature we call WiFi Triangulation.
- Notecard includes an onboard accelerometer that can stream readings from the accelerometer over AUX or even tell you when your product has moved or changed orientation.
- Last, but certainly not least, you don't want to build and manage your own data ingestion server. Notehub handles ingesting and routing data to your cloud endpoint of choice.
Frequently Asked Questions
How do I choose a cellular IoT module?
Pick based on three things: whether the module handles SIM provisioning and cellular auth for you or requires you to manage a carrier contract, how much firmware you have to write before it does anything useful, and whether it supports the network types your deployment region uses (LTE-M, NB-IoT, Cat-1 bis). A module that hands you a simple API and bundles cellular data — like Notecard — saves weeks of firmware versus a bare cellular modem on a generic Arduino board.
What's the difference between a cellular IoT module and a bare cellular modem?
A bare cellular modem is just the radio. You provide the SIM, the firmware to talk to it (typically over AT commands or a vendor SDK), the retry logic, the data plan, and any cloud routing. A cellular IoT module is more integrated — it usually includes a SIM, a higher-level API, and sometimes cloud connectivity bundled in. Notecard sits on the higher-integration end; a board like the Arduino MKR NB 1500 is closer to the bare-modem end.
Do cellular IoT modules include a SIM card?
Some do, most don't. Notecard ships with an embedded SIM pre-provisioned with 500 MB of data and 10 years of cellular service — no carrier contract needed. Most other cellular modules require you to buy a SIM separately, sign up with a carrier or MVNO, and handle SIM activation and APN configuration in firmware.
What is Blues Notecard?
Notecard is a small cellular (or WiFi, LoRa, or satellite) IoT module that talks to host MCUs over a simple JSON API. It includes an embedded SIM with bundled data, automatic network management, OTA firmware updates, and built-in support for routing data to your existing cloud through Notehub. It's designed to let firmware developers add wireless connectivity to a product without writing modem code.
Why use Notecard instead of writing my own cellular firmware?
Rolling your own cellular stack means writing — and maintaining — connection management, retry logic, exponential back-off, SIM handling, certificate rotation, OTA updates, data store-and-forward, and cloud routing. Notecard provides all of that out of the box. The trade-off is hardware integration: Notecard is an additional component on your board, where a bare modem is a chip on your PCB.
Can I add cellular connectivity to Arduino without a Notecard?
Yes — boards like the Arduino MKR NB 1500 give you a cellular modem and the MKRNB library to drive it. You'll write the connection management, retry logic, back-off, power management, and cloud-side ingestion yourself. The trade-off versus Notecard is more firmware ownership in exchange for a fully integrated MCU-plus-modem on a single board.
What is store-and-forward in cellular IoT?
Store-and-forward is the pattern where a device saves outbound data to flash before attempting to send it, then retries the send when connectivity returns. It's essential for cellular IoT, where coverage gaps, network failures, and power loss are routine. Notecard implements store-and-forward automatically; rolling your own means writing the flash storage, retry queue, and recovery logic yourself.
What's the lowest-power cellular IoT module?
Power consumption varies enormously by module and by the radio technology in use — LTE-M and NB-IoT draw less than Cat-1, and idle current matters more than active current for most deployments. Notecard idles at approximately 8–18 µA at 5V — orders of magnitude lower than most cellular modules. Always check the module datasheet for actual numbers in the modes your design uses.
Summary
My main takeaway is that, while it was relatively easy to perform the basics with the Arduino board, there is a lot of nuance with cellular connectivity. It's nice to have a product like Notecard to have your back. Again, It Just Works™.
While I truly started this article with the best intentions of eliminating my inherent bias for Blues and giving the DIY path a fair shake, it's clear the combination of Notecard and Notehub provide the easiest, most secure, and frankly most powerful path for connecting a product.
If you're already sold and would like to try this for yourself, the best place to get started with Blues is via the Blues Starter Kit for Cell + WiFi and then join our community on Discourse.
Thanks for reading and best of luck with whichever wireless connectivity path you choose to take! 💙