
Using JSONata to Transform JSON
JSONata is a JSON query and transformation language. In the context of Notehub, JSONata allows you to transform Notecard-generated JSON into a different structure before routing to external services.
JSONata was inspired by XPath 3.1, so if you've performed XML querying or transformation in the past, JSONata will feel familiar to you. Even if you're unfamiliar, the syntax is simple and the documentation is comprehensive, so you'll find JSONata to be an easy way to transform your data.
In this guide you'll learn the basics of JSONata, how to test JSONata expressions, and how to create your own JSONata transformations in Notehub. Let's start by looking at how to test and experiment with JSONata.
See examples of JSONata in action with Notehub Routes in these accelerator projects.
The JSONata Exerciser
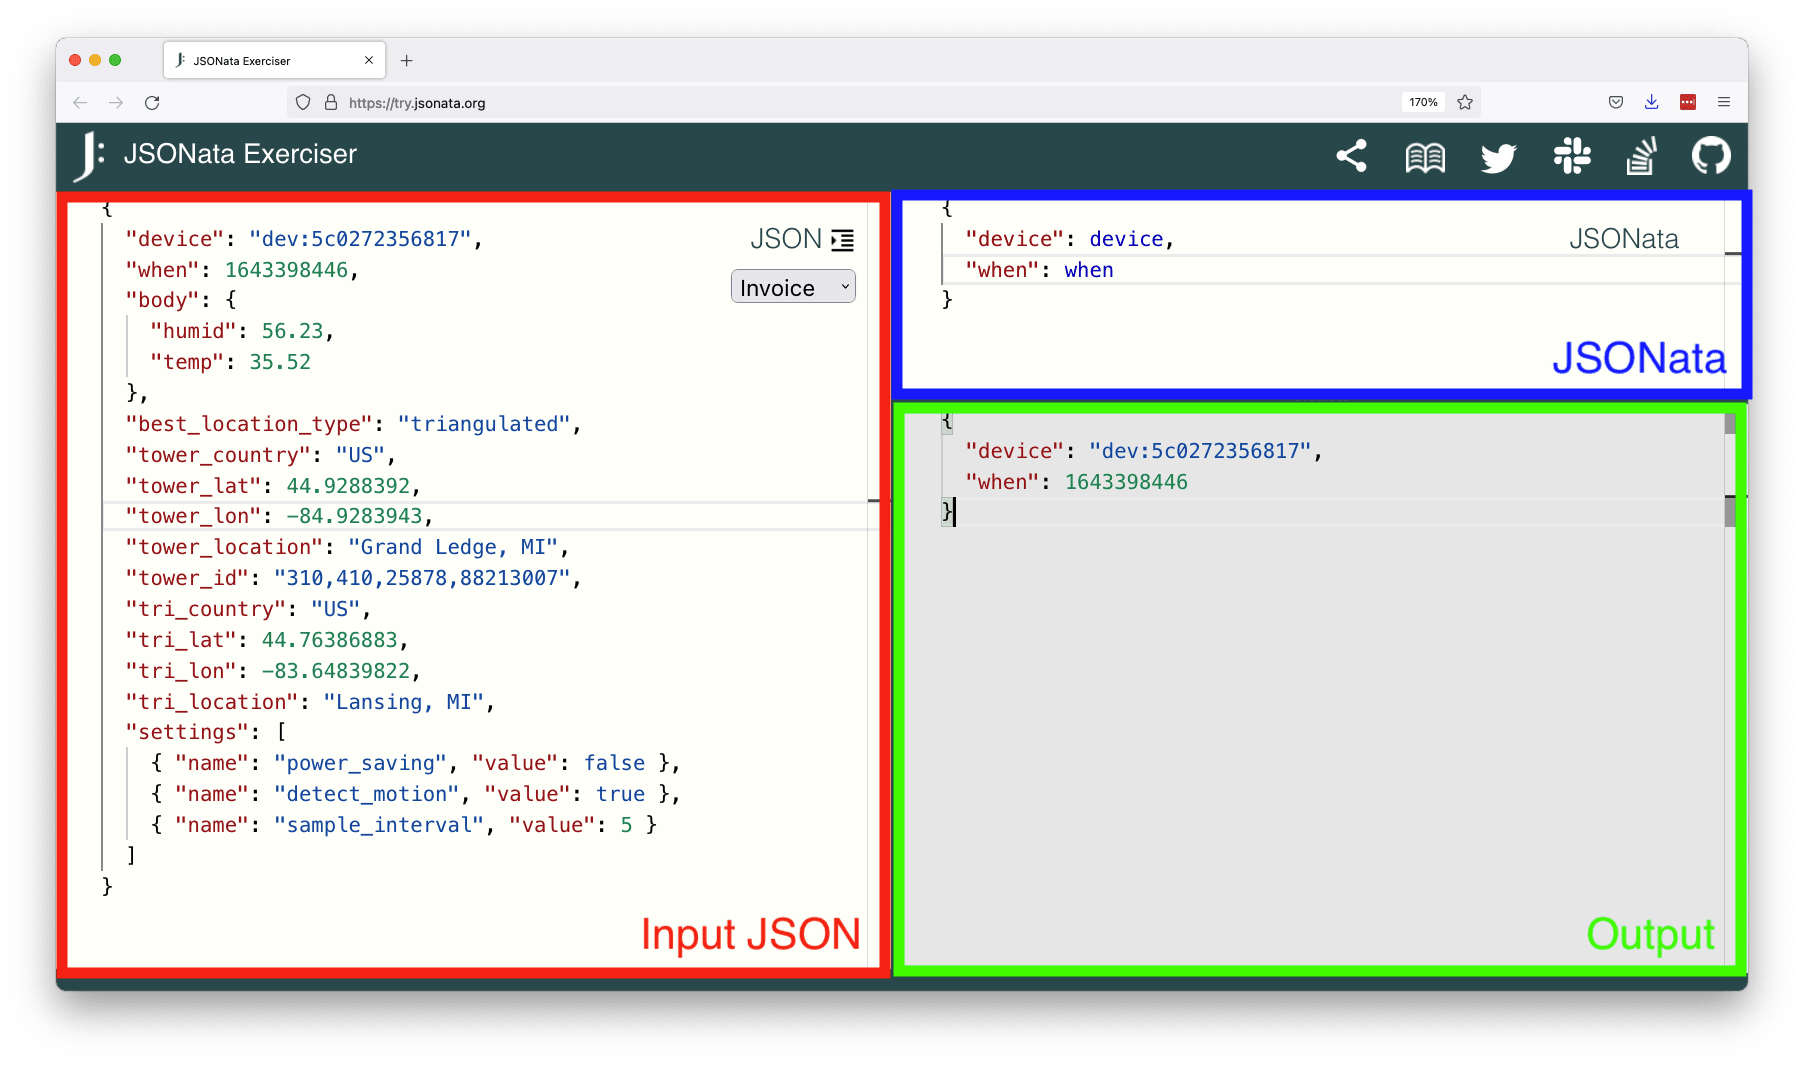
JSONata provides a utility to practice creating well-formed JSONata expressions: the JSONata Exerciser. To use the JSONata Exerciser you place your input JSON in the left pane (see image below), and write a JSONata expression in the top-right pane. The Exerciser automatically applies the JSONata to the input JSON, and displays the result in the bottom-right pane.
 note
noteNotehub.io currently supports JSONata version 2.0.6. To ensure that your
transformations work in Notehub, you can change the target version number in the
top-right dropdown of the JSONata exerciser to 2.0.6.
Collect Notehub Event Data
Now that you know how the JSONata explorer works, you'll next want to grab the JSON from a real Notehub event to use as your input.
Complete the following steps to get a Notehub event's JSON.
- Visit Notehub and open the Notehub project that includes the device you're working with.
- On your project's devices list, double click the device that is generating the data you want to transform.
- Click the Events link in the top-right corner to view device-specific events.
- Double click an event with a good sample of data.
- Click the event's JSON tab.
- Copy the JSON body of the event.
- Paste it into the JSONata Exerciser.
You can view these steps in action in the gif below.

Now that you have your data pasted into the JSONata Exerciser, you can execute several methods of transformation. Let's see how it works.
Simple Transformations
By default, nothing from the Event JSON appears in the JSONata output. This allows you to intentionally select properties and create your output.
In JSONata the input JSON's property names are available as variables without
any special syntax. For example, suppose you wanted to send a JSON object that
contains only an event's device to an external service. You can select the
device field by referring to its name directly.
{
  "device": device
}
Create Your Own JSON Structure
Building on the previous example, sometimes you want to create your own JSON
structure that includes a mix of data from your input JSON, and completely new
properties. The following JSONata outputs a device property from the input JSON,
and a newly created property and value.
{
  "device": device,
  "a_new_property": "a value"
}
You can also use JSONata to create a JSON object that uses a completely different structure than your input JSON. This can be useful if, for instance, you need send JSON to a system that expects JSON data in a completely different format.
The JSONata below creates a JSON object with a new data property that includes
two properties from the input JSON.
{
  "data": {
    "device": device,
    "when": when
  }
}
Parsing with Built-in Functions
In addition to simple transformations, JSONata also offers several built-in functions that can help you parse data. Let's look a few examples of how you might use them in your own JSONata expressions.
Currently a Notehub event's JSON holds a cell tower's global identity, CGI,
in a single field, tower_id.
"tower_id": "310,410,20483,185425416",
...
Split JSON Data
Let's say you are sending the CGI to a service expecting a structure delineating
each of the components. You can use JSONata's
$split to
break tower_id into its sub-components.
{
  "tower": {
    "cgi": {
      "mobile_country_code": $split(tower_id,",")[0],
      "mobile_network_code": $split(tower_id,",")[1],
      "location_area_code": $split(tower_id,",")[2],
      "cell_id": $split(tower_id,",")[3]
    },
    "city": tower_location,
    "timezone": tower_timezone
  }
}
Here's what that looks like on the JSONata Exerciser. Note how the tower id is split into its constituent parts in the output.

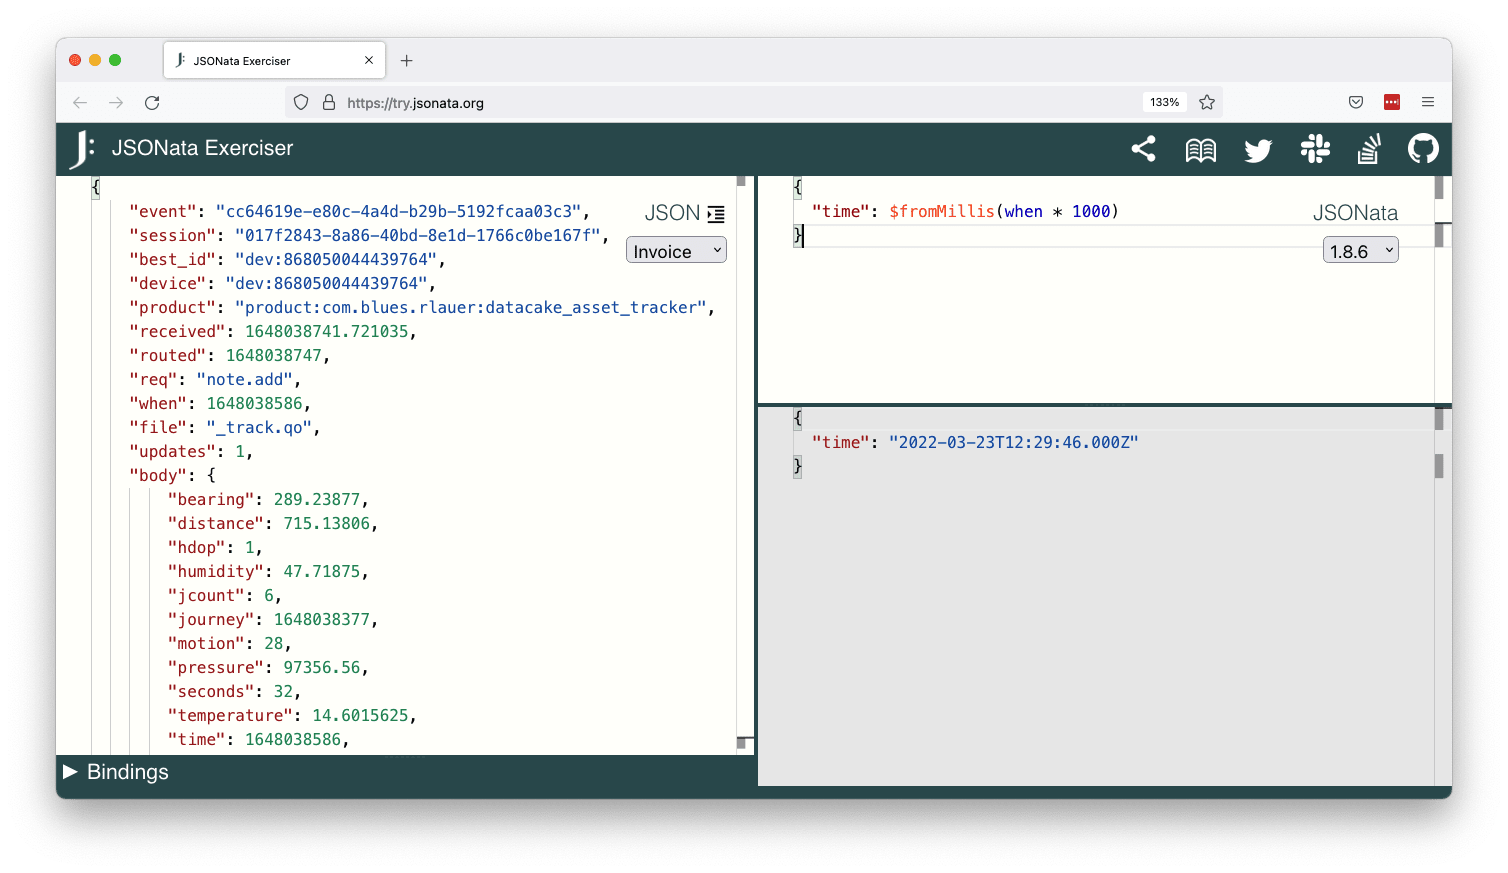
Format a Date
Suppose you are sending data to a service that expects a human readable date.
You can use the JSONata
fromMillis function
to do that.
{
  "time": $fromMillis(when * 1000)
}
Perform Mathematical Operations
If you need to perform any mathematical operations on your JSON data, there are
a variety of numeric functions
available in JSONata. For example, you might want to use the $round() function
to round your temperature values to the nearest whole number.
{
    "temperature_rounded": $round(body.temperature)
}
Other JSONata Functions
There are dozens of other built-in functions you might want to experiment with,
including $trim() and $substring() for working with strings, or $floor()
and $ceil() for working with numbers. Refer to the “Function Library”
section of the JSONata documentation
for a full list.
Conditional Logic
In addition to functions, JSONata also allows you to perform conditional checks using the ternary operator.
For example, in an asset tracking scenario, you may want to route the location of the nearest cell tower, but only if the GPS location cannot be ascertained.
The following JSONata selects the GPS location (where_lat and where_lon) if
it's available, and falls back to tower location (tower_lat and tower_lon) if
it's not.
{
    "position": {
      "lat": where_lat ? where_lat : tower_lat,
      "lng": where_lon ? where_lon : tower_lon
    }
}
Creating Custom Functions
If your logic is more advanced you can create reusable functions directly in JSONata.
Before you can define a custom function, you must introduce a scope using
parenthesis ((,)). To declare either a function or a variable, you must use
the colon-equal (:=) operator.
Functions themselves have additional rules to follow. First, you must identify
a function using the function keyword, followed by parenthesis with the names
of the variables required by the function. If the function will be more than one line,
then it must include an additional set of parenthesis inside the curly braces.
Finally, each line of the function, as well as the function itself, should be
followed by a semi-colon.
Creating a Simple Custom Function
A basic custom function in JSONata might involve simply adding two integers. In
the following example, the $myAdd function accepts two arguments and adds them
together.
(
    $myAdd := function($v1, $v2) {(
        $v1 + $v2
    )};
    {
        "temp": $myAdd(body.temperature, body.offset)
    }
)
Localizing Temperature Values
Suppose you want to use the Notecard-reported temperature (temp in a
_session.qo event), and localize the value to Celsius or Fahrenheit depending
on the country.
To do that you can use the custom $localizeTemperature function below.
(
  $localizeTemperature := function($degrees_celsius, $country) {(
    $conversion_ratio := (9 / 5);
    ($country = "US" or $country = "LR")
              ? (($degrees_celsius * $conversion_ratio) + 32)
              : $degrees_celsius;
  )};
  {
    "temp": $localizeTemperature(temp, tower_country)
  }
)
Note that JSONata converted the temperature from Celsius to Fahrenheit because the
tower_country was "US". You can modify the value of tower_country in your
input JSON and watch the value switch back to Celsius.
Merging Data with the Original JSON Structure
In some situations, you may want to write a custom function, but have it append
data to the original JSON data structure (instead of replacing it completely).
This is where the $merge() function is useful.
In this example, the pressure value is multiplied by a pressure_adjust value
and merged with the body of the original JSON structure.
(
    $myMult := function($v1, $v2) {(
        $v1 * $v2
    )};
    $merge([$, {"body": $merge([body, {
        "pressure_updated": $myMult(body.pressure, body.pressure_adjust)
    }])}])
)
Sorting and Filtering JSON
JSONata also allows you to sort and filter JSON data. For more information check out their order-by operator and filter operator.
JSONata Transforms in Notehub Routes
Everything covered so far in this guide apples to JSONata generically. Meaning, it's applicable to any program or service that utilizes JSONata. There are, however, some custom JSONata capabilities built into Notehub that allow you to create even more powerful JSONata expressions when you are transforming data in your Routes.
Conditionally Routing an Event
If you would like to conditionally route an Event based on a variable or a
calculation, you may do so with the $doNotRoute() function.
For example, suppose you wish to route a temperature reading to an external service, but you only want to do so if a GPS location exists on the Event. You can do so with the following JSONata.
(
  $result := {
    "temp": temp
  };
  $result := ($exists(where_location)) ?
    $result : $doNotRoute();
)- JSONata exports the last declared variable in scope. This is why the value
of
$resultbecomes the output of the code above. - Because
$doNotRoute()is a Notehub-specific function it does not exist in the JSONata Exerciser. You can still use the Exerciser for testing—just expect a “Attempted to invoke a non-function” error if you hit a code path that invokes$doNotRoute().

Using Environment Variables
Environment variables
are a powerful way to manage state or configuration settings on a project, fleet,
or device level. You can also access environment variables in JSONata
expressions using JSONata's variable syntax of $.
For example, to read an environment variable named temperature_setting, you
can use $temperature_setting in your JSONata expression.
Returning a Custom Error Event
If routing data to a remote endpoint fails on the server side, an error icon will automatically appear next to the associated event in Notehub. You may also create a custom error that prevents the event from being routed, with the specified message appearing in the event pane.
In the following example, if the GPS location does not exist, a custom error event will be created:
(
  $result := {
    "temp": temp
  };
  $result := ($exists(where_location)) ?
    $result : $error("GPS location is missing!");
)
Comments
While part of the JSONata standard, comments are not yet implemented in the
jsonata-go library that powers JSONata expressions on Notehub. However, they
are enabled for use in JSONata expressions within Notehub with the /* */
syntax:
/* this is a
 * multiline comment
 * in JSONata! */
Summary
Being able to perform calculations in the cloud is an incredibly powerful feature. First, your original inputs are preserved as Events. Second, the transformations occur in the cloud and not in firmware. This allows you to modify the transformation without having to modify firmware.
All told, JSONata is a simple, powerful, and flexible tool, which comes in handy as you create Routes for your external services. To explore JSONata further, check out the docs at JSONata.org.