Configuring an Amazon S3 Route
Notehub allows you to route data to Amazon S3 buckets. This is most commonly used to archive Notefile data in one or more JSON files.
Configuring the Route
To create an Amazon S3 route, open your Notehub project, head to the Settings tab and click the Archive menu item.

On the next screen you'll be asked to provide a variety of values to configure your Amazon S3 route. Below are the fields you'll need to provide to get a route up and running, but from there you can customize other pre-filled fields as necessary.
-
ArchiveID: This is a user-defined name for the archive. It will be the top-level directory name within the S3 bucket you create.
-
Type: The S3 bucket's access setting. Choose
private(the default and recommended value) orpublic-read. This setting must match the access configuration of the bucket on the S3 side. -
Archive Rate: How often Notehub archives events to your S3 bucket. The default is
daily;hourlyandweeklyare also available. Events also archive once they accumulate to 10 MB of storage usage or 15,000 events, whichever comes first. -
Monthly Folder: When
true(the default), archived events are organized into subfolders named with the formatYYYY-MM(e.g.2026-05). Set tofalseto specify a custom folder structure using the FileFolder field below. -
FileFolder: Only visible when Monthly Folder is
false. Provides a template for the folder structure within the S3 bucket (e.g.[id]/[year]-[month]/[device]). Supported placeholders are[id],[device],[product],[sn],[file],[year],[month],[day],[hour], and[weeknum]. -
BucketEndpoint: The S3 bucket endpoint. If using AWS this can be left as "(default)", for other S3 compatible services this should be set to the endpoint URL (e.g.
s3.us-west-001.myservice.com). -
BucketRegion: The AWS region for the S3 bucket (e.g.
us-east-2). -
BucketName: The unique S3 bucket name (either an existing bucket or a new bucket that will be created when the first event is routed from Notehub). Per AWS naming rules, the bucket name must be 3-63 characters, begin and end with a letter or number, and contain only lowercase letters, numbers, periods, and hyphens.
-
KeyID: The identifier for the AWS Access Key (see "AWS Authentication" below).
-
KeySecret: The "Secret Access Key" associated with the AWS Access Key (see "AWS Authentication" below).
-
Use NDJSON Format: Optional checkbox. When enabled, archived events are written as NDJSON (one JSON object per line) instead of as a JSON array. NDJSON is generally easier to stream and process line-by-line with tools like AWS Athena or
jq.
If you don't already have an access key configured, you may do so now in the AWS Console or follow the next set of instructions to create a root user access key.
AWS Authentication
The quickest and easiest way to provision access to an S3 bucket in the AWS Console is to create a root user access key. This is not recommended by AWS, so it's best to only be used as a temporary measure.
Read more about managing AWS access keys in the AWS documentation.
-
In your AWS Console, click on your user name in the upper-right corner, and choose Security credentials.

-
Scroll down to Access keys and click on Create access key.
-
Follow the prompts to create a new access key and copy the values for the Access key and the Secret access key to your clipboard.

Complete S3 Archive Route Configuration
-
Back in Notehub, copy and paste the Access key and the Secret access key values from your AWS Console into the KeyID and KeySecret fields of the Notehub route creation screen.
-
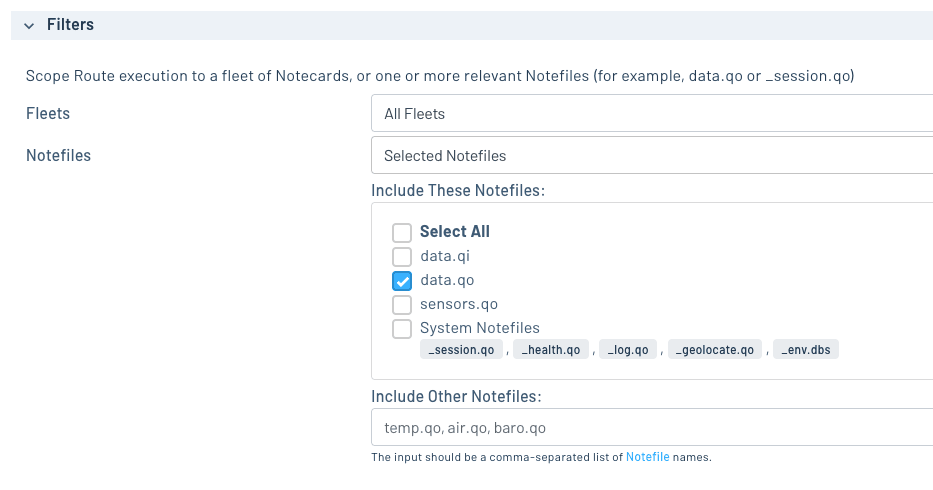
Scroll to the Filters section, set the Notefiles dropdown to Selected Notefiles, and select the Notefile you want to use this route for.
-
When you're all set, click the Apply changes button and then Confirm in the dialog that appears to save your new route.
Testing the Route
With the Amazon S3 route created, you're now ready to test it out. While the purpose of this route is to batch archive events over time, you can still test the route by sending a single event via the Notehub UI.
-
Within the details of an existing event you'd like to archive, click the Route event button:

-
In the modal dialog that appears, select the S3 archive route you just created and click the Route button to route the event immediately.
-
The response from AWS should be an empty JSON object
{}, which means routing to the S3 bucket was successful.
-
Back in your AWS Console, navigate to the S3 Buckets management page. You should see the generated S3 bucket and be able to drill down into the event JSON file you just routed:

To debug a route or inspect the exact request Notehub sends to your third-party service, open an event in Notehub, click Route as cURL, and choose the appropriate HTTP-based route. The modal shows a cURL command that reproduces the same request Notehub makes, with secrets (API keys, passwords, etc.) replaced by placeholders.
