
Starnote Quickstart: Starnote for Skylo
Introduction
This tutorial should take approximately 40–50 minutes to complete.
In this guide you'll learn how to use Starnote for Skylo, an affordable satellite IoT fallback device. Like cellular-based Notecards, which include prepaid cellular data and service, Starnote for Skylo includes satellite uplink and downlink data in the cost of the device.
Starnote for Skylo communicates through a paired Notecard, so developers continue to use the Notecard's JSON-based programming interface. This allows developers to send and receive data over NTN (Non-Terrestrial Networks) using straightforward, accessible semantics.
Starnote for Skylo is a cost-optimized "Notecard accessory" and must be paired with a Notecard device to function (specifically a Notecard Cellular, Notecard Cell+WiFi, or Notecard WiFi - Notecard for LoRa is not supported for use with Starnote for Skylo).
In a nutshell, you use the Notecard API to specify the mode of operations for when to fallback to satellite and what data to sync, and Notecard handles communications between itself and Starnote, as depicted in the flowchart below:

Starnote for Skylo is offered in two variants. One with onboard satellite and GPS/GNSS antennas from Ignion and one with u.FL connectors on the back of the board for use with the included Skylo-certified flexible antennas.
| Starnote for Skylo with Ignion Antennas | Starnote for Skylo with u.FL Connectors |
|---|---|
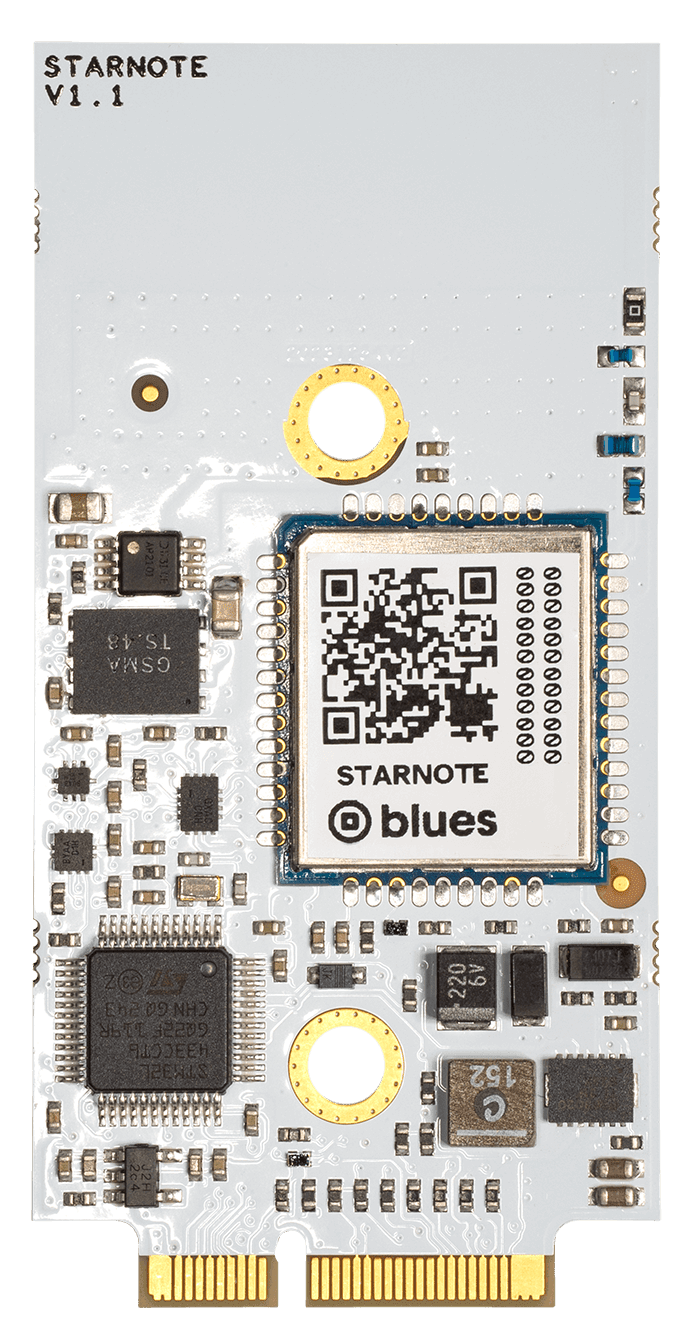 |  |
Before You Begin
 warning
Prerequisite
This tutorial assumes you've completed the Notecard Quickstart, and that you are familiar with the basics of how Notecard and Notehub work. If you haven't yet, complete the Notecard Quickstart and ensure your Notecard is connected to a Notehub project before continuing.
To complete this guide you must have access to the following:
-
A computer with an available USB port.
-
A browser that supports the Web Serial API, like Chrome or Microsoft Edge.
-
A free Notehub.io account.
-
A Notecard Cellular, Notecard Cell+WiFi, or Notecard WiFi device on firmware version >= v10.1.1.
To complete the final sections of this guide, Connecting a Starnote and Sending Data Over Satellite, you must additionally have the following:
-
A Starnote for Skylo (either the u.FL or Ignion antenna version).
-
If you have the Starnote for Skylo with u.FL connectors you will also need:
-
A Skylo-certified external LTE antenna (i.e. the flexible antenna that ships with Starnote for Skylo).
-
An external GPS/GNSS antenna (though Starnote for Skylo can use fixed location coordinates for testing).
-
-
-
Outdoor access. To transmit, Starnote for Skylo must have a clear view of the sky, away from buildings and overhead tree cover. You can complete all setup indoors—we'll let you know when it's time to go outside.
Understanding NTN Transport Mode
Notecard transport modes (via the card.transport API) let developers configure which Radio Access Technology (RAT) a Notecard should use, and enable a Notecard to fallback from one RAT to another, such as falling back from WiFi to cellular.
For satellite, Notecard also supports a transport mode called NTN (Non-Terrestrial Networks), the 3GPP standard for extending cellular networks over satellite, provided by Skylo, our connectivity partner for Starnote for Skylo.
Notecard's NTN mode is a byte-constrained mode that attempts to send as little data as possible over the network. NTN mode is compatible with all variants of Notecard Cellular, Notecard Cell+WiFi, and Notecard WiFi.
During phases of application development and testing, NTN mode can be used without the presence a Starnote device. This means you can develop and debug firmware using cellular or WiFi without using satellite data. Once your firmware is complete and ready for deployment, your application will be able to use Starnote for Skylo for satellite fallback without any firmware changes.
The NTN-related card.transport method arguments are as follows:
-
{"req":"card.transport","method":"ntn"}to always use NTN for network communications (useful for testing NTN mode over cellular or WiFi, not recommended for production deployments). -
{"req":"card.transport","method":"wifi-ntn"}to prefer WiFi and fallback to NTN. -
{"req":"card.transport","method":"cell-ntn"}to prefer cellular and fallback to NTN -
{"req":"card.transport","method":"wifi-cell-ntn"}to prefer WiFi, then fallback to cellular, and lastly to NTN. -
{"req":"card.transport","method":"-"}to reset the transport mode to the device default.
Let's start the hands-on portion of this tutorial by looking at how to use these modes on a Notecard.
warningFor a Note synced with Starnote for Skylo, satellite packets have a minimum billable size of 50 bytes and a maximum supported size of 256 bytes. Packets smaller than 50 bytes are billed as 50 bytes. Packets exceeding 256 bytes are not transmitted, are ignored by the satellite network, and result in the Note being deleted. Billing is based on the packet size.
Using NTN Mode
In this section of the guide you'll set your Notecard to use NTN mode and send your first Note over NTN mode to Notehub. To complete this section you must have a Notecard Cellular, Notecard Cell+WiFi, or Notecard WiFi connected to a compatible Notecarrier. If you are unsure how to do this refer to the Notecard quickstart.
If you're using a Starnote for Skylo Starter Kit, you can complete this section by connecting your Notecard WiFi to the appropriate M.2 connector on your Notecarrier XS.

warningDo NOT hook up your Starnote for Skylo yet. Notecard automatically detects the presence of a Starnote and will start using it when your Notecard is in NTN mode.
You'll hook up your Starnote for Skylo in a later step after you've learned how NTN mode works.
-
Connect a USB cable from the Notecarrier's USB port to your computer's USB port.
-
Locate the panel on the right-hand side of your browser window, which we call the In-Browser Terminal. Within the In-Browser Terminal, click the USB Notecard button.
-
Reset your Notecard's transport method to its default mode with the
card.transportAPI.{"req":"card.transport","method":"-"} -
If you're using a Notecard WiFi, connect to a 2.4 GHz network using the
card.wifirequest (as shown below), or by using the device's AP button.{"req":"card.wifi","ssid":"your-network-name","password":"your-network-password"} -
All NTN communications require the use of templated Notefiles and templated environment variables to help reduce usage of satellite data.
For example, to create a Notefile template for use with NTN, define the template with the
"format":"compact"and"port":<1-100>arguments. Read more about theformatandportarguments in the note.template API documentation.{"req":"note.template","file":"sat.qo","format":"compact","port":55,"body":{"temp":14.1,"humidity":14.1}} -
Likewise, if you wanted to set an inbound Notefile template you would use the same format, but with a
.qiextension on thefileargument.{"req":"note.template","file":"config.qi","format":"compact","port":44,"body":{"cmd":"*"}} -
After all of your Notefile templates are defined, set your Notecard to your Notehub project's ProductUID with the
hub.setrequest below. Setting the request's"mode"to"minimum"instructs the Notecard to only connect to Notehub during explicithub.setrequests, which will help us manage satellite data usage in later sections.{"req":"hub.set","product":"com.your.domain:product","mode":"minimum"} -
Run a
hub.syncrequest. It is required that the Notecard first syncs with Notehub over a non-NTN connection to copy all of your generated templates to your Notehub project before they may be used by Starnote.{"req":"hub.sync"} note
noteThese configuration settings persist across both Starnote and Notecard restarts. This means that once you create or update a template and perform a single sync over cellular or WiFi, the changes are retained. If the device restarts, you do not need to re-establish a new cellular or WiFi connection with Notehub as the stored configuration remains in effect.
-
Watch the progress bar in the In-Browser Terminal for updates on the syncing process.
warningYou must wait for your Notecard to complete a full sync with Notehub before you proceed to the next step!

-
Once the sync with Notehub is complete, turn on NTN mode with the
card.transportAPI.{"req":"card.transport","method":"ntn"}warningWe do not recommend using
"method":"ntn"in production. When using a physical Starnote, NTN mode will force Notecard to send all data over satellite, which may inadvertently consume your data allocation. -
Add a Note to a templated Notefile. For example:
{"req":"note.add","file":"sat.qo","body":{"temp":12.3,"humidity":45.6}} -
Next, enable trace mode on your Notecard.
trace +reqFor now you'll use trace mode to verify NTN mode is working as expected, and in later sections you'll use it to display requests to and from Notecard and Starnote.
-
Send a
hub.syncrequest to sync data over NTN, using theoutargument to only sync pending outbound data.{"req":"hub.sync","out":true} -
If you need to instruct your Notecard and Starnote to check for inbound data, you must use the
inargument of thehub.syncAPI.{"req":"hub.sync","in":true}noteYou can still use the
inboundandoutboundarguments in thehub.setAPI to specify a cadence of syncing with Notehub. However, a best practice is to either set a relatively highinboundargument or manually manage inbound connections as detailed here. -
Watch for the sync with Notehub to complete in the In-Browser Terminal. Eventually you may notice a fragment of text like the following, which details the size of each Note and total packet size.
S03:05.53 ntn: enqueueing note len:15 (port 55) S03:05.53 ntn: enqueueing note len:15 (port 55) S03:05.53 ntn: enqueueing note len:15 (port 55) S03:05.54 sync: work: upload sat.qo (3 changes) {sync-get-local-changes} S03:05.54 purge sat.qo: S03:05.55 1 notes (0 stable, 0 queued, 1 tombstones) S03:05.55 -> 0 notes (0 stable, 0 queued, 0 tombstones) S03:05.59 sync: work to be done: S03:05.59 upload sat.qo S03:05.60 deleting /data/sat-qo.000 S03:05.63 sync: work: completed {sync-end} S03:05.64 sync: advancing last sync time from 14:08:26Z to 14:09:04Z S03:05.76 ntn: adding downlink request note into packet (6/248) S03:05.77 ntn: dequeueing 15-byte note (port 55) into packet (23/248) S03:05.77 ntn: dequeueing 15-byte note (port 55) into packet (40/248) S03:05.77 ntn: dequeueing 15-byte note (port 55) into packet (57/248) S03:05.78 packet: sending 57 bytes (encoded as 61 bytes on-air) S03:05.78 to 216.245.146.112:8089 S03:05.78 ntn: sent 57-byte packet containing 4 notes -
IMPORTANT: Be sure to disable trace mode by sending the
trace offcommand in the In-Browser Terminal.trace off -
Finally, head to your Notehub project to look for the Note you just sent.
 note
noteEvents sent over NTN will not have a location, by default, because location is not included in compact Notefile templates. You can add fields that would be otherwise omitted by using a handful of reserved keywords. See Creating Compact Templates.
-
At this point you can reset the transport mode of your Notecard to restore it to prioritizing cellular or WiFi communications.
{"req":"card.transport","method":"-"}
Connecting a Starnote
Now that you've seen how NTN mode works, let's connect a Starnote for Skylo and see how to send data over a real satellite connection.
Starnote for Skylo must be connected to a Notecard via UART, either using the Starnote for Skylo's M.2 pins or the 6-pin JST connector on the front of the device.
The easiest way to connect Starnote for Skylo to a Notecard is via the Notecarrier XS, which was specially built to accommodate both a Starnote for Skylo and a Notecard. Alternatively, you may use your own cable to connect Starnote for Skylo to a Notecard via male jumper wires inserted into the header pins on a Notecarrier A or Notecarrier F.
warningWhen you integrate a host MCU to communicate with Notecard/Starnote for Skylo after completing this guide, please note that your host must interface with Notecard using I2C or AUX UART, as Starnote for Skylo connects to your Notecard via standard UART.
Learn more about how to interface with a Notecard from a host in Notecard Interfaces.
The Notecarrier XS includes an M.2 connector for both a Starnote for Skylo and a Notecard Cellular, Notecard WiFi, or Notecard Cell+WiFi device. Both are clearly labeled and the screw connectors are aligned such that each device will only fit in the correct M.2 slot.

-
Disconnect the USB cable from your Notecarrier XS, if still connected from the previous section.
-
Insert a Starnote for Skylo into the M.2 connector labeled "Starnote" and secure the mounting screw. Both the Starnote for Skylo with Ignion Antennas and Starnote for Skylo with u.FL Connectors are compatible with the Notecarrier XS.

-
Insert a Notecard Cellular, Notecard WiFi, or Notecard Cell+WiFi device into the M.2 connector labeled "Notecard" and secure the mounting screw.
While not pictured here, be sure to attach any required cellular and/or WiFi antennas to the u.FL connectors on the Notecard as well.

-
If using a Starnote for Skylo with u.FL Connectors, connect the provided external u.FL antennas. The larger antenna should be connected to the
SATconnector and the smaller antenna to theGPSconnector.
To use the 6-pin JST connector on the front of Starnote for Skylo, you'll need a cable that breaks out each of the six pins into its own wire, such as this one. Insert the male connector into the 6-pin JST connector on the face of the Starnote for Skylo, and then follow this wiring guide for wiring to a Notecarrier A or Notecarrier F:
-
Disconnect the USB cable from your Notecarrier XS, if still connected from the previous section.
-
Connect one or both of the
GNDwires from the connector toGNDon the Notecarrier A or F. -
Connect the
TXwire toRXon the Notecarrier A, or toN_RXon the Notecarrier F. -
Connect the
RXwire toTXon the Notecarrier A, or toN_TXon the Notecarrier F. -
Connect the
VMAINwire toVMAINon the Notecarrier A or F. -
Connect the
VIOwire toVIOon the Notecarrier A, or toN_VIOon the Notecarrier F.

Now that you have everything connected, let's look at how to pair a Starnote for Skylo to a Notecard.
Pairing a Starnote
When a Notecard first detects a connected Starnote it will pair with the module. Once paired, a Notecard will look for its paired Starnote every time it restarts, and will report errors if it can’t connect.
The pairing process happens automatically when you power on a Notecard and it's connected to a Starnote via UART (as shown in the previous section).
Let’s look at how it works.
-
Re-connect a USB cable from the Notecarrier's USB port to your computer's USB port, and re-open the In-Browser Terminal.
-
After Notecard and Starnote power on, run a
hub.syncrequest over cellular or WiFi. This will ensure that any additional templates and this new association between Notecard and Starnote are communicated with Notehub.{"req":"hub.sync"} -
After the sync is completed, run a
ntn.statusrequest, which will report on the status of any connected NTN modules. If all went well, you should see{ntn-idle}in the response, which indicates that your Starnote has paired and is idle.>{"req":"ntn.status"}{"status":"{ntn-idle}{ntn-unknown-location}"}
warningOnce you’ve connected your Notecard to a Starnote for Skylo, the presence of
a physical Starnote for Skylo is stored in a permanent configuration that is
not affected by a card.restore request.
If you'd like to reset this so you can go back to testing NTN over cellular or WiFi OR if you'd like to pair the Starnote with a different Notecard, issue an ntn.reset request.
Sending Data Over Satellite
Now that you have your Starnote for Skylo paired, let's use it to send your first data over a satellite connection.
Starnote for Skylo needs to know its location so that it can find overhead satellites. Although Starnote for Skylo will determine its location during its first transmission using its onboard GPS module, you can (optionally) expedite this process by manually providing a location.
-
(Optional) To provide a fixed location, use Notecard's
card.location.modeAPI and substitute your current latitude and longitude for thelatandlonarguments.{"req":"card.location.mode","mode":"fixed","lat":12.3,"lon":45.6}If you take this approach, you'll also need to use Notecard's
ntn.gpsrequest to tell Notecard to use its internal GPS data (which in this case has the hardcoded location), instead of using the GPS data from the connected Starnote for Skylo.{"req":"ntn.gps","on":true} -
Issue another
trace +reqcommand in the In-Browser Terminal to watch serial communications.trace +reqwarningIf you notice from your log that your Notecard is actively syncing data over cellular or WiFi, please wait for it to finish before proceeding to the next step.
-
After that, turn on NTN mode with the
card.transportAPI.{"req":"card.transport","method":"ntn"} -
Next, queue a new Note onto the Notecard using the
note.addrequest.{"req":"note.add","file":"sat.qo","body":{"temp":45.6,"humidity":78.9}}
-
After that, you need to take your device to a location that has a clear view of the sky, away from buildings and overhead tree cover. Skylo's GEO satellites sit above the equator, so your view of the southern sky (from the northern hemisphere) or northern sky (from the southern hemisphere) is especially important.
If you are testing outdoors you will also need to bring a laptop that is capable of connecting to the Notecard, sending a
hub.syncrequest, and watching the serial logs. Depending on your setup this might be a bit of a hassle, but remember—you're about to send data to space! It'll all be worth it.
-
When you're ready to go, trigger an outbound sync with a
{"req":"hub.sync","out":true}request. Notecard will again use NTN mode to send your data, but this time—because you have a Starnote for Skylo connected—your Notecard will use Starnote for Skylo to send data over a satellite connection.{"req":"hub.sync","out":true}
-
Watch the serial communications in the In-Browser Terminal, as it gives detailed information on steps Starnote for Skylo takes to connect to satellites and send your data. The process may take a few minutes, but when you see an
ntn.uplinkcommand you'll know everything worked! 🛰️S49:31.96 sync: sync triggered by explicit sync request; NTN S49:31.96 sync: work: begin (anything pending) {sync-begin} S49:32.02 sync: work to be done: S49:32.02 upload sat.qo S49:32.05 ntn: enqueueing note len:11 (port 55) S49:32.05 sync: work: upload sat.qo (1 changes) {sync-get-local-changes} S49:32.05 purge sat.qo: S49:32.05 1 notes (0 stable, 0 queued, 1 tombstones) S49:32.06 -> 0 notes (0 stable, 0 queued, 0 tombstones) S49:32.09 sync: work to be done: S49:32.09 upload sat.qo S49:32.10 deleting /data/sat-qo.000 S49:32.10 sync: work: completed {sync-end} S49:32.11 sync: advancing last sync time from 18:57:23Z to 18:57:50Z S49:32.27 ntn: dequeueing 11-byte note (port 55) into packet (13/254) S49:32.27 packet: sending 11 bytes (encoded as 13 bytes on-air) << {"cmd":"ntn.uplink","id":21,"time":1717441070,"ltime":1717428925,"lat":...,"lon":...,payload":"ADcACwBmZjZCzcydQg=="} S49:32.47 ntn: sent 11-byte packet containing 1 notes
-
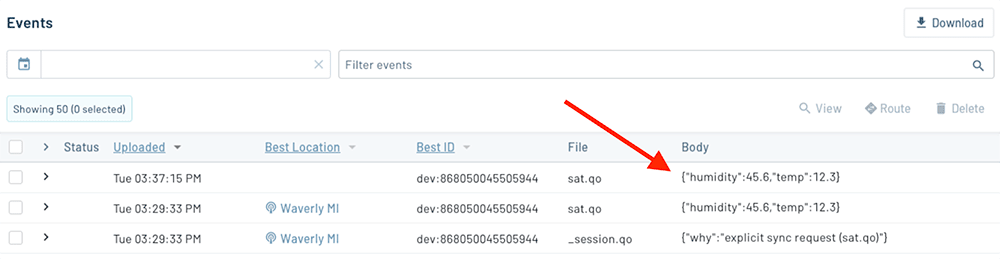
Return to the Events page in your Notehub project. You should see your data listed in a new Event.

Having trouble connecting?
Satellite communications are notoriously difficult to get right, due to all of the variables involved. Here are some of the more common issues to be aware of:
- Give it time. It can take multiple minutes for Starnote for Skylo to find and communicate with Skylo's GEO satellites that sit above the equator. Double check that your antenna is free from obstructions and has a clear view of the southern sky (from the northern hemisphere) or northern sky (from the southern hemisphere).
-
Make sure you have successfully synced any and all templates with Notehub over cellular or WiFi before attempting NTN communications with Starnote for Skylo.
-
Likewise, after physically connecting Starnote for Skylo to your Notecard, be sure to perform a sync over cellular or WiFi before attempting to use NTN mode.
-
If data appears to be sending successfully over NTN but nothing shows up in Notehub, the Starnote may be paired with a different Notecard. In this case, issue an ntn.reset command on the original Notecard to unpair the Starnote.
Congratulations! You just sent your first data to space using Starnote. Before we wrap up let's reset a few things.
-
First, be sure to disable trace mode by sending the
trace offcommand in the In-Browser Terminal.trace off -
Next, if you used hardcoded GPS coordinates for your device's location during testing, you'll likely want to reset the
ntn.gpsrequest so that you use the GPS location from your Starnote for Skylo moving forward.{"req":"ntn.gps","off":true} -
Lastly, set your Notecard's transport method to an appropriate value for your product, so you don't send any more data over satellite until you're ready. For example:
{"req":"card.transport","method":"wifi-cell-ntn"}
Next Steps
The power of Starnote for Skylo is just how easy it makes satellite connectivity, and in this tutorial you saw this ease of use in action.
You learned how Notecard transport methods work, how to use the Notecard's NTN mode, how to connect a physical Starnote for Skylo, and how to send your first data using satellite connectivity.
Now that you know the basics, your next step is to review the Satellite Best Practices guide to better understand how to build a product around Starnote for Skylo. At any time, if you find yourself stuck, please reach out on the community forum.