Updating Starnote for Iridium Firmware
On this page you'll learn how to update the firmware on your Starnote for Iridium device.
 warning
Make sure you read and understand the Blues Firmware Release Policies and Procedures before updating Starnote firmware.
- Software Prerequisites
- Placing Starnote in DFU Mode
- Flashing a New Starnote Firmware Binary
- Verifying Success of a Starnote Firmware Update
Software Prerequisites
You must have the following software installed to perform firmware updates on your Starnote for Iridium.
- STM32CubeProgrammer (version >= 2.20.0)
- Access to a terminal (e.g. macOS Terminal, Linux shell, or Windows Powershell)
 note
noteIf you are installing STM32CubeProgrammer for the first time, see these installation notes for some additional (required) platform-specific instructions.
Placing Starnote in DFU Mode
The first step is to configure your Starnote for Iridium to accept firmware updates by placing it in bootloader mode. There are two different ways you can accomplish this.
Option 1: DFU Mode Using the Starnote's AUX Pins
You can place a Starnote for Iridium in bootloader mode using its AUX pins, which are exposed on Notecarrier XI. To take this approach you must have soldering equipment and be familiar with the basics of soldering and breadboards.
Required Hardware (AUX Pins)
- Starnote for Iridium
- Soldering equipment
- Breadboard
- Jumper wires
- FTDI cable
- USB-C cable
Steps (AUX Pins)
-
Solder
GNDandVIOpins onto your Notecarrier XI. -
Connect the USB end of your FTDI cable to your computer.
-
Make the following pin connections. In the image below I use a breadboard to provide
VIOto bothS_BOOTandS_AUX_EN.- FTDI
RX(orange) -->S_AUX_TX - FTDI
TX(yellow) -->S_AUX_RX - FTDI ground (black) -->
GND VIO-->S_BOOTVIO-->S_AUX_EN
- FTDI
-
Provide power to your Notecarrier XI by plugging in a LiPo battery. (You can optionally also plug in a USB cable, but a LiPo battery is required.)
-
Reboot your Starnote by pressing the
S_RSTbutton on your Notecarrier XI.
With these steps complete your Starnote is now in bootloader mode, and you can continue in Flashing a New Starnote Firmware Binary.
Option 2: DFU Mode Using a Separate Notecarrier
Alternatively, you can put a Starnote for Iridium in bootloader mode using the Notecard M.2 slot of a separate, compatible Notecarrier. This approach requires you to have one of the Notecarriers listed below, and for the header pins on the Notecarrier to be soldered on.
Required Hardware (Separate Notecarrier)
- Starnote for Iridium
- A Notecarrier that can seat a Starnote for Iridium (floating, not screwed down) in the
Notecard M.2 socket
- The following Notecarriers fit a Starnote for Iridium and have the required pins exposed: Notecarrier F, Notecarrier X, Notecarrier XM, Notecarrier XS
- Micro USB or USB-C cable (depending on the model of your Notecarrier)
- Jumper wire
Steps (Separate Notecarrier)
-
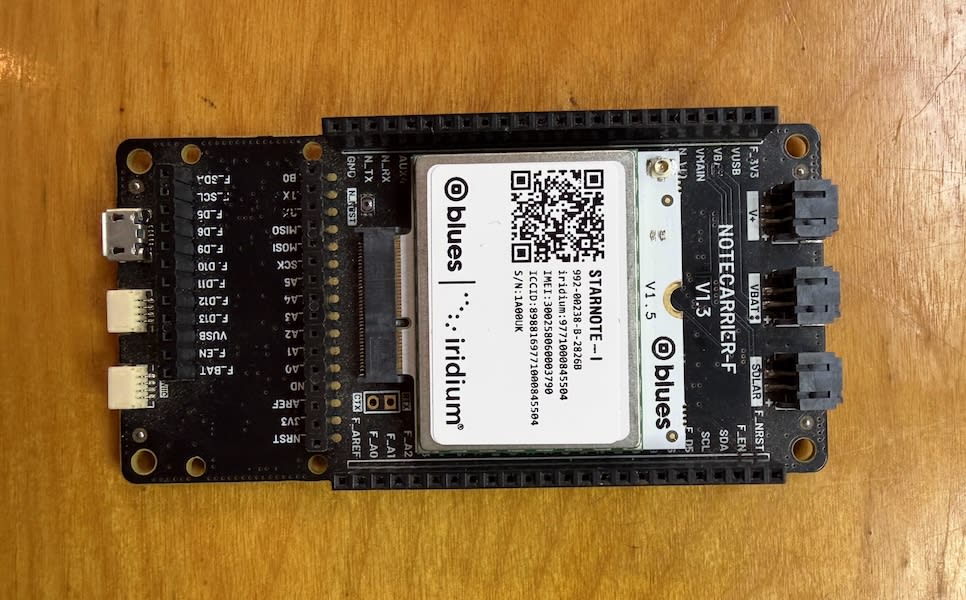
Place your Starnote for Iridium into the Notecard M.2 connector of your Notecarrier. Ensure your Starnote is snug in the M.2 connector, but don't expect it to lay flat and do NOT attempt to use the screw terminal. Starnote will end up "floating" in the socket. This is ok as long as it's firmly snug in the M.2 connector!
-
Attach a jumper wire between the
BOOTandVIOpins. On a Notecarrier F you can do this by running the wire fromN_BOOTtoN_VIO.warningDo NOT use the
BOOTpin under theALT DFUlabel available on some Notecarriers.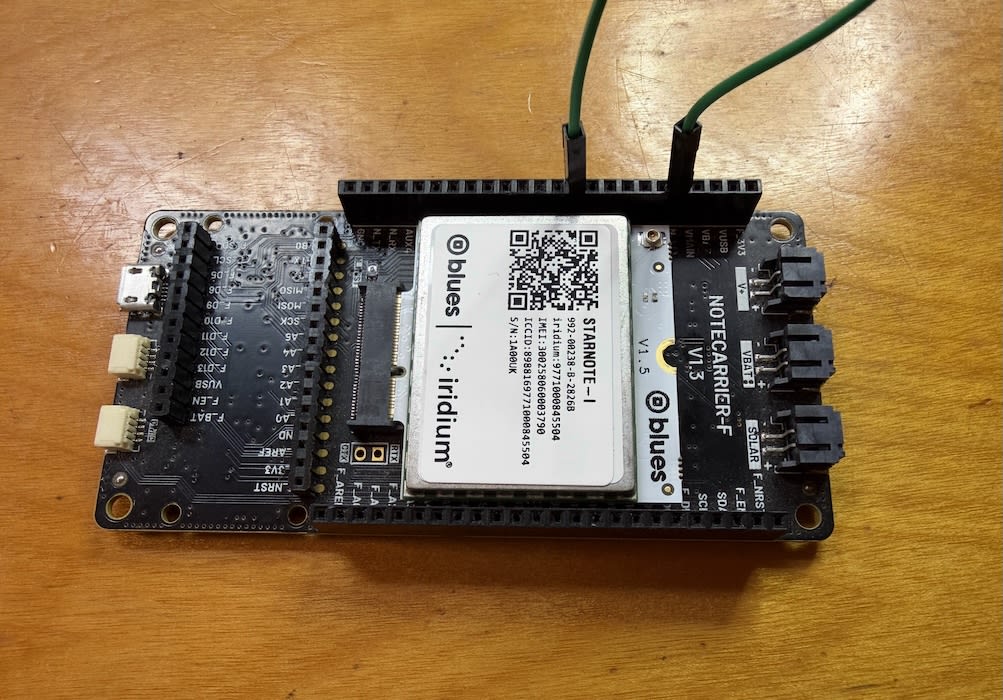
-
Connect your Notecarrier to your computer using a USB cable. NOTE: You must have the jumper wire connected from
BOOTtoVIOBEFORE you connect your Notecarrier!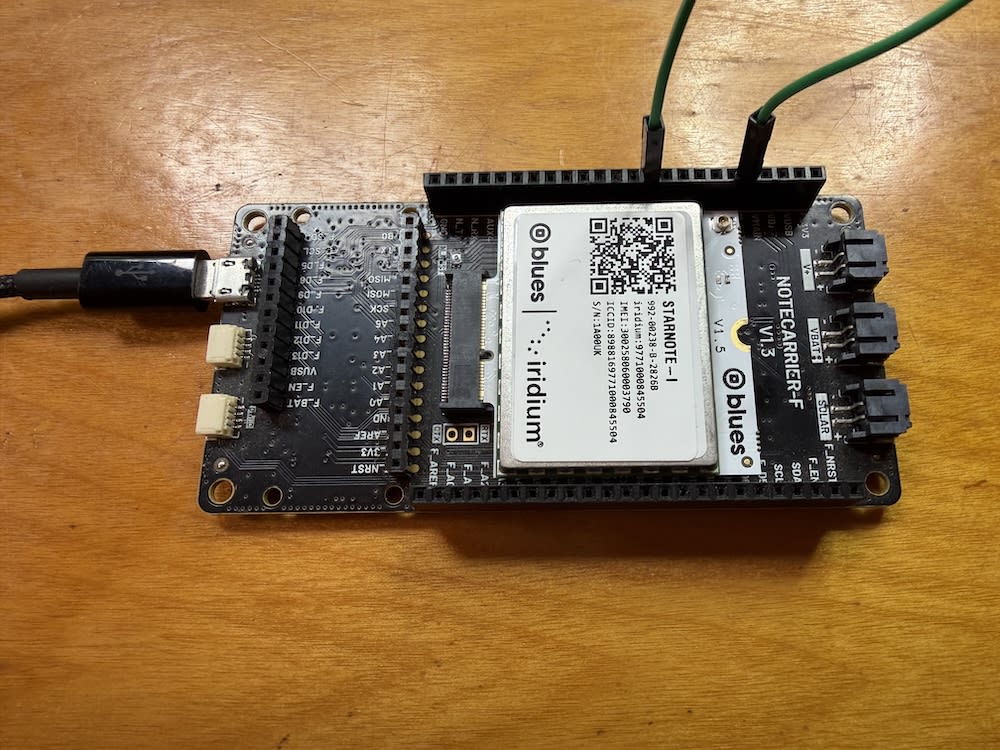
-
Remove the jumper wire between
VIOandBOOT. -
At this point, your Starnote should be in DFU mode. To verify, open a terminal and run the following command.
$STM32_Programmer_CLI --list usbIf all went well, STM32CubeProgrammer should detect and list a single device in DFU mode.
-------------------------------------------------------------------
                    STM32CubeProgrammer v2.20.0
  -------------------------------------------------------------------
=====  DFU Interface   =====
Total number of available STM32 device in DFU mode: 1
 Device Index           : USB1
 USB Bus Number         : 001
 USB Address Number     : 004
 Product ID             : STM32  BOOTLOADER
 Serial number          : 208F35A85830
 Firmware version       : 0x011a
 Device ID              : 0x0435
Flashing a New Starnote Firmware Binary
With your Starnote in DFU mode, you can now flash a new binary to update its firmware.
Start by downloading the appropriate Starnote for Iridium firmware binary from the list of firmware releases, and then complete one of the sections below (depending on approach you took in the previous section).
Option 1: Flashing Firmware Using the Starnote's AUX Pins
If you used the Starnote’s AUX pins to place your Starnote for Iridium in DFU mode, you have a UART connection to your device and can use the following steps to update it.
-
Open STM32CubeProgrammer, select UART from the blue dropdown, select your port (which should be something like
tty.usbserialFTDIxxxxx), and click the green Connect button.
-
Next, go the Erasing & Programming screen (see screenshot below). On this screen use the Browse button to select the Starnote for Iridium
.binfile you downloaded earlier.
-
Make sure the other checkboxes match the image above. Verify programming and Run after programming should be checked, and Skip flash erase before programming and Full Flash memory checksum should not.
-
Click Start Programming. After a few seconds of commands displayed in the log, you should see multiple dialog warnings/notifications to click through and confirm. If you see a Download verified successfully dialog you’ll know everything worked.
With these steps complete you can continue to Verifying Success of a Starnote Firmware Update.
Option 2: Flashing Firmware Using a Separate Notecarrier
-
From your terminal, use the command shown below to flash the binary to your device. Make sure to:
-
Replace the listed
portwith the "Device Index" returned from yourSTM32_Programmer_CLI --list usbcommand, if necessary. -
Update the path to the binary to the correct location on your computer.
$STM32_Programmer_CLI --connect port=USB1 --write '/path/to/starnote.bin' 0x08000000 --verify --go -
-
The update process may take a minute or so to complete. If all goes well, you will see a "Start operation achieved successfully" message.
...
RUNNING Program ...
  Address:      : 0x8000000
Start operation achieved successfully
Verifying Success of a Starnote Firmware Update
Regardless of the approach you took above, now that you have installed the firmware update you can use the same steps to verify the installation worked correctly.
-
If you haven’t already, go ahead and seat a Notecard in the Notecard M.2 slot on your Notecarrier XI, and your Starnote for Iridium in the Starnote slot.
-
Connect a USB-C cable to your Notecarrier XI.
-
Open the In-Browser Terminal, connect to your Notecard, and run an
ntn.configrequest. If all went well you should see the updated firmware version in the response’sversionfield.
If you have any trouble with the Starnote firmware update process, please reach out to us via the Blues Developer Forum.
