Starnote Quickstart: Starnote for Iridium
Introduction
This tutorial should take approximately 40–50 minutes to complete.
Watch a video of this tutorial
In this guide you'll learn how to use Starnote for Iridium, an affordable satellite IoT fallback device. Like cellular-based Notecards, which include prepaid cellular data and service, Starnote for Iridium includes satellite uplink and downlink data in the cost of the device.
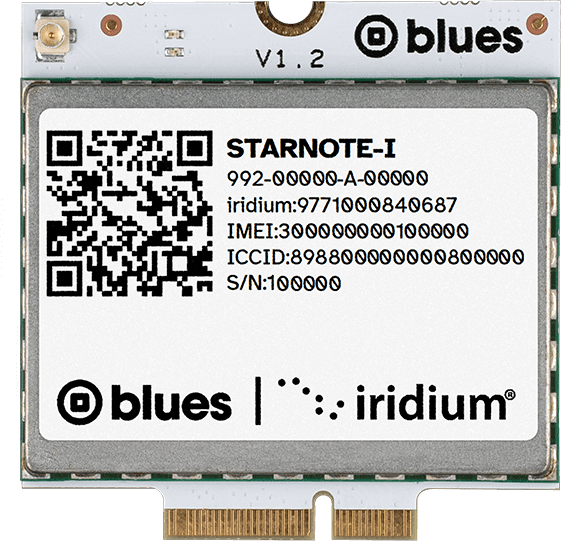
Starnote for Iridium communicates through a paired Notecard, so developers continue to use the Notecard's JSON-based programming interface. This allows developers to send and receive data over NTN (Non-Terrestrial Networks) using straightforward, accessible semantics.
Starnote for Iridium is a cost-optimized "Notecard accessory" and must be paired with a Notecard device to function (specifically a Notecard Cellular, Notecard Cell+WiFi, or Notecard WiFi - Notecard for LoRa is not supported for use with Starnote for Iridium).
In a nutshell, you use the Notecard API to specify the mode of operations for when to fallback to satellite and what data to sync, and Notecard handles communications between itself and Starnote, as depicted in the flowchart below:

Before You Begin
 warning
Prerequisite
This tutorial assumes you've completed the Notecard Quickstart, and that you are familiar with the basics of how Notecard and Notehub work. If you haven't yet, complete the Notecard Quickstart and ensure your Notecard is connected to a Notehub project before continuing.
To complete this guide you must have access to the following:
-
A computer with an available USB port.
-
A browser that supports the Web Serial API, like Chrome, Microsoft Edge, or Firefox.
-
A free Notehub.io account.
-
A Notecard Cellular, Notecard Cell+WiFi, or Notecard WiFi device on firmware version >= v10.1.1.
-
A Notecarrier XI.
-
A LiPo battery.
-
Outdoor access. To transmit, Starnote for Iridium must have a clear view of the sky, away from buildings and overhead tree cover. You can complete all setup indoors—we'll let you know when it's time to go outside.
Understanding NTN Transport Mode
Notecard transport modes (via the card.transport API) let developers configure which Radio Access Technology (RAT) a Notecard should use, and enable a Notecard to fallback from one RAT to another, such as falling back from WiFi to cellular.
For satellite, Notecard also supports a transport mode called NTN (Non-Terrestrial Networks), which enables communication via Iridium’s satellite network.
Notecard's NTN mode is a byte-constrained mode that attempts to send as little data as possible over the network. NTN mode is compatible with all variants of Notecard Cellular, Notecard Cell+WiFi, and Notecard WiFi.
The NTN-related card.transport method arguments are as follows:
-
{"req":"card.transport","method":"ntn"}to always use NTN for network communications (useful for testing NTN mode over cellular or WiFi, not recommended for production deployments). -
{"req":"card.transport","method":"wifi-ntn"}to prefer WiFi and fallback to NTN. -
{"req":"card.transport","method":"cell-ntn"}to prefer cellular and fallback to NTN -
{"req":"card.transport","method":"wifi-cell-ntn"}to prefer WiFi, then fallback to cellular, and lastly to NTN. -
{"req":"card.transport","method":"-"}to reset the transport mode to the device default.
Let's start the hands-on portion of this tutorial by looking at how to use these modes on a Notecard.
warningFor a Note synced with Starnote for Iridium, satellite packets have a minimum billable size of 10 bytes and a maximum supported size of 10,000 bytes. Packets smaller than 10 bytes are billed as 10 bytes. Packets exceeding 10,000 bytes are not transmitted, are ignored by the satellite network, and result in the Note being deleted. Billing is based on the packet size.
Setting Up For NTN
Before you can send data over satellite, there are a few setup steps to complete. In this section you'll learn how Notecard selects its transport method, and how to create and sync the compact templates required before you can use NTN.
To complete this section you must have a Notecard Cellular, Notecard Cell+WiFi, or Notecard WiFi connected to a compatible Notecarrier. If you are unsure how to do this refer to the Notecard quickstart.
If you’re using a Starnote for Iridium Starter Kit, you can complete this section by connecting your Notecard Cell+WiFi to the appropriate M.2 connector on your Notecarrier XI.
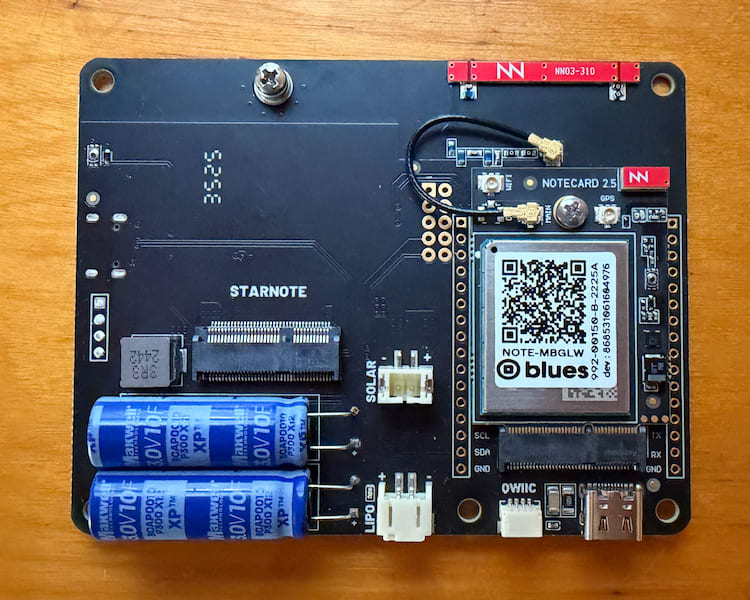
warningDo NOT hook up your Starnote for Iridium yet. Notecard automatically detects the presence of a Starnote and will start using it when your Notecard is in NTN mode.
You'll hook up your Starnote for Iridium in a later step after you've prepared your Notecard for NTN.
Connect to Notecard
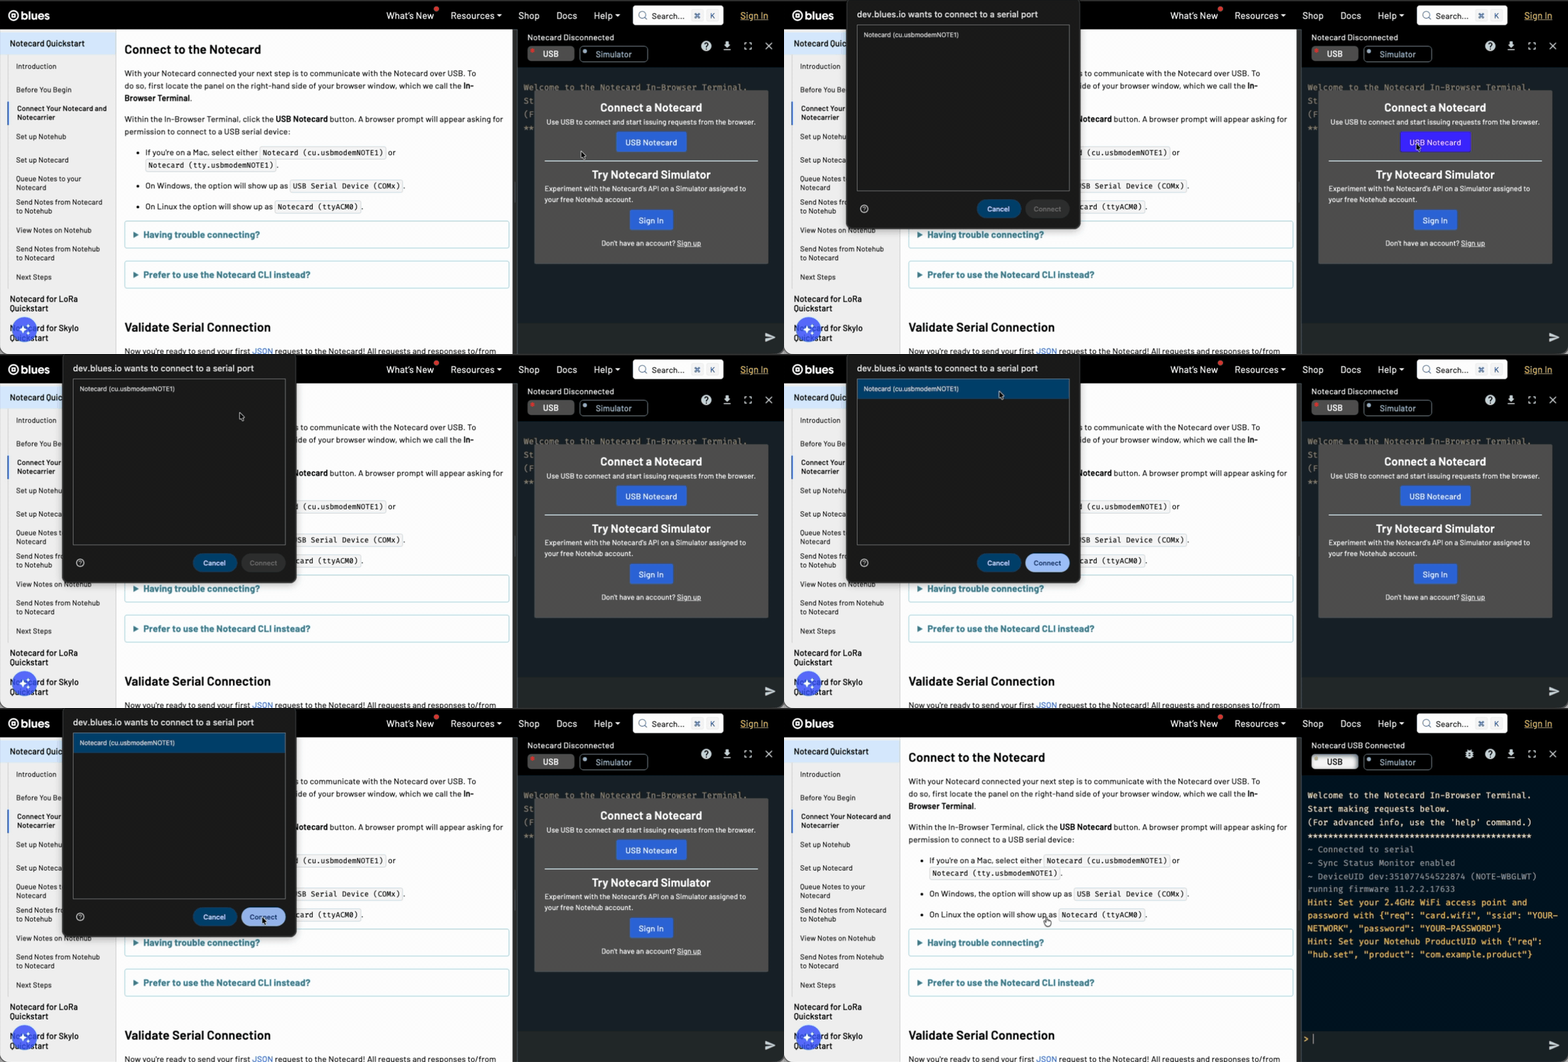
To complete this guide you’ll need to perform a number of requests on your Notecard. To do that, connect it to the In-Browser Terminal using the following steps.
-
Connect a USB cable from the Notecarrier XI's USB port to your computer's USB port.

-
Connect a LiPo battery to the
LIPOJST port on your Notecarrier XI.
 note
noteThe LiPo battery must remain connected at all times, including when the Notecarrier XI is powered from another source such as USB or a supply wired to the
VBATorVMAINheader pins. Starnote for Iridium’s high-current transmit bursts are supplied by the carrier's onboard supercapacitor bank, and the battery is what keeps that bank topped up between transmissions. -
Locate the panel on the right-hand side of your browser window, which we call the In-Browser Terminal. Within the In-Browser Terminal, click the USB Notecard button.
Checking Your Device's Transport Method
By default, your Notecard communicates over a terrestrial transport—cellular, WiFi,
or both, depending on your Notecard model. With your Notecard connected to the
In-Browser Terminal, you can verify its current transport method by running a
card.transport request.
{"req":"card.transport"}{"method":"wifi-cell"}The exact value depends on your Notecard model—for example, a Notecard Cellular
reports cell, a Notecard WiFi reports wifi, and a Notecard Cell+WiFi reports
wifi-cell.
In order to send data over satellite you'll need to switch to a transport
method that uses NTN as a fallback ("wifi-ntn", "cell-ntn",
"wifi-cell-ntn"), or a method that uses NTN alone ("ntn").
Don't do this quite yet.
In production scenarios you will likely want to use one of the fallback methods, as they allow you to prioritize the fastest and cheapest protocols first, and let Notecard handle fallback scenarios as your device leaves WiFi or cellular coverage.
noteYou can read about the exact algorithm Notecard uses to fallback to alternate radio access technologies in Connection Retry and Fallback Behaviors.
However, when testing a satellite connection for the first time, it can be
helpful to explicitly set card.transport to "ntn", which tells Notecard
to use NTN without waiting for other transport methods to time out. You'll do
this in a later section, but again don't do this quite yet, as there's a
prerequisite to complete first.
Creating and Syncing Compact Templates
All NTN communications require the use of templated Notefiles and templated environment variables to help reduce usage of satellite data.
For example, here's a sample Notefile template you could use for NTN communication.
{
  "req": "note.template",
  "file": "sat.qo",
  "format": "compact",
  "port": 55,
  "body": {"temp": 14.1, "humidity": 14.1}
}
Let's break down this request in detail.
"file": "sat.qo"
When you use the note.template request you define the format for a single
Notefile. This file argument gives the Notefile a name of sat.qo, where
the .qo stands for "outbound queue".
Learn more about Notefile naming conventions.
"port": 55
When using NTN every byte is important. The port argument is a unique integer
that refers to a single Notefile. Providing this value allows Notecard to
send a numerical reference to the Notefile over the air, rather than the full
Notefile name.
port must be an integer from 1 to 100, and each Notefile you use over NTN
needs its own unique value.
"format":"compact"
This is a required field for all Notefiles used over NTN. The "compact" value
tells Notecard to send a minimal amount of metadata with the Note.
You can view a full list of fields this affects in
Creating Compact Templates.
"body":{"temp":14.1,"humidity":14.1}
The body argument tells Notecard about the contents of each Note in the
Notefile, as well as their data types. These values tell Notecard to expect
two fields, "temp" and "humidity", each of which have a value in 14.1 format,
which represents a 4-byte floating-point number. When creating your own templates
you'll want to refer to
Understanding Template Data Types,
which lists all data formats Notecard supports.
When using an NTN transport you must create a Notefile template for every inbound and outbound Notefile you use. Similarly, you must create an environment variable template for every environment variable you intend to receive over an NTN connection.
For our tutorial, let's create one simple template we can use for testing.
-
With your Notecard still connected to the In-Browser Terminal, run the following request to create a new
sat.qotemplate.{ "req":"note.template", "file":"sat.qo", "format":"compact", "port":55, "body":{"temp":14.1,"humidity":14.1} } -
Next, use the
hub.setrequest below to instruct your Notecard to only connect to Notehub during explicithub.syncrequests, which will help us manage satellite data usage in later sections.{"req":"hub.set","mode":"minimum"} -
If you haven't already, also make sure you've used the
hub.setrequest to associate your Notecard with a valid Notehub ProductUID.{"req":"hub.set","product":"com.your.domain:product"} -
If you're using a Notecard WiFi, connect to a 2.4 GHz network using the
card.wifirequest (as shown below), or by using the device's AP button.{"req":"card.wifi","ssid":"your-network-name","password":"your-network-password"} -
Next, run a
hub.syncrequest. It is required that Notecard first syncs with Notehub over a non-NTN connection to copy all of your generated templates to your Notehub project before they may be used over NTN.{"req":"hub.sync"} -
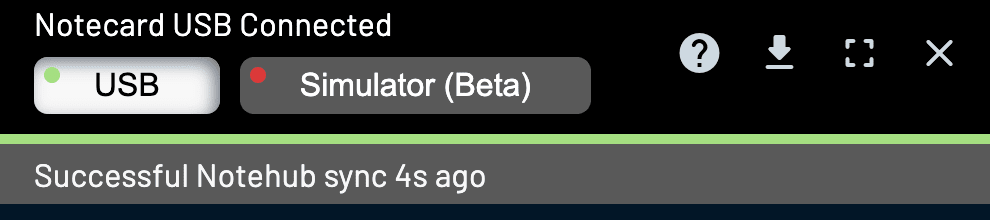
Watch the progress bar in the In-Browser Terminal for updates on the syncing process.
warningYou must wait for your Notecard to complete a full sync with Notehub before you use NTN mode.
 note
noteThese configuration settings persist across both Starnote and Notecard restarts. This means that once you create or update a template and perform a single sync over cellular or WiFi, the changes are retained. If the device restarts, you do not need to re-establish a new cellular or WiFi connection with Notehub as the stored configuration remains in effect.
-
With the sync complete, let's make sure your Notefile template is working correctly. To do so, add a Note to your templated Notefile using the request below.
{ "req":"note.add", "file":"sat.qo", "body":{"temp":12.3,"humidity":45.6} } -
And then finally, send a
hub.syncrequest to sync this new Note to your Notehub project.{"req":"hub.sync"} -
When this sync completes, visit your Notehub project's Events list and ensure the new Note made it to Notehub successfully. Hover over the
sat.qoevent's transport (see screenshot below), and ensure it shows Cellular or WiFi, indicating this event was sent over a terrestrial transport.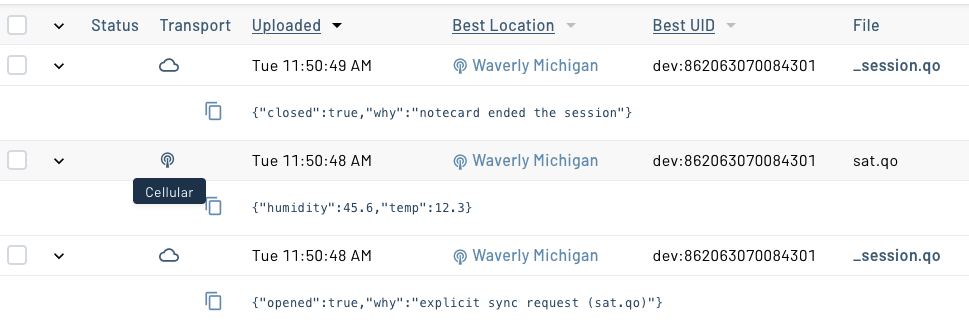
Connecting a Starnote
Now that you've set up your Notecard for NTN, let's connect a Starnote for Iridium and see how to send data over a real satellite connection.
Starnote for Iridium must be connected to a Notecard via UART, and the easiest way to make this connection is through a Notecarrier XI. Complete the following steps to connect the two.
-
Remove power to your Notecard by disconnecting your USB cable and LiPo battery.
-
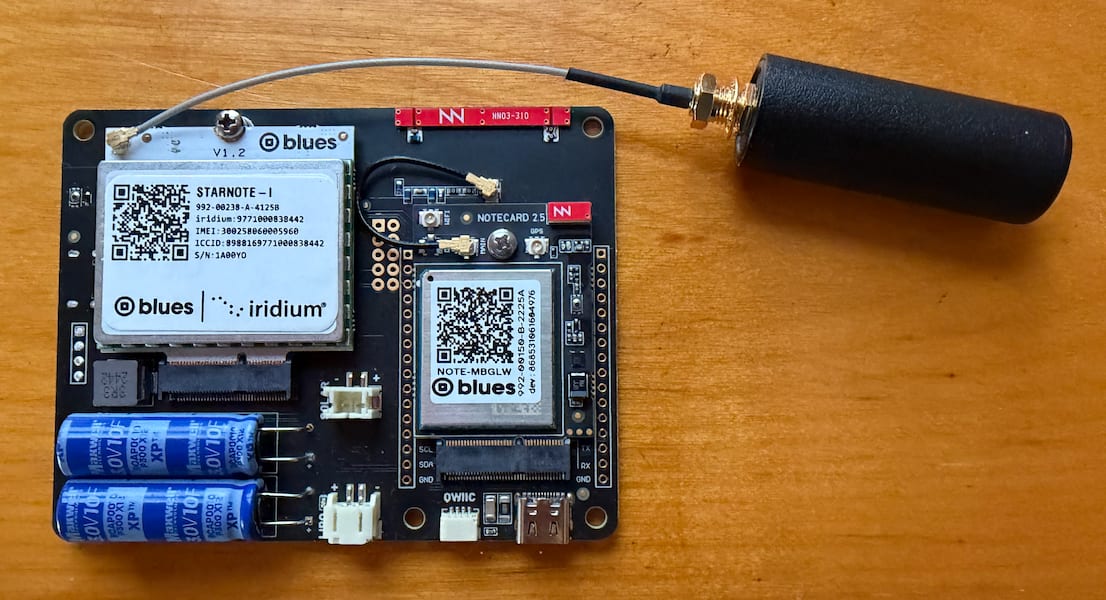
Remove the remaining screw on your Notecarrier XI and insert your Starnote for Iridium into the M.2 connector.
-
Attach the included Iridium satellite antenna to the u.FL connector on your Starnote for Iridium. When seated properly, you will feel the connector "click" into place.
-
Re-connect your LiPo battery to the Notecarrier XI's
LIPOJST connector. The LiPo battery must remain connected even when also powering the Notecarrier XI via USB, as the Starnote for Iridium modem can draw up to 8.5A during transmission.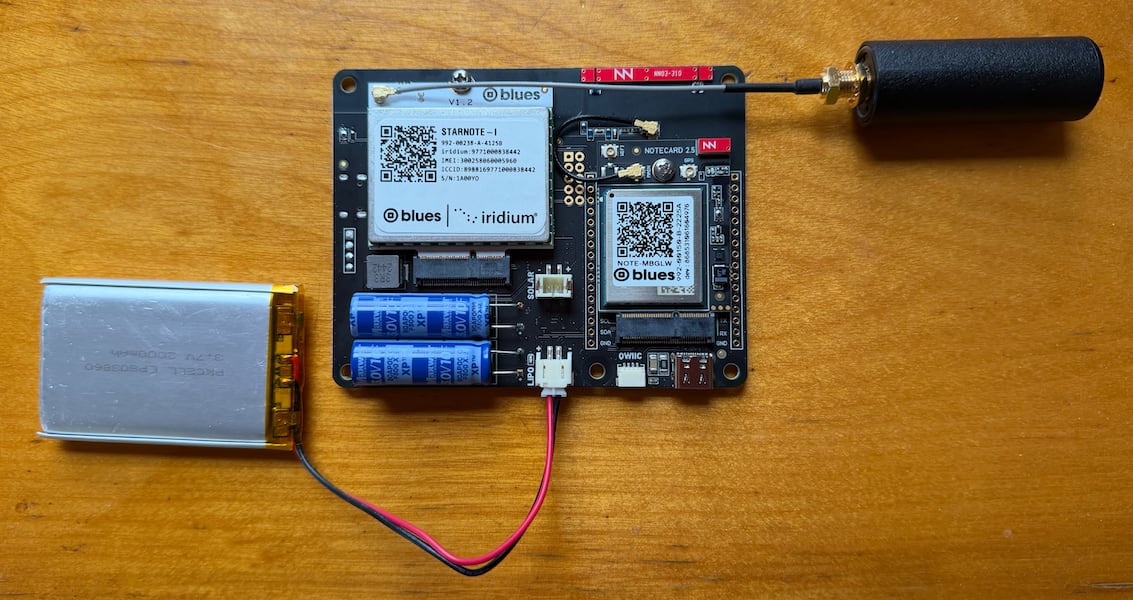
Now that you have everything connected, let's look at how to pair a Starnote for Iridium to a Notecard.
Pairing a Starnote
When a Notecard first detects a connected Starnote it will pair with the module. Once paired, a Notecard will look for its paired Starnote every time it restarts, and will report errors if it can’t connect.
The pairing process happens automatically when you power on a Notecard and it's connected to a Starnote via UART (as shown in the previous section).
Let’s look at how it works.
-
Re-connect a USB cable from the Notecarrier's USB port to your computer's USB port, and re-open the In-Browser Terminal.
-
After Notecard and Starnote power on, run a
hub.syncrequest over cellular or WiFi. This will ensure that any additional templates and this new association between Notecard and Starnote are communicated with Notehub.{"req":"hub.sync"} -
After the sync is completed, run a
ntn.statusrequest, which will report on the status of any connected NTN modules. If all went well, you should see{ntn-idle}in the response, which indicates that your Starnote has paired and is idle.>{"req":"ntn.status"}{"status":"{ntn-idle}{ntn-unknown-location}"}
warningOnce you’ve connected your Notecard to a Starnote for Iridium, the presence of
a physical Starnote for Iridium is stored in a permanent configuration that is
not affected by a card.restore request.
If you'd like to reset this so you can go back to testing NTN over cellular or WiFi OR if you'd like to pair the Starnote with a different Notecard, issue an ntn.reset request.
Sending Data Over Satellite
Now that you have your Starnote for Iridium paired, let's use it to send your first data over a satellite connection.
Sending a Note Over Satellite
-
Issue the following command to enable your Notecard's trace mode. Trace mode will let you monitor debug logs from Notecard as it attempts to make a satellite connection.
trace +reqwarningIf you notice from your log that your Notecard is actively syncing data over cellular or WiFi, please wait for it to finish before proceeding to the next step.
-
After that, turn on NTN mode with the
card.transportAPI.{"req":"card.transport","method":"ntn"} -
Next, queue a new Note onto the Notecard using the
note.addrequest.{"req":"note.add","file":"sat.qo","body":{"temp":45.6,"humidity":78.9}}
-
After that, you need to take your device to a location that has a clear view of the sky, away from buildings and overhead tree cover.
If you are testing outdoors you will also need to bring a laptop that is capable of connecting to the Notecard, sending a
hub.syncrequest, and watching the serial logs. Depending on your setup this might be a bit of a hassle, but remember—you're about to send data to space! It'll all be worth it.
-
When you're ready to go, trigger an outbound sync with a
{"req":"hub.sync","out":true}request. Notecard will again use NTN mode to send your data, but this time—because you have a Starnote for Iridium connected—your Notecard will use Starnote for Iridium to send data over a satellite connection.{"req":"hub.sync","out":true}
-
Watch the serial communications in the In-Browser Terminal, as it gives detailed information on steps Starnote for Iridium takes to connect to satellites and send your data. The process may take a few minutes, but when you see an
ntn.uplinkcommand you'll know everything worked! 🛰️S10:44.01 sync: sync triggered by explicit sync request S10:44.02 sync: work: begin (anything pending) {sync-begin} S10:44.08 sync: work to be done: S10:44.09 upload sat.qo S10:44.11 ntn: enqueueing 9-byte note from sat.qo (port 55) S10:44.11 sync: work: upload sat.qo (1 changes) {sync-get-local-changes} S10:44.12 purge sat.qo: S10:44.12 1 notes (0 stable, 0 queued, 1 tombstones) S10:44.12 -> 0 notes (0 stable, 0 queued, 0 tombstones) S10:44.14 sync: work to be done: S10:44.15 upload sat.qo S10:44.16 deleting /data/sat-qo.000 S10:44.16 sync: work: completed {sync-end} S10:44.17 sync: advancing last sync time from 20:11:30Z to 20:19:41Z S10:44.28 ntn: moved 9-byte note (port 55) into packet (11/338) S10:44.29 packet: sending 9 bytes (encoded as 11 bytes on-air) << {"cmd":"ntn.uplink","id":17,"time":1767730781,"ltime":1767730288,"lat":...,"lon":...,"payload":"ADeAZmY2Qs3MnUI="} S10:44.55 ntn: sent 9-byte packet containing 1 notesnoteThe website iridiumwhere.com displays a real-time map of the Iridium satellite constellation, and can tell you how many satellites should be in view at your location. If you’re having trouble transmitting you may need to wait until more satellites are visible.
-
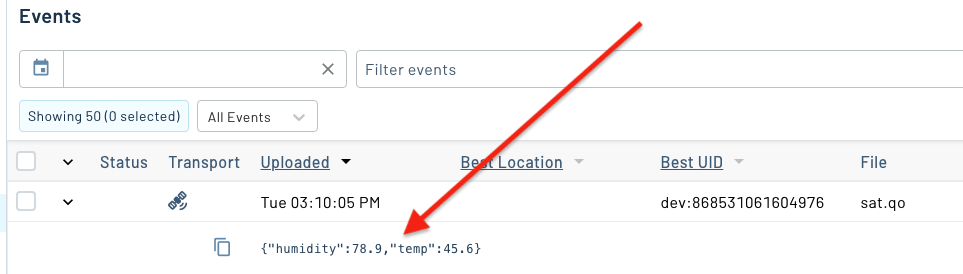
Return to the Events page in your Notehub project. You should see your data listed in a new Event.
Having trouble connecting?
Satellite communications are notoriously difficult to get right, due to all of the variables involved. Here are some of the more common issues to be aware of:
- Give it time. It can take multiple minutes for Starnote for Iridium to find and communicate with Iridium's LEO satellites. Double check that your antenna is free from obstructions.
-
Make sure you have successfully synced any and all templates with Notehub over cellular or WiFi before attempting NTN communications with Starnote for Iridium.
-
Likewise, after physically connecting Starnote for Iridium to your Notecard, be sure to perform a sync over cellular or WiFi before attempting to use NTN mode.
-
If data appears to be sending successfully over NTN but nothing shows up in Notehub, the Starnote may be paired with a different Notecard. In this case, issue an ntn.reset command on the original Notecard to unpair the Starnote.
Congratulations! You just sent your first data to space using Starnote. Before we wrap up let's reset a few things.
-
First, be sure to disable trace mode by sending the
trace offcommand in the In-Browser Terminal.trace off
-
Lastly, set your Notecard's transport method to an appropriate value for your product, so you don't send any more data over satellite until you're ready. For example:
{"req":"card.transport","method":"wifi-cell-ntn"}
warningIf you plan to run the Notecarrier XI outdoors without a USB power source, be sure your attached LiPo battery is fully charged. The LiPo is what keeps the XI's supercapacitor bank topped up between transmissions, and the supercapacitor bank is what supplies Starnote for Iridium's high-current transmit bursts.
Next Steps
The power of Starnote for Iridium is just how easy it makes satellite connectivity, and in this tutorial you saw this ease of use in action.
You learned how Notecard transport methods work, how to use the Notecard's NTN mode, how to connect a physical Starnote for Iridium, and how to send your first data using satellite connectivity.
Now that you know the basics, your next step is to review the Satellite Best Practices guide to better understand how to build a product around Starnote for Iridium. At any time, if you find yourself stuck, please reach out on the community forum.
